background image

Thermal Imaging Camera C.A 1879   


  English 


Page 19 sur 22 

9. 

WARRANTY 

Except as otherwise stated, our warranty is valid for twelve months starting from the date on which the 
equipment was sold; Extract from our General Conditions of Sale provided on request. 
 
The warranty does not apply in the following cases : 

• 

Inappropriate use of the equipment or use with incompatible equipment; 

• 

Modifications made to the equipment without the explicit permission of the manufacturer’s 
technical staff; 

• 

Work done on the device by a person not approved by the manufacturer; 

• 

Adaptation to a particular application not anticipated in the definition of the equipment or not 
indicated in the user’s manual; 

• 

Damage caused by shocks, falls or floods. 


10.  TO ORDER 


C.A 1879 ......................................................................................................................................... P01.6512.50 

 
Supplied in case with : 
1 handle, 1 AC adapter to charge, 1 USB cable, 1 user’s manual, 1 Software CD-ROM, 1 quick start guide 
on paper. 


Summary of Contents for C.A 1879

Page 1: ...C A 1879 Thermal Imaging Camera ENGLISH User s manual ...

Page 2: ...s 6 e Menu 7 f Saving an image 7 g Temperature measurement 7 5 THERMAL AND VISIBLE IMAGE BLENDING 7 6 MENU STRUCTURE 9 6 1 INFRARED SETTINGS 10 6 2 MEASUREMENT OPTIONS 11 6 3 CAMERA SETTINGS 12 6 4 AUDIO SETTINGS 13 6 5 IMAGE BROWSER 13 6 6 DATE TIME SETTINGS 14 6 7 LANGUAGE SELECTION 14 7 ADDING CAPTIONS WHEN SAVING IMAGES 15 7 1 VOICE MESSAGE 15 7 2 TEXT CAPTIONS 15 7 3 TECHNICAL SPECIFICATION 1...

Page 3: ...n this operating manual preceded by this symbol or to perform them correctly may cause bodily injury or damage to the instrument ant the installations Conforms to European Union directives Earth terminal Equipment protected throughout by double or reinforced insulation Battery 1 PRECAUTIONS FOR USE Safety warning The equipment described in this document uses a Class 2 laser Under no account should...

Page 4: ...OF THE CASE The case Camera PSU and International adaptors CD User s manual and software USB cable camera to PC Handle Quick start guide 3 MAIN FEATURES AND CONTROLS Hotkeys Speaker On Off button Toggle button 4 Navigation buttons Microphone Laser button Save button ...

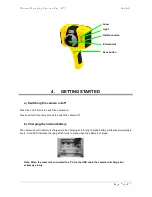
Page 5: ... camera off b Charging the internal battery The camera s built in battery is charged via the charging port A fully charged battery will last approximately 6 hours A red LED indicates charging which turns to green when the battery is charged Note When the camera is connected to a PC via the USB cable the camera will charge but extremely slowly Laser Light Visible camera Infrared lens Save button ...

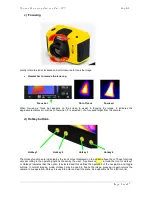
Page 6: ... camera d Hotkey buttons The Hotkey functions are indicated by the icons or text displayed on the screen above them These functions vary according to the operating options chosen by the user A yellow box around the icon for Hotkey1 or Hotkey2 indicates that this option is selected and this defines the operation of the navigation and toggle buttons In normal imaging mode Hotkey 3 may be used to fre...

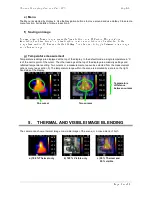
Page 7: ...ature measurement Temperature readings are displayed at the top of the display In the default mode a single temperature in C is of the centre point of the cursor The other readings at the top of the display are emissivity settings and reflected temperature setting Two cursors or a measurement area can be selected from the measurement options menu see section 5 The temperature range within the scen...

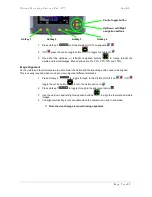
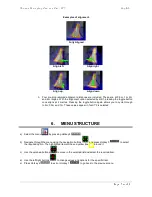
Page 8: ...image often need to be aligned This is usually required when moving to view objects at different distances 1 Press Hotkey 2 to toggle through to the Visible On Off icon If off toggle the centre button to turn the visible option on 2 Press Hotkey 1 to toggle through to the alignment option 3 Use the up down and left right navigation buttons to align the thermal and visible images 4 The alignment fa...

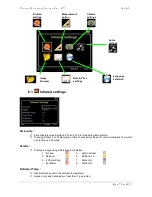
Page 9: ... again allows you to cycle through to 4m 0 5m and 1m These values appear in feet if F is selected 6 MENU STRUCTURE a Select the menu by pressing Hotkey 4 b Navigate through the menu using the navigation buttons and press Hotkey 3 to select the required option The highlighted item will have a yellow box around it c Use the up down buttons to move in the selected list and select the required item d ...

Page 10: ...e gives a table of emissivity values of common materials from which a selection can be made Palette Display in image using different colour palettes 1 Ironbow 5 High Contrast 2 Rainbow 6 Rainbow 16 3 Isotherm Style 7 Black Hot 4 Hot Metal 8 White Hot Reflected Temp Général Usually set to the ambient temperature Applies only when emissivity of less than 1 is selected Audio settings Image browser Da...

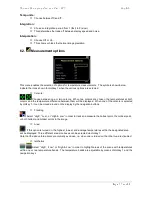
Page 11: ...e difference between them will be displayed When one of the cursors is selected by Hotkey 1 it can be moved around on the display by the navigation buttons Tracking Select High Low or High Low in order to track and measure the hottest point the coldest point or both hottest and coldest points in the image Area If this option is turned on the highest lowest and average temperatures within the desig...

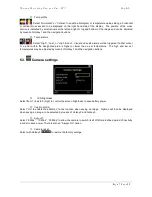
Page 12: ...r or a point within the designated area is higher or lower than a set temperature The high and low set temperatures may be adjusted by means of Hotkey 1 and the navigation buttons 6 3 Camera settings LCD brightness Select from 1 low to 9 high to control the screen brightness to save battery power Caption mode Select On to enable the addition of a text caption when saving an image Options will then...

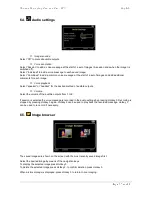
Page 13: ...desired method of audible outputs Volume Select the volume of the audible outputs from 1 to 9 If session is selected the voice message is recorded in the audio settings by pressing Hotkey 3 Recording is stopped by pressing Hotkey 3 again Hotkey 2 can be used to play back the recorded message Hotkey 3 can be used to re record if necessary 6 5 Image browser The saved images are shown on the screen w...

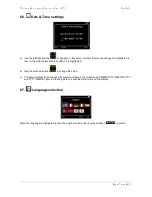
Page 14: ...d In the picture above the day DD 14 is highlighted b Use the up down buttons to change the value c The date formats can be changed by pressing Hotkey 2 to cycle through DD MM YYYY MM DD YYYY and YYYY MM DD options Pressing Hotkey 4 will select the option on the display 6 7 Language selection When the language is highlighted shown by a yellow box around it press Hotkey 3 to select ...

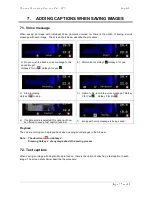
Page 15: ...y 3 for yes c Stop recording Hotkey 3 to stop d Option to Re record the voice message Hotkey 2 for Yes Hotkey 3 for No e If caption mode is selected this option will now be offered to save a text caption see 6 2 f Image with voice message is being saved Playback The voice recording can be played back when viewing saved images in the browser Note The abort icon on Hotkey 4 Pressing Hotkey 4 at any ...

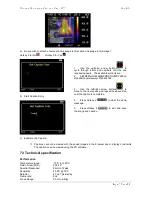
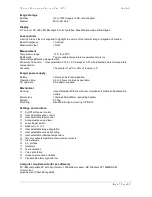
Page 16: ... Temperature range 10 C to 350 C Field of view FOV 20 x 20 Spectral Response 8mm to 12 µm m Sensitivity 0 3 C 30 C Detector 47 x 47 pixel array Frame rate 8Hz Focus Range 0 5m to infinity 1 Use the up down arrow buttons to cycle through letters and numbers until the one required appears The available symbols are 2 ABCDEFGHIJKLMNOPQRSTUVWXYZabcd efghijklmnopqrstuvwxyz0123456789 3 Use the left right...

Page 17: ...ion field rechargeable Operation time Up to 6 hours continuous operation AC operation AC adaptor supplied Mechanical Housing Impact Resistant Plastic with over moulded soft plastic and detachable handle Dimensions 130mmx95mmx90mm excluding handle Weight 0 70kg Mounting Handheld tripod mounting 1 4 BSW Settings and controls On Off soft power control User selectable span control User selectable leve...

Page 18: ...y an approved repairer Cleaning Disconnect the unit completely and turn the rotary switch to OFF Use a soft cloth dampened with soapy water Rinse with a damp cloth dry rapidly with a dry cloth or forced air Do not use alcohol solvents or hydrocarbons Make sure that no foreign body interferes with the operation of the snap device of the sensor Metrological check Like all measuring or testing device...

Page 19: ...or use with incompatible equipment Modifications made to the equipment without the explicit permission of the manufacturer s technical staff Work done on the device by a person not approved by the manufacturer Adaptation to a particular application not anticipated in the definition of the equipment or not indicated in the user s manual Damage caused by shocks falls or floods 10 TO ORDER C A 1879 P...

Page 20: ...nular 0 88 Glazed Silica 0 87 Cuprous Oxide at 38 C 0 86 Emery Corundum 0 85 Snow 0 85 Stainless oxidized at 800 C 0 84 Oxidised Iron at 500 C 0 83 Cuprous Oxide at 260 C 0 82 Snow fine particles 0 81 Brass unoxidised 0 80 Glass convex D 0 79 Steel oxidised 0 78 Copper heavily oxidised 0 77 Cotton cloth 0 76 Sand 0 75 Unglazed silica 0 74 Oxidised iron at 100 C 0 73 Coating No C20A 0 72 Basalt 0 7...

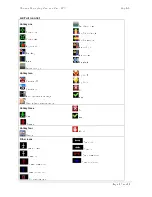
Page 21: ...rm low Profile horizontal Profile vertical Alarm high Alarm low Playback Hotkey two Camera off Camera on Auto temperature range Manual temperature range Light off Light on No Yes Hotkey three Live Freeze No Yes Hotkey four Menus Abort Other icons Level down Level up Level maximum Level minimum No memory card Span out Span in Span maximum Span minimum ...

Page 22: ...Court Flagship Square Shaw Cross Business Park DEWSBURY West Yorkshire WF12 7TH Tel 011628 788 888 Fax 01628 628 099 ITALIA Amra SpA Via Sant Ambrogio 23 25 20050 Bareggia di Macherio MI Tel 039 245 75 45 Fax 039 481 561 MIDDLE EAST Chauvin Arnoux Middle East P O BOX 60 154 1241 2020 JAL EL DIB Beirut LEBANON Tel 01 89 04 25 Fax 01 89 04 24 ÖSTERREICH Chauvin Arnoux Ges m b H Slamastrasse 29 3 123...

Reviews: