


Double Derby X User Manual Rev. 3
5
2/9/2012 11:11 AM
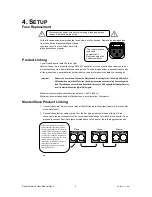
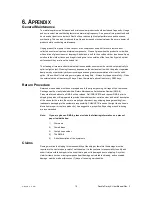
Often, the setup for Master-Slave
and Standalone operation requires
that the first product in the chain be
initialized for this purpose via either
settings in the control panel or DIP-
switches. Secondarily, the products
that follow may also require a slave
setting. Please consult the
“Operating Instructions” section in
this manual for complete
instructions for this type of setup
and configuration.
Master
Slave
Slave
The fuse is located
inside this
compartment.
Remove using a flat
head screwdriver.
4.
S
ETUP
Fuse Replacement
With a flat-head screwdriver wedge the fuse holder out of its housing. Remove the damaged fuse
from its holder and replace with exact same
type fuse. Insert the fuse holder back in its
place and reconnect power.
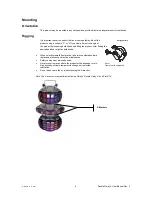
Product Linking
You will need a serial data link to run light
shows of one or more products using a DMX-512 controller or to run synchronized shows on two or
more products set to a master/slave operating mode. The combined number of channels required by
all the products on a serial data link determines the number of products the data link can support.
Important:
Products on a serial data link must be daisy chained in one single line. To comply with the EIA-
485 standard no more than 32 devices should be connected on one data link. Connecting more
than 32 products on one serial data link without the use of a DMX optically-isolated splitter may
result in deterioration of the digital DMX signal.
Maximum recommended serial data link distance: 1,640 ft (500 m).
Maximum recommended number of products on a serial data link: 32 products
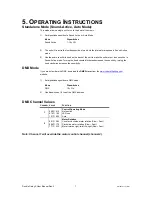
Master/Slave Product Linking
1. Connect the (male) 3-pin connector side of the DMX cable to the output (female) 3-pin connector
of the first product.
2. Connect the end of the cable coming from the first product which will have a (female) 3-pin
connector to the input connector of the next product consisting of a (male) 3-pin connector. Then,
proceed to connect from the output as stated above to the input of the following product and so
on.
Disconnect the power cord before replacing a fuse and always
replace with the same type fuse.