background image

463251914

0

1

/

21

/

1

5

 • G521-001-050801

during assembly, please call 1-888-430-7870.

durante el Ensamblado, llámenos Al 1-888-430-7870

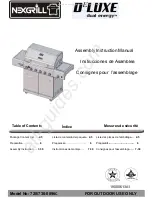
Char-Broil Gourmet T-47D

#4584625

Summary of Contents for Gourmet T-47D 463251914

Page 1: ...463251914 01 21 15 G521 001 050801 during assembly please call 1 888 430 7870 durante el Ensamblado ll menos Al 1 888 430 7870 Char Broil Gourmet T 47D 4584625...

Page 2: ...only authorized replacement parts supplied by manufacturer Installation Safety Precautions Use grill as purchased only with LP propane gas and the regulator valve assembly supplied If your grill is Du...

Page 3: ...rs that sell grills offer you the option of replacing your empty LP cylinder through an exchange service Use only those reputable exchange companies that inspect precision fill test and certify their...

Page 4: ...you hear a rushing sound turn gas off immediately There is a major leak at the connection Correct before proceeding 4 Brush soapy solution onto areas circled below or other similar fittings on your g...

Page 5: ...s can ignite behind the control panel This flashback can damage your barbeque and cause injury To prevent flashbacks and ensure good performance the burner and venturi tube assembly should be removed...

Page 6: ...r this limited warranty or any applicable implied warranty or for failure or damage resulting from acts of God improper care and maintenance grease fire accident alteration replacement of parts by any...

Page 7: ...ados por el fabricante ADVERTENCIA La instalaci n de la parrilla debe cumplir con las disposiciones de los c digos locales o en su defecto con el National Fuel Gas Code o C digo nacional sobre gases c...

Page 8: ...mediante un servicio de recambio Emplee nicamente empresas de recambio de buena reputaci n que inspeccionen carguen con precisi n verifiquen y certifiquen sus cilindros Cambie su tanque s lo por otros...

Page 9: ...e le indique los requisitos y los c digos contra incendios que corresponden al uso de parrillas de gas propano en un edificio de apartamentos Si se le permite usarla h galo al aire libre en la planta...

Page 10: ...los quemadores y gire las perillas de la graduaci n a la graduaci n Deber ver una llama m s reducida en la graduaci n que en la graduaci n Haga un control de la llama en el quemador lateral Controle s...

Page 11: ...onnels El fabricante no ser responsable por ning n tipo de da o accesorio o indirecto ocasionado por el incumplimiento de lo estipulado ya sea en esta garant a limitada o en alguna garant a impl cita...

Page 12: ...D W HARDWARE F TOP LID 6 4 RUBBER BUMPER LID 7 1 FIREBOX 8 4 COOKING GRATE 9 1 WARMING RACK 10 4 MAIN BURNER F FIREBOX 11 2 ELECTRODE F MAIN BURNER 900MM WIRE 12 2 ELECTRODE F MAIN BURNER 600MM WIRE 1...

Page 13: ...pci n 1 1 TAPA SUPERIOR 2 2 EXTREMO DEL ASA TAPA SUPERIOR 3 1 ASA DE LA TAPA SUPERIOR 4 1 PLACA DEL LOGOTIPO CON MEDIDOR DE TEMPERATURA 5 2 TOPE DE CAUCHO REDONDO c HERRAJE TAPA SUPERIOR 6 4 TOPE DE C...

Page 14: ...DIAGRAM VISTA ESQUEM TICA DE PIEZAS 48 1 5 6 4 13 9 18 50 2 3 20 19 11 10 49 8 28 29 22 16 36 17 14 15 23 24 32 33 41 31 27 36 30 37 36 35 38 37 36 40 28 46 47 45 44 43 39 27 42 34 29 26 25 7 21 11 1...

Page 15: ...15 1 2 1ST A 3RD 2ND 44 46 47 44 38 39 A A A ASSEMBLY ARMADO Caster pin 1 4 20x1 2 Screw Qty 6 Clavija para la rueda Tornillo de 1 4 20 x 1 2 Cant 6...

Page 16: ...20x1 2 Screw Qty 5 Tornillo de 1 4 20 x 1 2 Cant 5 3 4 A 40 42 A A A A A A B A A A B B 10 24x3 8 Screw Qty 3 Tornillo No 10 24x3 8 Cant 3 8x3 8 self tapping Screw Qty 2 Tornillo autorroscante No 8x3 8...

Page 17: ...17 5 6 41 30 A A A A A A A 10 24x3 8 Screw Qty 4 Tornillo No 10 24x3 8 Cant 4 1 4 20x1 2 Screw Qty 1 Tornillo de 1 4 20 x 1 2 Cant 1...

Page 18: ...A A B B Tornillo de 1 4 20 x 1 Cant 2 1 4 20x1 Screw Qty 2 8x3 8 self tapping Screw Qty 1 Tornillo autorroscante No 8x3 8 Cant 1 Tie wrap Cord n de amarre Note remove the tie wraps Nota retire los cor...

Page 19: ...19 9 10 1ST 2ND 32 33 A B B A A A A A B B B B 1 4 20x1 Screw Qty 4 Tornillo de 1 4 20 x 1 Cant 4 Fiber Washer Qty 4 Arandela de fibra Cant 4...

Page 20: ...Tornillo de 1 4 20 x 1 2 Cant 2 1 4 Nut Qty 2 Tuerca de 1 4 Cant 2 Large Flat Washer Qty 2 Arandela plana grande Cant 2 1 4 20x1 Screw Qty 1 Tornillo de 1 4 20 x 1 Cant 1 10 24x3 8 Screw Qty 4 Tornil...

Page 21: ...Tornillo No 10 24x3 8 Cant 4 1 4 20x1 Screw Qty 1 Tornillo de 1 4 20 x 1 Cant 1 8x3 8 self tapping Screw Qty 2 Tornillo autorroscante No 8x3 8 Cant 2 Large Flat Washer Qty 2 Arandela plana grande Cant...

Page 22: ...22 13 26 28 29 A A A 1ST Remove screws and washers Retire los tornillos y arandelas 2ND 8 32x3 8 Screw Qty 2 Tornillo No 8 32x3 8 Cant 2 3RD...

Page 23: ...23 14 1ST 2ND 19 20 26 21 A A Wing Nut Qty 1 Tuerca de mariposa Cant 1...

Page 24: ...24 15 17 18 A B B B B B A A A A 8 32x3 8 Screw Qty 4 Tornillo No 8 32X3 8 Cant 4 8 32 Nut Qty 4 Tuerca de No 8 32 Cant 4 16 22...

Page 25: ...25 17 35 1ST 2ND PRESS OPRIMA...

Page 26: ...26 18 37 A A A A A A A A A A A 8 32x1 4 Screw Qty 4 Tornillo No 8 32x1 4 Cant 4 1ST 2ND A 8 32x1 4 Screw Qty 4 Tornillo No 8 32x1 4 Cant 4...

Page 27: ...Note Remove caps from trough supports 8 places Nota Retire las tapas de apoyos cilindro 8 plazas Trough pins Clavija de la cuba Trough support Soporte de la cuba 27 19 20 49 8...

Page 28: ...28 21 9...

Page 29: ...ylinder correctly may allow gas hose to be damaged in operation resulting in the risk of fire ADVERTENCIA Una vez que el tanque haya quedado instalado la v lvula del tanque debe quedar orientada hacia...

Page 30: ...for spider nests or rust See Natural Hazard and Cleaning the Burner Assembly pages Turn off control knobs and LP cylinder valve Leave lid open to allow flames to die down After cooling clean food part...

Page 31: ...Button is pressed no noise can be heard from spark module SECTION II SECTION III Sparks are present but not at all electrodes and or not at full strength Possible Cause Battery not installed properly...

Page 32: ...quemador Cierre las perillas de control y la v lvula del cilindro de gas Deje abierta la tapa para permitir que las llamas se extingan Una vez que se haya enfriado limpie las part culas de comida y l...

Page 33: ...i n Resoluci n de problemas Encendido electr nico Problema encendido SECCI N I SECCI N II SECCI N III Hay chispas pero no en todos los electrodos y o no a plena potencia Causas probables La pila no es...

Page 34: ...34 NOTES NOTAS...

Page 35: ...35...

Page 36: ......

Reviews: