background image

2

1

RED WHT

Figure 4

REMOVE COVER

18

INSTALLATION STEP 6

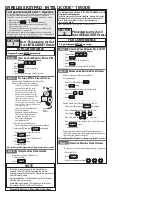
Install the Door Control

Locate door control within sight of the door at a
minimum height of 5 feet where small children
cannot reach, and away from moving parts of the
door and door hardware. If installing into drywall
(Fig. 1), drill 5/32" holes and use anchors provided.
For pre-wired installations (as in new home
construction), it may be mounted to a single gang
box (Fig. 2). 

NOTE: After installation, a green indicator light
behind the cover will indicate proper connection. If
not lit, the Lock and Light features will not function
(reverse wires to correct).

1. Strip 1/4" of insulation from one end of bell wire

and connect to the two screw terminals on back of
door control by color: white wire to 2 and white/red
wire to 1 (Fig. 3). 

2. Remove white cover by gently pushing both

thumbs against upper corners of cover on back
side of door control (Fig. 4). Fasten with
6ABx1-1/4"self-tapping screws (standard
installation) or 6-32x1" machine screws (into gang
box) as follows:

• Drill and install bottom screw, allowing 1//8" to

protrude above wall surface.

• Position bottom of door control on screw head

and slide down to secure. Adjust screw for snug
fit.

• Install top screw with care to avoid

cracking plastic housing. Do not over tighten.

• Insert bottom tabs and snap on cover. (To

remove cover after mounting, gently pry at top
with paper clip or small flat head screwdriver.)

3.

(Standard installation only) Run bell wire up wall
and across ceiling to motor unit. Use insulated
staples to secure wire in several places. Do not
pierce wire with a staple, creating a short or open
circuit. 

4. Connect bell wire to the opener terminal screws as

follows: white to 2 and white/red to 1. (Fig. 5).

5. Use tacks or staples to permanently attach

entrapment warning label to wall near door control,
and manual release/safety reverse test label in a
prominent location on inside of garage door.

NOTE: DO NOT connect the power and operate the
opener at this time. The trolley will travel to the full
open position but will not return to the close position
until the sensor beam is connected and properly
aligned. See Safety Reversing Sensor Instructions
beginning on page 21.

2

1

RED WHT

 Bell Wire

Terminal 
Screws

 Bottom Mounting Hole

 Top Mounting Hole

6ABx1-1/4" Screw

(Standard installation)

Insulated Staples

Dry Wall Anchors

Screw 6-32x1"

(Pre-wired installation) 

HARDWARE SHOWN

ACTUAL SIZE

Figure 2

To Replace
Insert Bottom Tabs First

PRE-WIRED INSTALLATION

24 Volt
Bell Wire

LOCK

LIGHT

LOCK

LIGHT

To Replace
Insert Bottom Tabs First

Figure 1

STANDARD 
INSTALLATION

Single
Gang Box

Figure 3  

MULTI-FUNCTION 
DOOR CONTROL (BACK)

To prevent possible serious injury or death from
electrocution:
• Be sure power is not connected before installing door

control.

• Connect only to 24 VOLT low voltage wires. 
To prevent possible serious injury or death from a closing
garage door:
• Install door control within sight of garage door, out of

reach of children at a minimum height of 5 feet, and
away from all moving parts of door.

• Never permit children to operate or play with door

control push buttons or remote control transmitters.

• Activate door only when it can be seen clearly, is

properly adjusted, and there are no obstructions to door
travel.

• Always keep garage door in sight until completely

closed. Never permit anyone to cross path of closing
garage door.

WARNING

Push 
Bar

Light Button

Lock 

Button

LOCK

LIGHT

Opener

Terminal Screws

KG

KG

1

3

9

7

5

1

3

9

7

5

3

1

RIGHT PANEL

Figure 5

Summary of Contents for Whisper Drive Security+ 8200C

Page 1: ...osed safety materials carefully Fasten the manual near the garage door after installation The door WILL NOT CLOSE unless the Protector System is connected and properly aligned Periodic checks of the o...

Page 2: ...door opener 31 Using the wall mounted door control 32 To open the door manually 32 Care of your garage door opener 33 Having a problem 34 Programming Pages 35 36 To add a hand held remote control 35 T...

Page 3: ...kets or their hardware all of which are under EXTREME tension Disable ALL locks and remove ALL ropes connected to garage door BEFORE installing and operating garage door opener to avoid entanglement P...

Page 4: ...bracket and addi tional fastening hardware may be required Installation Step 10 Depending upon garage con struction extension brackets or wood blocks may be needed to install sensors Installation Ste...

Page 5: ...ersing Sensor Header Wall Safety Reversing Sensor Gap between floor and bottom of door must not exceed 1 4 FINISHED CEILING Support bracket fastening hardware is required See page 17 Access Door Wall...

Page 6: ...Pulley Bracket LOCK LIGHT 2 Safety Reversing Sensors 1 Sending Eye and 1 Receiving Eye with 2 Conductor White White Black Bell Wire attached Safety Sensor Bracket 2 Model 8200C 2K Only Your garage doo...

Page 7: ...d Shaft 1 Wing Nut 14 20 2 Hex Screw 5 16 18x7 8 4 Carriage Bolt 1 4 20x1 2 2 Spring Trolley Nut 1 Nut 5 16 18 4 Clevis Pin 5 16 x2 3 4 1 NOTICE Handle Insulated Staples 30 Clevis Pin 5 16 x1 1 Dry Wa...

Page 8: ...versals 3 Assemble lock nuts ensure alignment and tighten NOTE If T rail is not assembled exactly as shown trolley will not travel smoothly along length of rail or it will hit against nuts 4 Position...

Page 9: ...rt under the belt pulley bracket Remove the two 5 16 18x1 2 washered screws mounted in the top of the motor unit Align the holes in the back section of the T rail with the holes in the motor unit Fast...

Page 10: ...6 Remove the screwdriver SETTING THE TENSION 1 Insert the trolley threaded shaft through the hole in the trolley 2 Hold the belt at the trolley shaft to avoid twisting as you thread the spring trolley...

Page 11: ...r before installing opener to avoid entanglement 5 Install garage door opener 7 feet or more above floor 6 Mount emergency release handle 6 feet above floor 7 NEVER connect garage door opener to power...

Page 12: ...of travel as shown Draw an intersecting horizontal line on the header wall 2 above the high point This height will provide travel clearance for the top edge of the door Proceed to Step 2 page 14 One p...

Page 13: ...shown Measure the distance from the top of the door to the floor Subtract the actual height of the door Add 8 to the remainder See Example 3 Close the door and draw an intersecting horizontal line on...

Page 14: ...arage Door Travel Vertical Centerline Header Wall Garage Door UP CEILING MOUNT ONLY Wall Mounting Holes Optional Wall Mounting Holes The nail hole is for positioning only You must use lag screws to mo...

Page 15: ...you ll need help Have someone hold the opener securely on a temporary support to allow the rail to clear the spring Position the rail bracket against the header bracket Align the bracket holes and jo...

Page 16: ...venient for setting an ideal door to T rail distance Raise the opener onto a stepladder You will need help at this point if the ladder is not tall enough Open the door all the way and place a 2x4 laid...

Page 17: ...he T rail is centered over the door or in line with the header bracket if the bracket is not centered above the door 7 Remove the 2x4 Operate the door manually If the door hits the rail raise the head...

Page 18: ...e opener terminal screws as follows white to 2 and white red to 1 Fig 5 5 Use tacks or staples to permanently attach entrapment warning label to wall near door control and manual release safety revers...

Page 19: ...m the end of the rope to prevent slipping Thread the other end of the rope through the hole in the release arm of the outer trolley Adjust rope length so the handle is 6 feet above the floor Secure wi...

Page 20: ...rd Connect the black line wire to the screw on the brass terminal the white neutral wire to the screw on the silver terminal and the ground wire to the green ground screw The opener must be grounded R...

Page 21: ...Either can be installed on the left or right of the door as long as the sun never shines directly into the receiving eye lens The mounting brackets are designed to clip onto the track of sectional ga...

Page 22: ...e track as shown in Figure 1 If your door track will not support the bracket securely wall installation is recommended Wall installation Place the bracket against the wall with curved arms facing the...

Page 23: ...the sending eye wing nut and readjust aiming directly at the receiving eye Lock in place Loosen the receiving eye wing nut and adjust sensor until it receives the sender s beam When the green indicato...

Page 24: ...nding on your door s construction Metal or light weight doors using a vertical angle iron brace between the door panel support and the door arm bracket Drill 3 16 fastening holes Secure the door brack...

Page 25: ...he door if required for your installation Refer to the dotted line optional placement drawing Header Wall Vertical Centerline of Garage Door Finished Ceiling Optional Placement of Door Bracket Header...

Page 26: ...r apart as possible to increase door arm rigidity Figure 3 Hole alignment alternative If holes in curved arm are above holes in straight arm disconnect straight arm Cut about 6 from the solid end Reco...

Page 27: ...rs 5 16 Ring Fastener Straight Arm Bolts 5 16 18x7 8 Door Bracket Clevis Pin 5 16 x1 1 4 Curved Door Arm Door Arm Door Arm Connector Hole Closed Door Fully Closed Trolley Emergency Release Handle Full...

Page 28: ...ained in Adjustment Step 2 If the door does not close completely Increase down travel Turn the down limit adjustment screw counterclockwise One turn equals 2 of travel If door still won t close comple...

Page 29: ...trol clockwise Make small adjustments until the door completes a close cycle After each adjustment run the opener through a complete travel cycle Do not increase the force beyond the minimum amount re...

Page 30: ...the door reverses on the one inch board remove the obstruction and run the opener through 3 or 4 complete travel cycles to test adjustment IMPORTANT SAFETY CHECK Repeat Adjustment Steps 1 2 and 3 afte...

Page 31: ...Entry System If you purchase a new remote or if you wish to deactivate any remote follow the instructions in the Programming section Activate your opener with any of the following The hand held Remot...

Page 32: ...sooner The 4 1 2 minute interval can be changed to 1 1 2 2 1 2 or 3 1 2 minutes as follows Press and hold the Lock button until the light blinks about 10 seconds A single blink indicates that the time...

Page 33: ...on The garage door spring may be broken Have it replaced Repeated operation may have tripped the overload protector in the motor Wait 15 minutes and try again 2 Opener operates from the remote but not...

Page 34: ...eview Adjustment Step 2 on page 29 If door reverses in the fully closed position decrease the travel limits Adjustment Step 1 Repeat safety reverse test after adjustments to force or travel limits The...

Page 35: ...bar on the Multi Function Door Control all three buttons are held 4 Release buttons when the motor unit lights blink It has learned the code If light bulbs are not installed two clicks will be heard...

Page 36: ...r buttons for the present PIN then press and hold the button The opener light will blink twice Release the button 2 Press the new 4 digit PIN you have chosen then press Enter The motor unit lights wil...

Page 37: ...assembly hardware kit see page 7 KEY PART NO NO DESCRIPTION 1 41A5273 8 Multi function door control panel 2 41A5056 19 Multi function remote control housing only no circuit board 3 10A20 3V2032 Lithiu...

Page 38: ...e harness assembly with plug 6 41A5021 5E Receiver logic board assembly Complete with Logic board 7 41A4888 End panel w all labels 8 175B88M Light socket 9 108D34 Lens KEY PART NO NO DESCRIPTION 10 30...

Page 39: ...1A5281 935C 7702C 953C Outside Quick Release Required for a garage with NO access door 8 Foot Rail Extension Kit To allow an 8 foot door to open fully Extension Brackets Optional For safety sensor ins...

Page 40: ...r for warranty repair You will be advised of shipping instructions when you call the toll free service number Please include a brief description of the problem and a dated proof of purchase receipt wi...

Page 41: ...rocher ce manuel pr s de la porte de garage pour s y reporter ult rieurement La porte NE SE FERMERA PAS si le Syst me Protector n est pas branch et r gl correctement Pour un bon fonctionnement en tout...

Page 42: ...sation de la commande de porte mont e au mur 32 Pour ouvrir la porte manuellement 32 Entretien de votre ouvre porte de garage 33 D fauts de fonctionnement 34 Programmation Pages 35 36 Pour ajouter une...

Page 43: ...sorts c bles poulies supports de porte ou leurs ferrures de montage lesquels sont tous sous une tension EXTR ME Inactiver TOUTES les serrures et retirer TOUTES les cordes raccord es la porte de garage...

Page 44: ...ation de montage Le montage alternatif au sol du d tecteur inverseur de s curit n cessitera des ferrures non fournies Avez vous une porte d acc s en sus de la porte de garage Sinon un d tachement rapi...

Page 45: ...port de la porte 11e op ration POSE DE PORTE RIGIDE SANS GUIDES PORTE RIGIDE AVEC GUIDES Sans syst me inverseur de s curit en bon tat de marche des personnes particuli rement les petits enfants pourra...

Page 46: ...mod le achet S il manque quoi que ce soit v rifier soigneusement le mat riel d emballage Les pi ces peuvent tre coinc es dans la mousse Les fixations n cessaires l assemblage et au montage apparaissen...

Page 47: ...S parer toutes les fixations et les regrouper comme illustr ci apr s aux fins des op rations d assemblage et de montage 7 RAIL GREASE NO 83A11 2 4 4 Vis autotaraudeuse 1 4 po 14x5 8 po FIXATIONS D ASS...

Page 48: ...user un fonctionnement saccad du chariot du bruit et ou une remont e ennuyeuse de la porte 3 Assembler les contre crous s assurer d un bon alignement et serrer REMARQUE Si le rail en T n est pas assem...

Page 49: ...ont es dans le dessus du moteur Aligner les trous de la section arri re du rail en T sur les trous du moteur Fixer le rail l aide des deux vis rondelle d pos es pr c demment Serrer fermement Ne pas ou...

Page 50: ...non doivent engager la courroie Figure 2 5 Utiliser le second raccord principal pour raccorder la courroie l extr mit plate de l arbre filet du chariot Figure 1 S assurer que la courroie n est pas tor...

Page 51: ...la porte de garage avant de poser l ouvre porte afin d viter un emm lement 5 Poser l ouvre porte de garage au moins 7 pieds au dessus du sol 6 Monter la poign e de d clenchement d urgence 6 pieds au...

Page 52: ...rage Suivre les instructions qui correspondent la porte du garage sur laquelle on pose l ouvre porte PORTE ARTICUL E ET PORTE RIGIDE MUNIES DE GUIDES 1 Fermer la porte et marquer l axe vertical int ri...

Page 53: ...ntre le haut de la porte et le sol Soustraire la hauteur r elle de la porte Ajouter 8 pouces cette mesure Se reporter l exemple 3 Fermer la porte et tracer une ligne horizontale d intersection sur le...

Page 54: ...port sur une solive avec les fixations fournies POSE DU SUPPORT DE LINTEAU AU PLAFOND Prolonger l axe vertical sur le plafond comme il est illustr GRANDEUR R ELLE DES FIXATIONS UP CEILING MOUNT ONLY U...

Page 55: ...ressort de la porte g ne il faudra demander de l aide Demander une personne de bien retenir l ouvre porte sur un support temporaire de fa on que le rail ne touche pas le ressort Positionner le support...

Page 56: ...Un 2x4 convient tr s bien pour obtenir l espace qu il faut entre la porte et le rail Lever l ouvre porte et le faire reposer sur un escabeau Si l escabeau n est pas assez haut demander de l aide Ouvr...

Page 57: ...de suspension sur une solive avec des tire fond de 5 16 po 18x 1 7 8 po 5 Fixer l ouvre porte aux supports de suspension l aide de vis hexagonales de 5 16 po 18x7 8 po de rondelles freins et d crous 6...
Page 58: ...e plafond jusqu au moteur Utiliser des agrafes isol es pour fixer solidement le fil plusieurs endroits Ne pas percer le fil l aide d une agrafe ce qui cr erait un court circuit 4 Brancher ensuite le f...

Page 59: ...l autre extr mit de la corde dans le trou du levier de d clenchement du chariot ext rieur Ajuster la longueur de la corde de fa on que la poign e soit environ 6 pieds au dessus du sol Fixer l aide d u...

Page 60: ...le couvercle de c t D brancher le cordon 3 fils Brancher le fil noir courant secteur sur la vis de borne en laiton le fil blanc neutre sur la vis de la borne en argent puis le fil de terre sur la vis...

Page 61: ...oleil ne reluise jamais directement dans la cellule r ceptrice Les supports de montage sont con us en vue de leur fixation par pince sur le guide des portes de garage articul es sans ferrures de monta...

Page 62: ...r suppl mentaire est n cessaire on peut employer un support de rallonge se reporter la section Accessoires ou des blocs en bois Utiliser les trous de montage de support comme gabarits pour positionner...

Page 63: ...otant et que la trajectoire du faisceau lumineux invisible n est pas obstru e aligner les deux d tecteurs Desserrer l crou de la cellule mettrice et ajuster de fa on ce qu elle vise directement la cel...

Page 64: ...Marquer percer des trous et poser comme indiqu ci apr s suivant la construction de votre porte Portes m talliques ou l g res utilisant une ferrure angulaire verticale entre le support du panneau de po...

Page 65: ...crou 5 16 po 18 PORTES RIGIDES Pri re de lire et de suivre les avertissements et les instructions de renforcements la page pr c dente Ils s appliquent galement aux portes rigides Centrer le support de...

Page 66: ...2 Rapprocher les biellettes et aligner les trous Choisir les trous les plus loign s tant donn qu ils permettent aux biellettes d tre plus solides Figure 3 M thode alternative Si les trous de la biell...

Page 67: ...la fermeture de la porte diminuer la course de fermeture Tourner la vis de r glage de fermeture DOWN de 5 tours complets en sens horaire Appuyer sur le bouton poussoir de la commande de porte Le char...

Page 68: ...ne se ferme pas compl tement Augmenter la course de fermeture en tournant la vis de r glage DOWN gauche Un tour complet de la vis correspond 2 pouces de course Si la porte ne se ferme toujours pas co...

Page 69: ...vis de r glage droite Effectuer de petits r glages jusqu ce que la porte fasse un cycle de fermeture complet Apr s avoir proc d chaque r glage faire faire un cycle complet l ouvre porte Ne pas augmen...

Page 70: ...e porte afin de v rifier le r glage V RIFICATION DE S CURIT IMPORTANTE R p ter les op rations 1 2 et 3 de r glage dans les cas suivants Chaque fois que l on modifie la longueur des biellettes et chaqu...

Page 71: ...d sirez inactiver toute t l commande suivez les instructions de la section Programmation Actionner l ouvre porte suivant l une des m thodes ci apr s La t l commande main appuyer sur le gros bouton po...

Page 72: ...u pour l teindre plus rapidement L intervalle de 4 1 2 minutes peut tre modifi 1 1 2 2 1 2 ou 3 1 2 minutes comme suit enfoncer et tenir le bouton de blocage jusqu ce que l clairage clignote environ 1...

Page 73: ...lace s est elle accumul e sous la porte La porte peut tre coll e au sol par le gel Enlever tous les obstacles Le ressort de la porte de garage pourrait tre cass Le faire remplacer Un fonctionnement r...

Page 74: ...pe de r glage 2 la page 29 Si la porte remonte apr s s tre compl tement ferm e diminuer les courses tape de r glage 1 Apr s avoir proc d au r glage r p ter le contr le de l inversion de s curit Le bes...

Page 75: ...ppuyant sur le gros bouton poussoir de la commande de porte fonctions multiples les trois boutons sont tenus 4 Rel cher les boutons lorsque l clairage du moteur clignote Il a appris le code Si les amp...

Page 76: ...ir un NIP temporaire 1 Appuyer sur les quatre boutons correspondant son NIP d entr e personnelle non le dernier NIP temporaire puis enfoncer et tenir le bouton L clairage de l ouvre porte clignotera t...

Page 77: ...N cessaire de d tecteur de s curit yeux de r ception et de transmission avec fil de sonnerie 2 conducteurs de 3 pi 12 41A5266 1 Supports de d tecteur de s curit 2 13 178B35 Biellette courb e NON ILLUS...

Page 78: ...trique 5 41C4876 Harnais de fils avec fiche 6 41A5021 5E Ensemble de plaque logique du r cepteur comprend plaque logique 7 41A4888 Panneau d extr mit avec toutes les tiquettes 8 175B88M Douille d ampo...

Page 79: ...re pour un garage SANS porte d acc s Mod le 8704C N cessaire de rallonge de rail de 8 pieds Pour permettre une porte de 8 pieds de s ouvrir compl tement Mod le 41A5281 Supports de rallonge Facultatif...

Page 80: ...era des instructions d exp dition Veuillez inclure une br ve description du probl me et un re u dat faisant preuve d achat avec tout produit renvoy pour r paration en vertu de la garantie Les produits...

Reviews: