THE FOLLOWING CHART OUTLINES ADJUSTMENT PROCEDURES. RUN THE OPENER THROUGH A
COMPLETE TRAVEL CYCLE AFTER EACH ADJUSTMENT.
NOTE: REPEATED OPERATION OF THE OPENER DURING ADJUSTMENT PROCEDURES MAY CAUSE
MOTOR TO OVERHEAT AND SHUT OFF. SIMPLY WAIT 15 MINUTES AND TRY AGAIN.
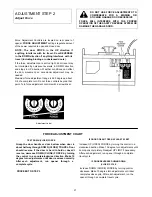
Read the chart carefully before proceeding to Step 2. Use a screwdriver to make limit adjustments.
LIMIT ADJUSTMENT CHART
IF DOOR DOES NOT OPEN COMPLETELY
BUT OPENS AT LEAST FIVE FEET
IF ONE-PIECE DOOR DOES NOT
CLOSE COMPLETELY
Increase UP travel. Turn the UP LIMIT adjustment
screw clockwise. One turn equals 2" of travel.
If door does not open at least 5 feet: adjust UP
(OPEN) FORCE as explained in Step 2.
IF DOOR DOES NOT CLOSE COMPLETELY
Increase DOWN travel. Turn down limit adjustment
screw counterclockwise. One turn equals 2" of travel.
If the door still will not close completely, the header
bracket is positioned too high. See Step 1, page 10.
Increase DOWN travel. Turn down limit adjustment
screw counterclockwise. One turn equals 2 inches of
travel.
IF OPENER REVERSES IN FULLY
CLOSED POSITION.
Decrease DOWN travel. Turn down limit adjustment
screw clockwise. One turn equals 2 inches of travel.
IF DOOR REVERSES WHEN CLOSING AND THERE
IS NO INTERFERENCE TO TRAVEL CYCLE
Test door for binding: Pull manual release handle.
Manually open and close door. If door is binding, call a
door serviceman. If door is not binding or unbalanced,
adjust DOWN (CLOSE) FORCE. See Step 2.
LIMIT ADJUSTMENT settings regulate the points at
which the door will stop when moving up or down.
NOTE: Door STOPS in the UP direction if anything
interferes with door travel. Door REVERSES in the
DOWN direction if anything interferes with the door
travel (including binding or unbalanced doors).
PROCEDURE: To operate the opener, press the Door
Control Button. Run the opener through a COMPLETE
TRAVEL CYCLE. No limit adjustments are necessary
when the door opens and closes completely and doesn't
reverse unintentionally when fully closed.
ADJUSTMENT STEP 1
Adjust UP and DOWN Limits
20
Summary of Contents for 1145-1/3HP
Page 5: ...5...

