12
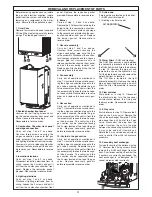
16. Main heat exchanger
Carry out step 1 and 2 as above. Drain
down the boiler as in step 12. Unscrew
three screws securing the air/gas con-
nection pipe onto the gas valve assem-
bly. Disconnect Ionisation and lighting
electrodes from their wiring. Unscrew six
nuts to release combustion chamber
front panel and pull the assembly
towards you. Undo the two clips of the
pipes to the main exchanger and pull
down the pipes. Unscrew the three
screws located at the bottom, top left
and at the right with the retaining system
to be able to pull the main heat exchang-
er towards you.
Reassemble in reverse order taking care
about the location of the gasket on the
fumes collector and replace the neces-
sary gaskets.
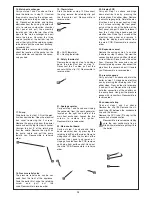
17. Pump
Drain boiler as in step 12. Pivot the elec-
tical box downwards. Open the electrical
box cover removing the 2 screws.
Remove the pump plug from the power
board and earth plug from earth socket.
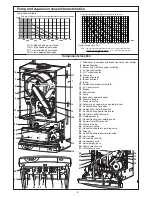
Unscrew the nut F of the return pipe
from the volute. Remove the clip G on
the pump volute and pull the pump
toward you. Reassemble in reverse
order.
18. Pressure relief valve
The pressure relief valve can be ser-
viced from the front of the appliance.
Drain the boiler first, undo the retaining
screw and pull out the
valve.Reassemble in reverse order.
19. Thermistors
Drain the boiler as step 12. Disconnect
the plug, remove the retaining clip pull
the thermistor out. Reassemble in
reverse order.
22 = DHW thermistor
21 = Heating thermistor
20. Safety thermostat
Remove the casing as step 1 and hinge
down the electrical box as step 5.
Disconnect the 2 cables, pull out the
sensor with the clip (13). Reassemble in
reverse order.
21. Spark generator
Carry out step 1 and 2 as above. Unplug
the connector from the spark generator
located on the right hand side of the
main heat exchanger. Loosen the two
screws to remove the igniter.
Reassemble in reverse order.
22. Main control board
Carry out step 1 as above and hinge
down electrical box by pressing the
retaining tabs P on either sides. Remove
wiring cover
C. Undo the 4 screws of the
electrical rear panel and remove it.
Unplug all cables from the PCB, remove
earth plug from earth socket. Hang out
the main PCB. Reassemble in reverse
order.
23. Display PCB
Carry out step 1 as above and hinge
down electrical box by pressing the
retaining tabs P on either sides. Remove
the pressure gauge clip. Rotate the elec-
trical box back in upper position. Undo
the 2 screws retaining the front panel,
put your two hands at the bottom of the
front panel and pull it down to release it
from the 2 clips. Hinge down again the
electrical box. Undo the 4 screws of the
electrical rear panel and remove it.
Unplug the display board cables from
the main PCB. Reassemble in reverse
order.
24. Expansion vessel
Remove the casing as step 1 and drain
the boiler as step 12 above. Unscrew the
connecting tails nuts and lift out the boil-
er from the wall. Place it on a side on the
floor. Remove the expansion vessel
bracket retaining screws, disconnect the
pipe from the vessel and pull it toward
you. Reassemble in reverse order.
25. pressure gauge
Carry out step 1 as above and drain the
boiler as step 12. Hinge down electrical
box by pressing the retaining tabs P on
either sides. Press on the clip to remove
it and pull it out. Remove the clip which
hold the connection of the capillary on
the pump hose. Hang out the pressure
gauge with its capillary. Reassemble in
reverse order.
26. condensate trap
Carry out steps 1 and 2 as above.
Remove the clip (
R). Remove the sili-
cone tube (S) between the condensate
trap and the burner.
Remove the PVC tube (
T) using for the
evacuation of condensation.
Reassemble in reverse order taking
care the new condensate trap is
filled with water before putting it into
the boiler.
F
G
21
22
23
P
P
C
R
S
T

