SmaRT HH-xH06
U076.0.4-SmaRT_HP-2/4/6_hhr
8
5.0 Using a Standard SmaRT Handheld Remote
Note: 3-LED handheld units use the same button sequence as 6-LED remotes.
Handheld control is achieved under the following conditions:
1. Communication between the handheld and base unit must be established using
the Associate Procedure (2.0).
1. You must be line of sight of the base unit while holding the handheld, within
approximately 300-1000 ft. (100-333m) of the unit.
2. Each button is Push-To-Operate (PTO). Each is dedicated to its assigned (or
hardwired) output driven by the base unit. The output is only controlled when the
appropriate button is pressed and held.
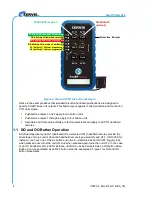
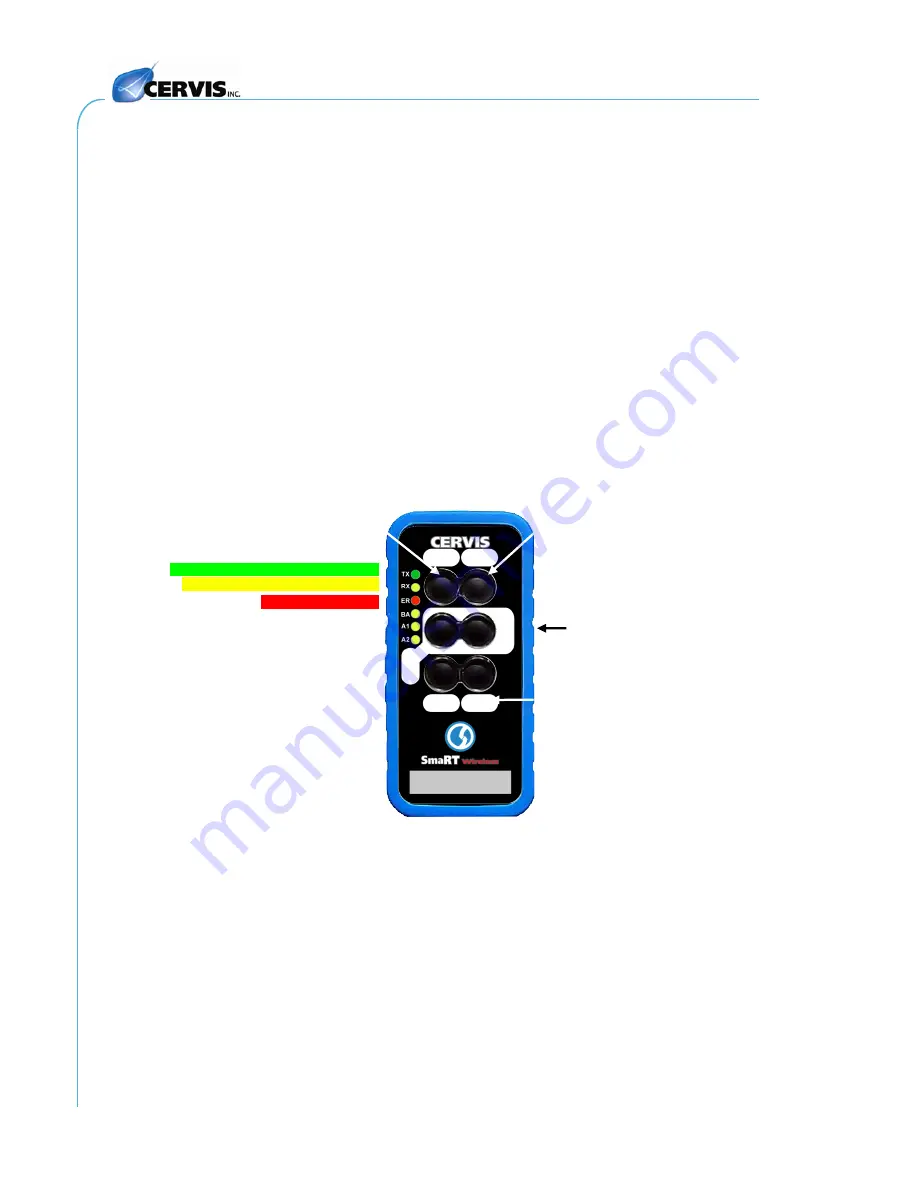
The front panel of SmaRT HH-xH06 handheld remotes respectively have two (2), four (4), or six
(6) buttons; all have three (3) diagnostic LEDs. Buttons 1 and 2 have dual functions used to
Associate and Dissociate the handheld to base units as previously described. Each button has
an area adjacent to it in which you can use a pen or a marker to write an Identifier for the button.
Output buttons control a particular base unit output only for as long as the button is pressed and
held. Output buttons are assigned as shown in the tables shown in Heading 5.4 for the particular
types of SmaRT handheld remotes.
Figure 5. PTO-906 and PTO-206 Front Panel
5.1 PTO Start and Stop
A standard PTO handheld remote activates (powers up) when any pushbutton is pressed.
Blinking TX and RX LEDs indicate that the remote is alive and communicating with the base unit.
To conserve battery power, the PTO unit stays active for approximately three (3) seconds and
will automatically power down unless there is button activity within the three second limit. When
the unit times out and powers down, all LED activity stops.
ASSOCIATE (button 1)
DISSOCIATE (button 2)
TX blinking Green when transmitting
RX blinking Yellow when receiving
ERROR blinking Red
Protective Bumper
5
3
Out 1
4
Out 6
2
Writable Identifier


