The function you can setting Aging time / VLAN Striding / and IGMP Snooping etc.
Please click
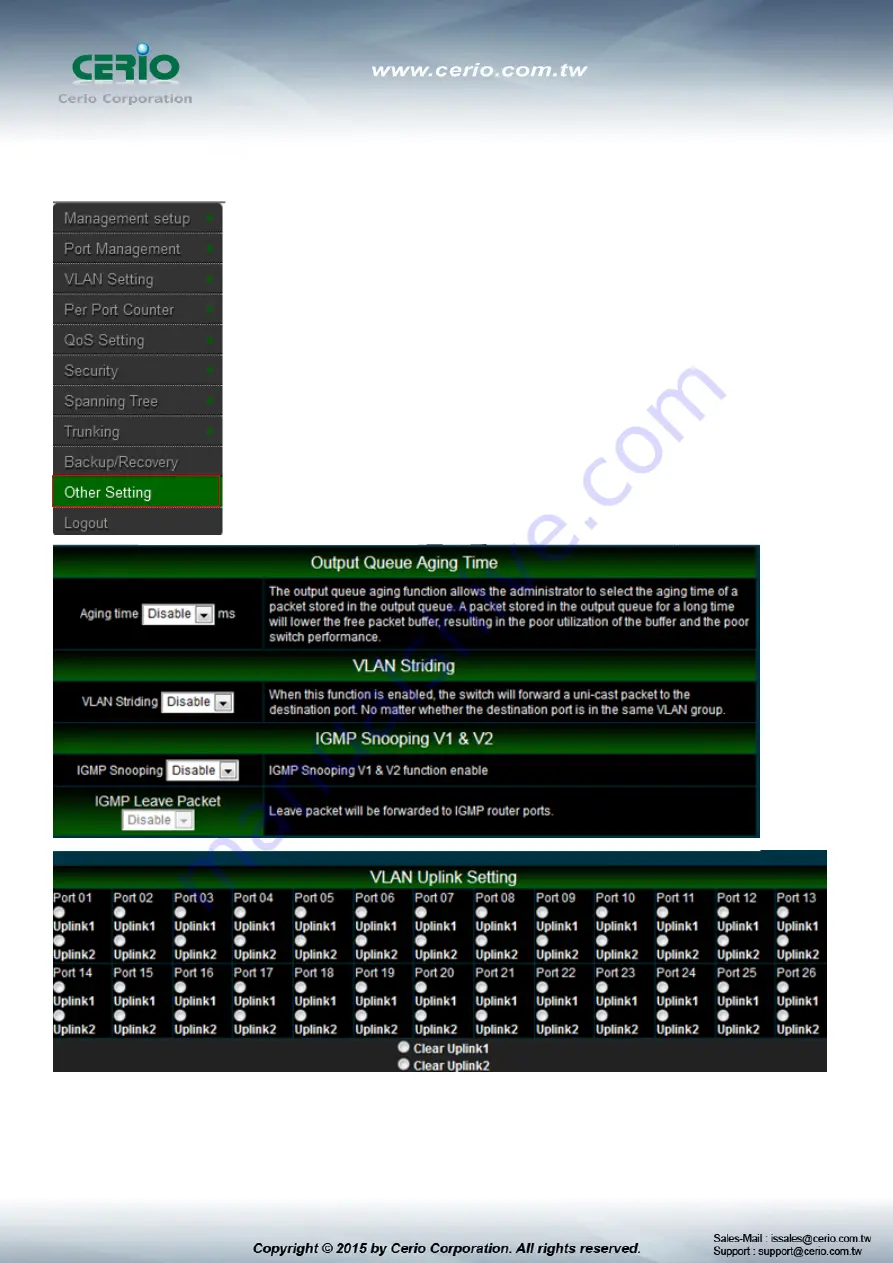
Other Setting
Output Queue Aging Time:
Choose Aging time is 200/400/600/800ms or disable etc. The
output queue aging function allows the administrator to select the aging time of a packet


