40
4.3 GASKETING
It is recommended that you change the door gasket (which makes your stove door air tight) once a
year, in order to insure good control over the combustion, maximum efficiency and security. To
change the door gasket, simply remove the damaged one. Carefully clean the gasket groove, apply a
high temperature silicone sold for this purpose, and install the new gasket.
Use only the genuine
Century gasket.
You may light up your stove again approximately 24 hours after having completed
this operation.
4.4 ASH REMOVAL USING THE ASH DRAWER
C
AUTION
:
ASHES CAN START FIRES
,
EVEN AFTER SEVERAL DAYS OF INACTIVITY
.
N
EVER DISPOSE OF ASHES
IN A COMBUSTIBLE CONTAINER
.
R
EMOVE ASHES WHEN THE STOVE AND ASHES ARE COLD
.
Whenever the ashes get 3 – 4” (76 – 102 mm) deep in the firebox, they should be emptied into the
ash drawer (except for S244 model which is not equipped with an ash drawer), using the following
instructions:
•
Make sure the fire is out, and the stove is cold.
•
Lift the ash dump plug in the center of the firebox by hooking the poker through the loop
on the cover and lifting up.
•
Push the ashes through the hole and leave an ash bed of approximately 1” deep on the
firebox bottom to help maintain a hot ember bed.
•
Clear the ashes from the area where the ash dump plug normally sits so that it will
properly seat against the opening edges. Tap it down with your poker to ensure proper
seating.
•
Ashes should be placed in a metal container with a tightly fitting lid. This closed container
should be placed on a non-combustible floor or on the ground, well away from all
combustible (heat sensitive) materials, pending final disposal.
•
Cover the ash dump plug with the remaining ashes and continue operation of your stove as
usual.
•
If the ashes are disposed of by burial in soil or otherwise locally dispersed, they should be
retained in the closed container until all cinders have thoroughly cooled. Do not place other
waste materials in the metal ash container.
Summary of Contents for FW2470
Page 26: ...25 FIGURE 2 2 2 B Factory Built Thimble ...
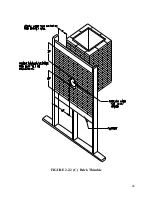
Page 27: ...26 FIGURE 2 2 2 C Brick Thimble ...
Page 47: ...46 ...

