
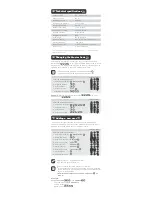
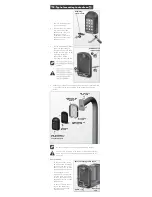
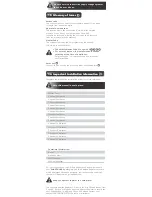
1. Remove retaining screw
cover and screws.
2. Insert screwdriver blade
into groove provided
between the cover and
back panel. Lever
screwdriver forward to
separate the cover from
the back panel.
16. Typical mounting instructions:
2
1
Retaining
screw cover
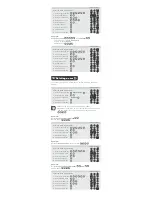
Self-adhesive
rubber pads
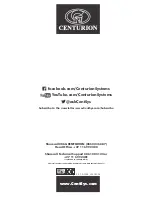
3. Fix the self-adhesive rubber
pads into the recesses
provided on the rear panel.
4. Attach the rear pane to the
mounting surface or
gooseneck with the
mounting screws supplied.
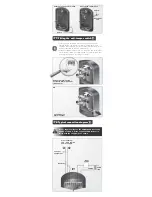
Cable routing
1. In the case of the wiring
being mounted externally,
knock out the tab in the
base of the cover to allow
the cable to pass through.
2. If the keypad is to be
mounted on a gooseneck,
or if the cable must pass
through the centre of the
back panel, knock out the
tab as shown
3. In both the above cases,
ensure the cable entry
points are sealed with
silicon sealant.
External wiring cable route
Cable
Knockout
tab
4
Mounting
screws
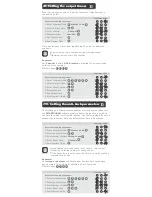
Be sure to seal all the mountings with silicone sealant.
Use only the mounting holes shown. If the other mounting
holes are used, the mounting screws will interfere with the
batteries.
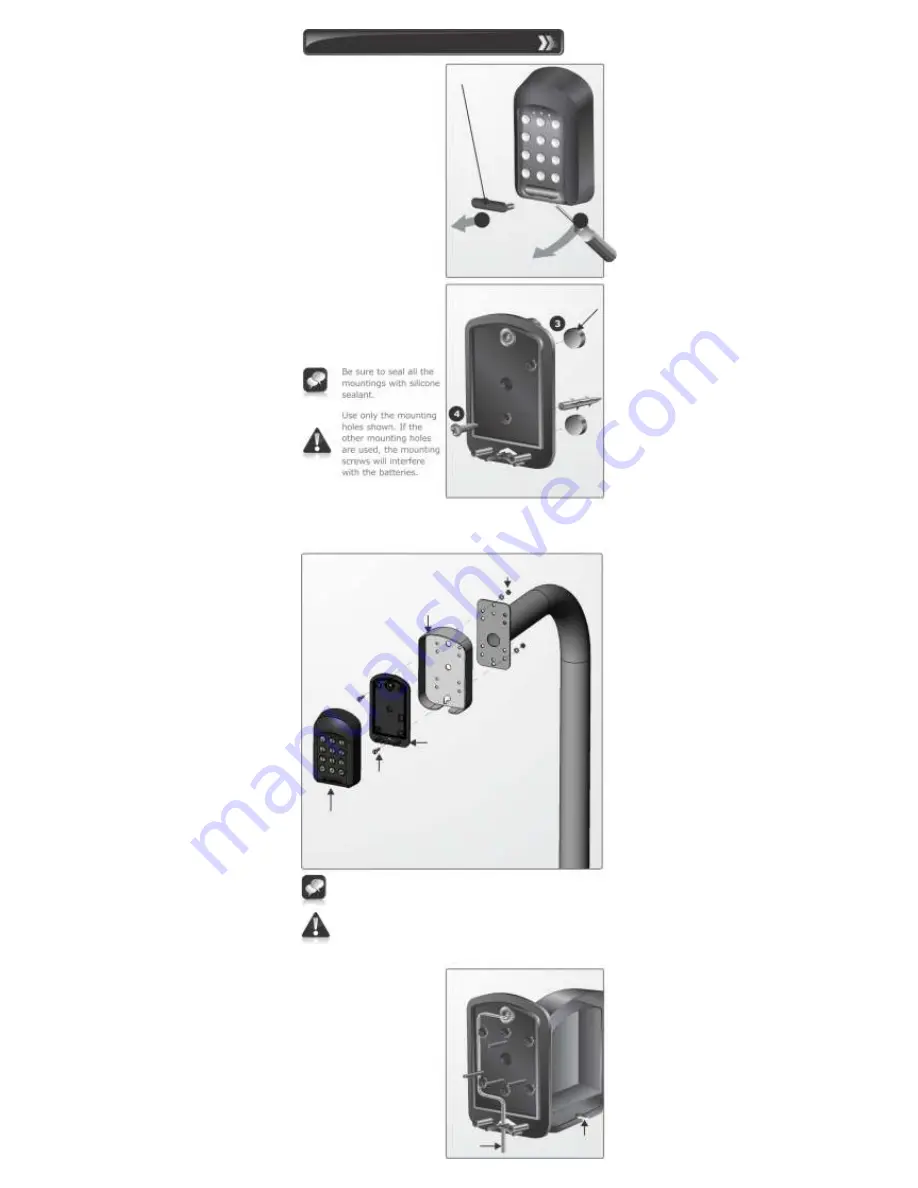
4. Attach the rear pane to the mounting surface, Anti-knock Shield
or gooseneck with the mounting screws supplied as shown
below.
SMARTGUARDair
wireless access
control keypad
Mounting
screws
SMARTGUARDair
backing plate
SMARTGUARD
Anti-knock
Shield
M4 washers
and nuts


