background image

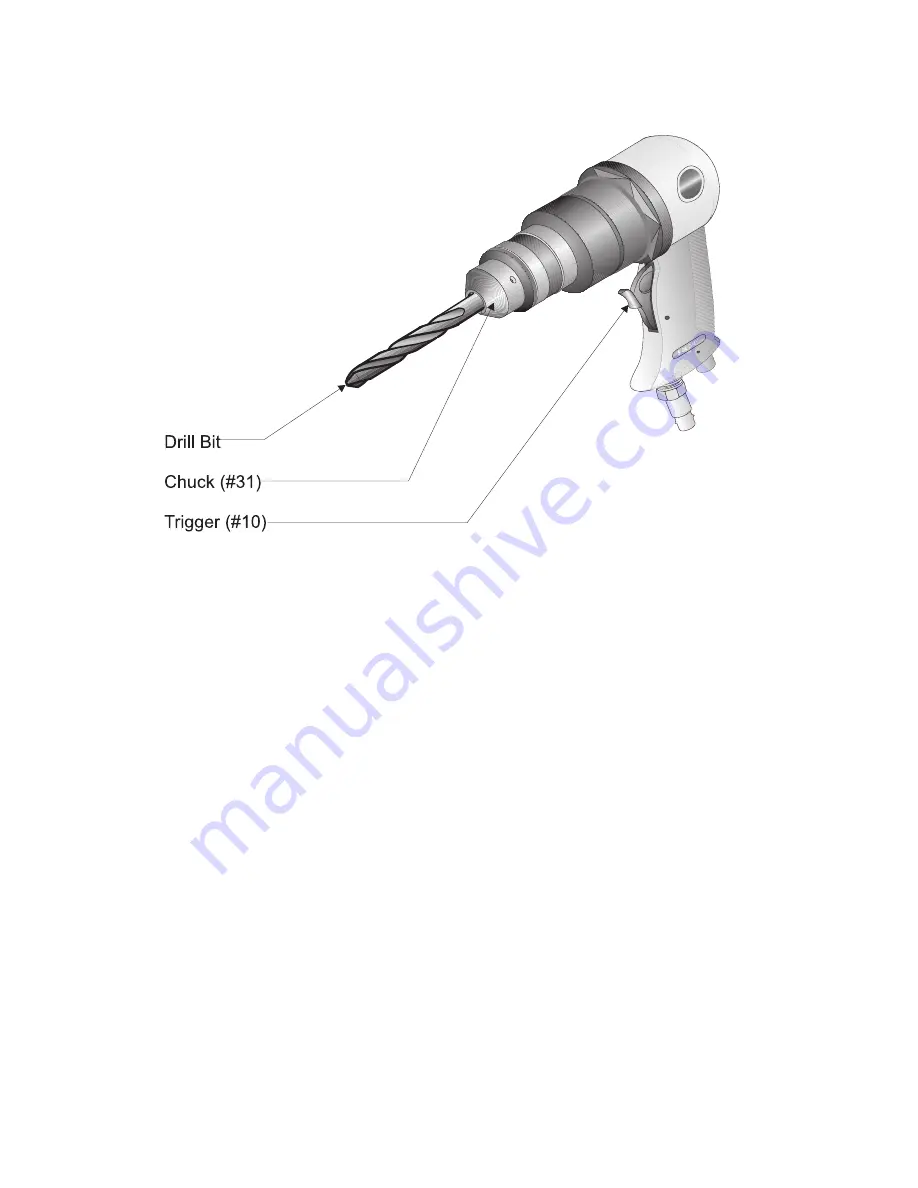
Step 7:   To begin drilling, press the TRIGGER (#10) as shown in Figure 5.

Figure 5  —  Drilling Operations

Step 8:   Your Sander/Drill has a variable speed for drilling.  To vary the speed of the drilling

action, vary the pressure on the TRIGGER.

Step 9:   Drill only as deep as necessary.  Do not drill deeper than necessary into walls or other

areas where you cannot identify any possible hazards behind the drilling surface.

Step 10:  When you have drilled the hole, remove the drill bit from the hole while the Sander/Drill

is still spinning.  This is to prevent the drill getting caught in the hole and causing
damage.

Sanding

Step 1:  Identify the area you will be sanding.  Make sure you are using the appropriate grit

sandpaper for the material you will be working with.

Step 2:  It is recommended that you start the Sander/Drill before placing the sandpaper disc

onto the work surface.  This will reduce deep scratching in the surface.

Step 3:  To operate the Sander/Drill, grip the BODY (#1) with your palm and place pressure on

the TRIGGER (#10) to begin sanding.

Step 4:  You can vary the speed of the Sander/Drill to suit different sanding applications by

varying the pressure placed on the TRIGGER.

Page #8 -- SKU: 35245

Summary of Contents for 35245

Page 1: ...te at http www harborfreight com Copyright 1997 by Harbor Freight Tools All rights reserved No protion of this manual or any artwork contained therein may be reproduced in any shape or form with out t...

Page 2: ...te attachments in an attempt to exceed the tool s capaci ties 6 USE THE RIGHT TOOL FOR THE JOB Do not attempt to force a small tool or attachment to do the work of a larger industrial tool Do not use...

Page 3: ...LCOHOL OR DRUGS Read warning labels on prescriptions to determine if your judgment or reflexes are impaired while taking drugs If there is any doubt do not operate the tool 18 DRAIN COMPRESSOR EVERY D...

Page 4: ...the CHUCK You may gently tap on the end of the Hex Key Wrench with a rubber mallet Step 4 Remove the CHUCK Step 5 You will need sandpaper discs the appropriate size for the Backing Plate you will be u...

Page 5: ...t the drill bit needed for the drilling you wish to perform Step 2 Open up the Jaws of the Drill by turning the CHUCK 31 as shown in Figure 3 Figure 3 Opening the Drill Chuck Step 3 When the Jaws are...

Page 6: ...me air compressor Your Sander Drill is ready for use OPERATION Setup Frequent but not excessive lubrication is required for best performance Oil added through the airline connection will lubricate int...

Page 7: ...Mark the material you wish to drill at the spot for the hole Make sure your drill bit is the correct size for the hole you need to make Step 2 If possible clamp the material in a vise to make sure the...

Page 8: ...Sander Drill is still spinning This is to prevent the drill getting caught in the hole and causing damage Sanding Step 1 Identify the area you will be sanding Make sure you are using the appropriate g...

Page 9: ...m the work surface and release pressure on the TRIGGER to stop the Sander Drill MAINTENANCE Your Sander Drill is best operated with an Airline Oiler If you are using the Sander Drill without an Airlin...

Page 10: ...HE FOLLOWING CAREFULLY THE MANUFACTURERAND OR DISTRIBUTOR HAS PROVIDED THE PARTS DIAGRAM IN THIS MANUAL AS A REFERENCE TOOL ONLY NEITHER THE MANUFACTURER NOR DISTRIBUTOR MAKES ANY REPRESENTATION OR WA...

Page 11: ...Page 11 SKU 35245 ASSEMBLY DIAGRAM...

Reviews: