Celestron VistaPix 72210 User Manual Download Page 8

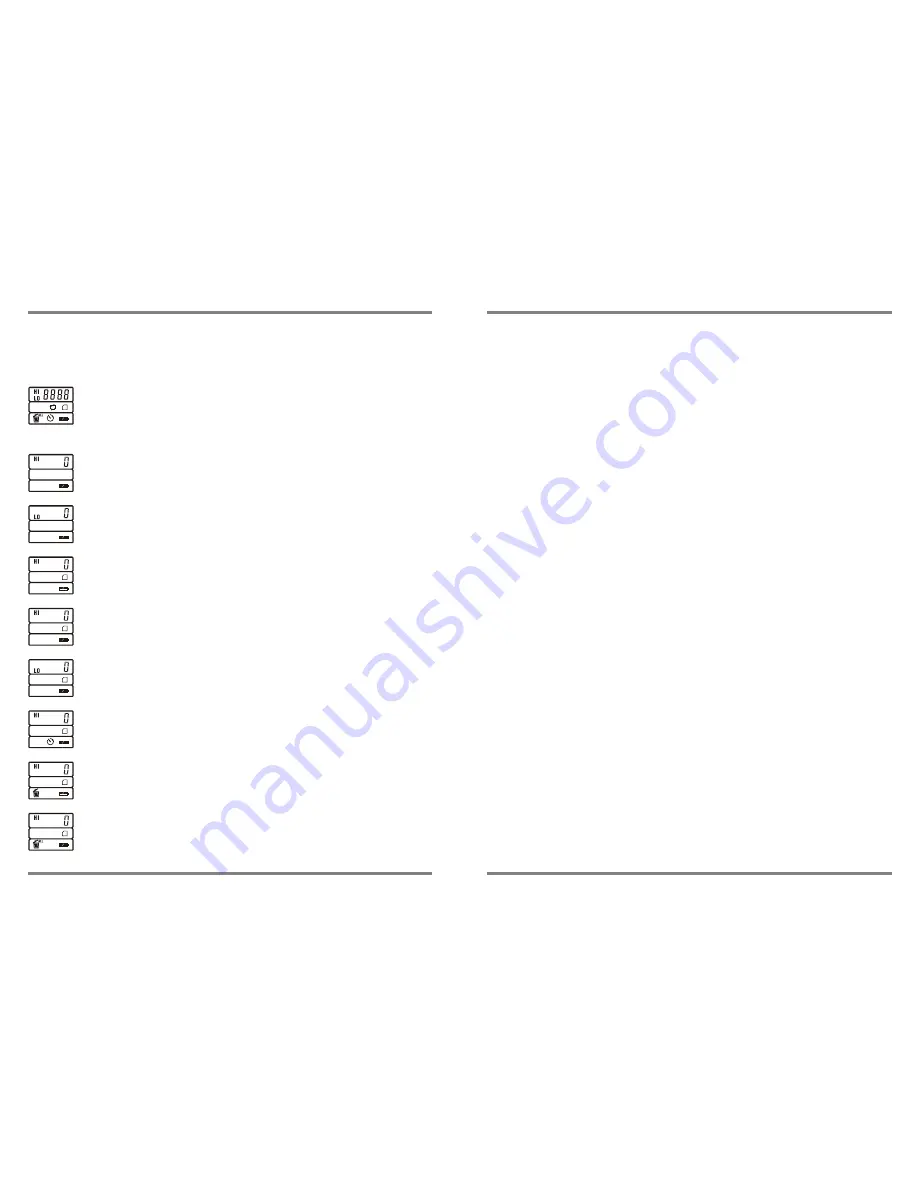
[ Erase All Images mode ]

P.5

P.10

8.Basic maintenance

o

o

o

o

Operating Environment: 41 to104  F(5  to 40 C). 20%-85% relative humidity,
non-condensing.

Care of your VistaPix

8 -1.Never immerse VistaPix into any fluid or liquid.Remove dust or stains

        with a soft cloth dampened with water or neutral detergent. Keep in a dry 

        and cool dust-free environment when not in use.

8 -2.Take the batteries out when VistaPix is not to be used over a long 

        period.

8 -3. Avoid dropping the VistaPix. Do not disassemble VistaPix.

4. Digital Camera Modes

4-2. Explanation of  mode icons.

Full display of mode icon

.

FMT

4-1

.

Press the left button (Mode/Power Button) to scroll through the Modes

.


Press right button(Shutter/Set Button)to select a mode or to take images.

[ Erase Last Image mode ]

[ Self timer mode ]
VistaPix will take an Image after 10 seconds. 

[ Low Resolution mode ]
(640x480)

[ High Resolution mode ]
(1600x1200)

[Optional SD Card inserted]

[ Low Resolution mode ]
(640x480)

[ High Resolution mode ]
(1600x1200)

Summary of Contents for VistaPix 72210

Page 1: ...14m 1000 YDS Exit pupil 4 0 mm Digital Camera Specifications Binocular specifications System Requirements USB Cable x1 1 Window 98 98SE ME 2000 XP 2 The processor above Pentium 233MHz 3 128MB SDRAM 4...

Page 2: ...anging tape and do not let children twist it around their necks and bodies to avoid danger due to improper operation Please don t throw the product with the gallus in hand to avoid damage to others or...

Page 3: ...s as indicated 2 Enter Removable Disk to open DCIM file 5 Images download finished 3 In DCIM file open 100MEDIA data file 4 In 100MEDIA Data file choose the pictures you want or choose all Images How...

Page 4: ...to share your fun with others by downloading images from the camera right to your computer to e mail to your friends and family P 14 8 Choose Custom or Typical form of installation 9 Please confirm th...

Page 5: ...is located on the front of the CD Press Next when complete 1 Insert the CD ROM 6 After confirming please press Yes SD card lid closed SD card lid opened Foil face up 2 1 When no action is performed w...

Page 6: ...tment Lid 11 Barrel 12 SD card Slot 10 1 4 5 6 7 3 2 8 9 11 12 7 3 7 11 5 Computer will automatically install the driver 7 Installation complete Please press Finish button Steps to install VistaPix dr...

Page 7: ...card memory must be downloaded separately Download from flash memory Take out the SD card if necessary and connect the to the computer then follow the downloading steps and all the photos in the flas...

Page 8: ...teries out when VistaPixis not to be used over a long period 8 3 Avoid dropping theVistaPix Do notdisassemble VistaPix 4 Digital Camera Modes 4 2 Explanation of mode icons Full display of mode icon FM...

Page 9: ...file To use continuous picture taking mode Use the Mode Power Button 4 to select the CPT mode Press the Shutter Set Button 5 to begin taking video Press the Shutter Set button again to finish the oper...

Page 10: ...SD card format mode and Press the Shutter Set Button for 3 Seconds NOTE This willerase all images stored on the memory card 5 How to use the binocular Focusing the Binocular Adjusting the eyepieces Th...

Reviews: