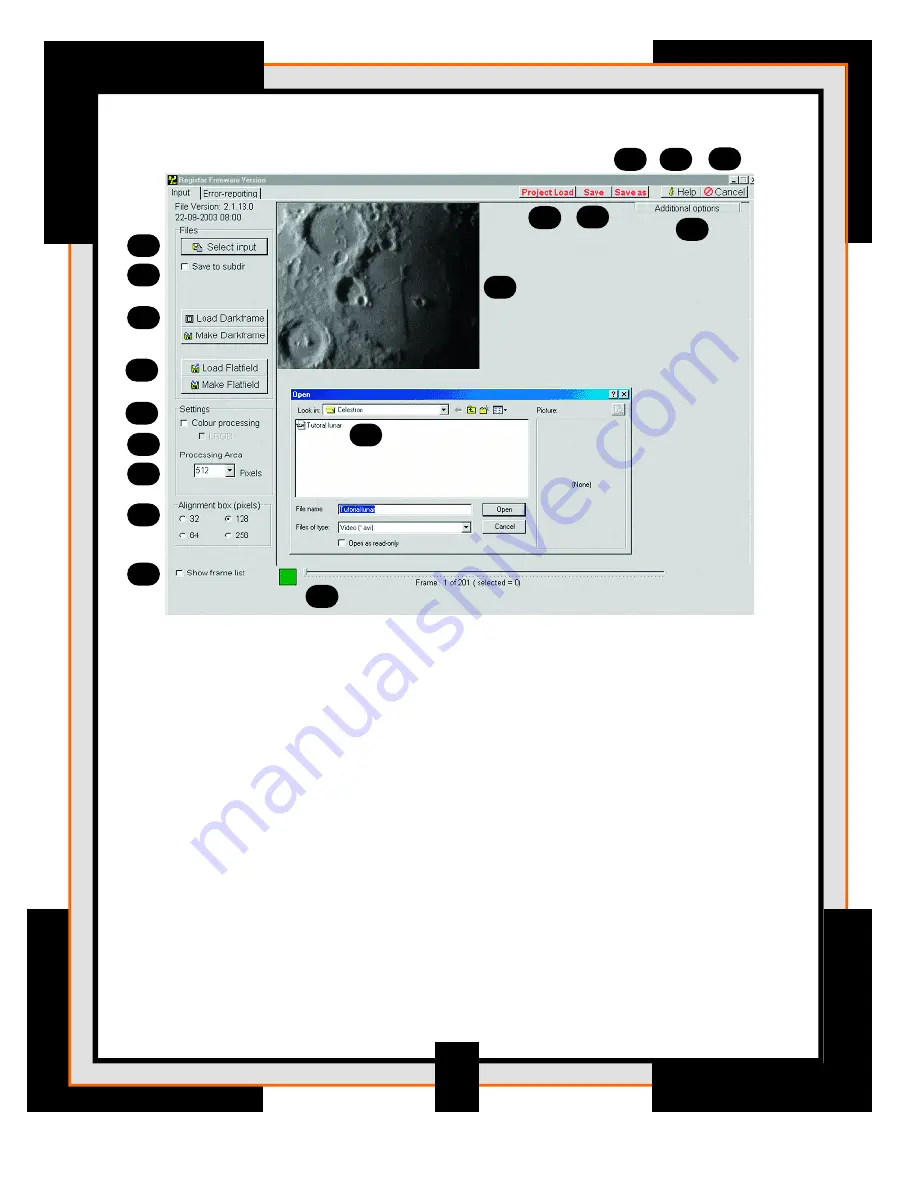
Input Screen
Controls/Features
1. Select Input (Button)
– Press this button to start selecting images (bmp, jpeg, fits, tiff)
or video sequences (avi) for processing. After the button is pressed a standard windows
file-dialog (#4) will open. You can select single avi-files or multiple (use ctrl or shift) bmp’s,
jpg’s, fit’s, tiff. For the latter, you can only choose one type of images and they need to be
the same size in terms of width/height (pixels).
2. Save to subdir (checkbox)
– When you process images or avi-files its often easy to
keep the results of the processing at a standard place relative to the input files. When the
checkbox is set you can automatically create a subdirectory. You can specify the name of
this subdirectory in a textbox (default = processed)
3. Image Window (image)
– When a set of image-files or a single avi is selected the
first image of the sequence is displayed in this window.
4. Dialog
– The OPEN dialog box appears when the Select Input button. (See #1)
5. Color processing (checkbox)
– When you process images in full color make sure this
checkbox is selected.
14
1
16
17
5
6
7
8
9
10
4
3
11
12
13
14
15
18
2
Summary of Contents for NexImage
Page 14: ...13 User s Guide...


