Celestar Manual
Using the Drive
40
USING THE CELESTAR DELUXE DRIVE
The Celestar Deluxe drive system uses a combination of a precision ground worm and a 5.5” diameter, 266
tooth anodized aluminum helical gear for superior tracking accuracy. The drive system employs stepper
motors on each axis for quick response to guiding corrections and extremely accurate tracking rates. The
clock drive can run off the optional AC wall transformer, or the car cigarette lighter adapter or two 9-volt
batteries, supplied with the Celestar Deluxe.
The Celestar Deluxe drive system is also equipped with the Periodic Error Correction function, PEC. This
feature allows the drive system to “learn” the characteristics of the worm gear, and as a result, improve the
tracking accuracy to an even greater degree. This typically reduces the periodic error to 30 percent of the
original error. The amount of improvement varies depending on guiding skills, atmospheric stability, the
characteristics of the worm gear, and the accuracy of the polar alignment.
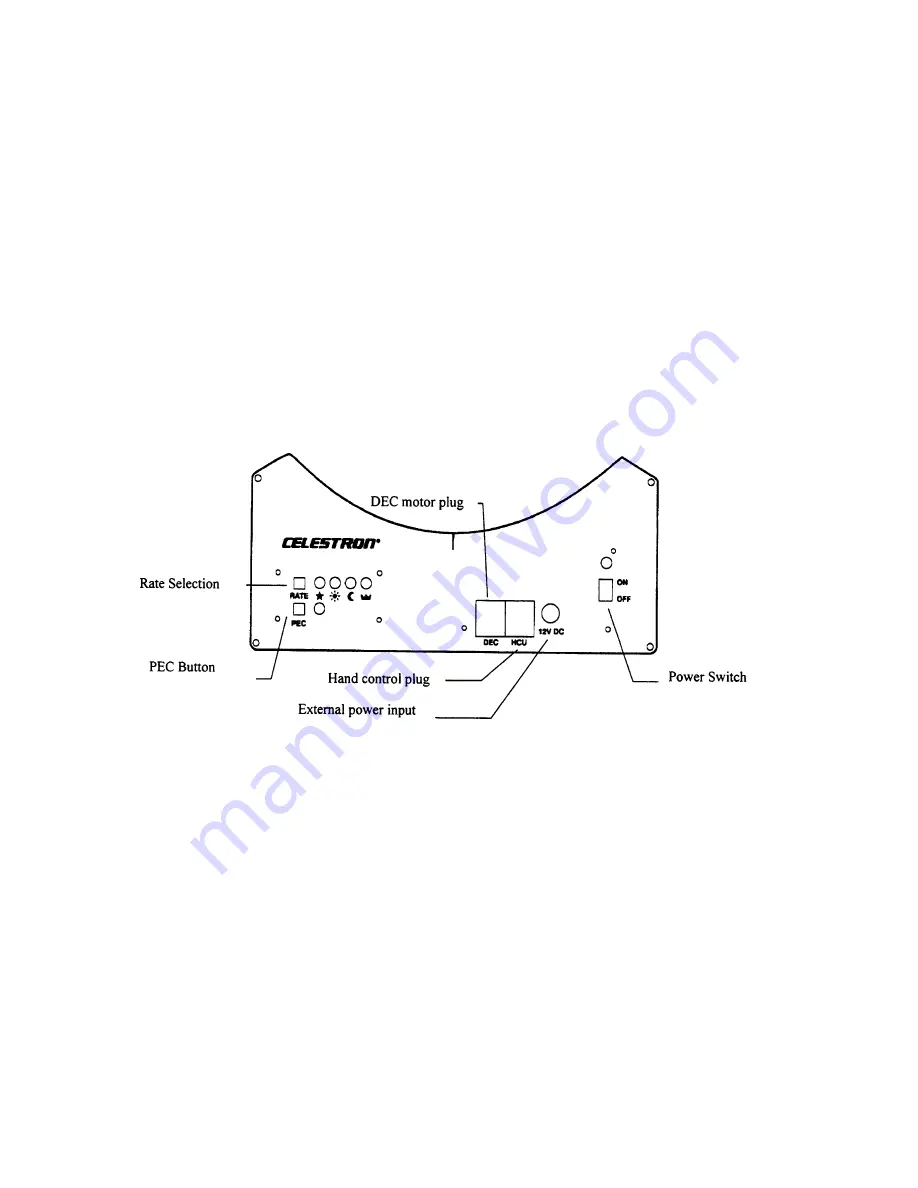
The following is a brief discussion of each of the features:
Figure 6-1
POWERING UP THE DRIVE
The Celestar Deluxe comes equipped with two 9-volt batteries and a cigarette lighter adapter. The batteries
are for convenience and are only meant to run the tracking motor. The 9-volt supplied by the batteries is
not sufficient to operate the declination motor for an extended length of time. The 9-volt batteries are
connected in parallel and provide about 8 hours of tracking time. The optimal way of powering the
telescope is via the cigarette lighter adapter or the optional AC wall transformer.
To power up the telescope:
1.
Plug the 6 conductor telephone type cable into the jack on the base board labeled DEC. Place the other
end of the cable into the phone jack located on the declination motor. The declination motor is
attached to the fork arm on the opposite side of the declination slow motion control.
2.
Plug either the AC wall transformer into the wall or the cigarette lighter adapter into the car cigarette
lighter. Plug the other end into the telescope jack marked “12V DC”.
3.
Turn the switch labeled “Power” to the ON position.


