

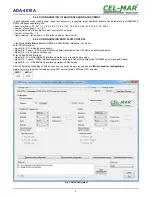


5.3. FIRMWARE UPDATE
ATTENTION!!!
THE SOFTWARE IN 0.007 VERSION AND UPPER WILL NOT OPERATE WITH THE CONVERTERS WITH CPU 1.0. VERSION.
IN CASE OF UPDATE THE SOFTWARE TO 0.007 VERSION AND UPPER IN THE CONVERTERS WITH CPU 1.0. VERSION
PLEASE CONTACT TO SERVICE.
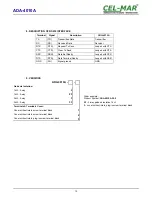
Set SW1 micro switch to
configuration mode
as in table below
SW1-1
SW1-2
ON
OFF
Yellow LED will blink with frequency 1Hz in this mode. Press a button
[Load New Firmware]
to change the software delivered by
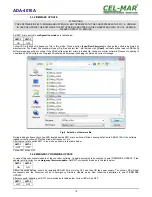
manufacturer. The Select File window will open (Fig.8) and select the *.bin file then click
[Open]
- software will be load to ADAConfig
buffer storage and will be checked. If the ADAConfig not detect errors in loaded file, change converter software. Process of updating is
visualized by ADAConfig in use Progress Window and after proper changing confirmed by correct message.
Fig 8. Selection of firmware file
During loading software the yellow LED located beside SW1 micro-switch will blink, showing data flow to ADA-4010A. If the software
loaded correctly yellow LED will be blink with frequency 1 Hz.
After that set micro switch SW1 to run mode as shown in the table below.
SW1-1
SW1-2
OFF
OFF
Yellow LED will be OFF
5.4. EMERGENCY FIRMWARE UPDATE
In case of the unsuccessful update of the converter software, try again according to description in point FIRMWARE UPDATE. If the
update is still incorrect, use
emergency firmware update
. Set SW1 microswitch mode as in the table below.
SW1-1
SW1-2
ON
ON
After microswitch setting, should be restarted ADA-4010A, by turning OFF and then ON the power supply. The yellow LED will light
continuously and the converter will be in Emergency Firmware Update mode. Now follow the description in point FIRMWARE
UPDATE.
After successful updating, set SW1 micro-switch as in table below. Yellow LED will be OFF.
SW1-1
SW1-2
OFF
OFF
10
ADA-4010A
Summary of Contents for ADA-4010A
Page 15: ...15 ADA 4010A...