background image

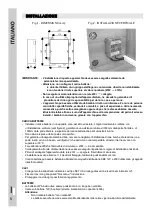
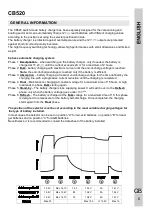
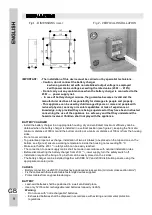
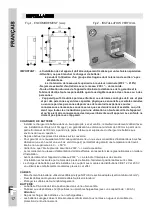
Fig.1 - DIMENSIONS (mm):

Fig.2 - VERTICAL INSTALLATION

GB

9

140

85

110

157

IMPORTANT:

- The installation of this device must be carried out by specialist technicians.
- Caution, do not connect the battery charger

when a generator set with non stabilised output voltage is employed
with power mains voltage exceeding the rated value (230V

±10%)

- Do not carry out any maintenance when the battery charger is connected to the

230V

power supply net.

- In case of battery charger misuse, the guarantee becomes invalid and the

manufacturer declines all responsibility for damages to people and property.

- This appliance can be used by children aged 8 years or more and people with

reduced physical, sensory or mental capabilities or lack of experience or
knowledge, only provided they are being supervised or they have been instructed
concerning the use of the appliance in a safe way and that they understand the
hazards involved. Children shall not play with the appliance.

BATTERY CHARGER

CABLES

BATTERY

Warning:


- Install the battery charger in an appropriate housing, dry and ventilated; maximum efficiency can be

obtained when the battery charger is installed in a vertical position (see figure 2), keeping the front at a
minimum distance of 300 mm and the bottom and top at a minimum distance of 100 mm from the housing
sides.

- Do not cover air intakes.
- To guarantee proper air exchange, installation of two air intakes (one placed on the top and one on the

bottom, see figure 2) ensure a working temperature inside the housing not exceeding 50 °C.

- Make sure that the 230V

safety switch can be easily reached.

- The connection to power supply mains shall be made in accordance with national installation rules.
- Before disconnecting the battery charger from 230V

power supply, turn the safety switch off.

- Installation requires the fixing of 4 pins that can be easily placed on the 4 sides.
- The battery charger can be installed together with CBE 12V and 230V distribution panels, using the

appropriate modular joints.

- Battery connection: use N07 V-K cables having adequate cross section (minimum cross section 4mm²).
- Fix the cables with the relevant cable fastenings devices supplied.
- Protect cables from any possible damage.

- Lead-acid batteries shall be positioned in a well ventilated place.
- Use only 12V

rechargeable lead batteries (capacity >40Ah).

- Do not use with “not rechargeable" batteries.
- Exhausted batteries shall be disposed in accordance with existing environmental protection

regulations.

(6 cells)

Summary of Contents for GB520

Page 1: ... 2017 cod 000244A Rev 00 ISTRUZIONI D USO BEDIENUNGSANLEITUNG INSTRUCTIONS D EMPLOI USER S MANUAL CARICA BATTERIE SWITCHING SWITCH MODE BATTERY CHARGER SWITCH MODE LADEGERÄT CHARGEUR DE BATTERIE A DECOUPAGE ...

Page 2: ... fine carica costante per il tempo definito dalla linea di carica con progressiva riduzione della corrente Fase 4 Carica di mantenimento a tensione costante per un tempo massimo di 15 ore Un elevato assorbimento dalla batteria comporta la ripartenza dalla fase Fase 5 Il carica batterie non fornisce più energia e passa alla fase di solo quando la tensione della batteria scende sotto i 13V Fase 6 La...

Page 3: ...e fonti di calore Se collegato modifica i valori di tensione di carica in funzione della temperatura rilevata COLLEGAMENTO SENSORE TEMPERATURA BATTERIA optional NERO 1 Alimentazione 12V COLLEGAMENTO BATTERIA 12V 2 Alimentazione 12V COLLEGAMENTO BATTERIA 12V 12V 230V On Off Fuse 230V F2 T 3 15A Sensore temperatura mod CTCB optional da posizionare in prossimità della batteria L 3mt B C A 4 2 1 3 30A...

Page 4: ...inversione di polarità rif F1 Protezione termica Segnale presenza rete S Fusibile di protezione rif F2 Interruttore di sicurezza 50 Hz 230V 10 T 3 15A vetro 5x20 230V luminoso 300W Tensione di Float 30 A lama IUoU Sì 12V 50 mA 86 Spina schuko Vite M6 180 x 140 x 85 mm 1kg 0 50 C Ventilazione Rendimento Dimensioni Frequenza Peso 14 1V A 14 4V B 14 7V C 13 5V A 13 8V B 13 8V C 3 posizioni A B C Sele...

Page 5: ... di 300mm dalla parte frontale e di 100mm dalla parte inferiore e superiore del carica batterie alle parti circostanti il vano Per garantire un adeguato ricambio d aria nel vano consigliamo l installazione di due bocche di areazione una posta in alto ed una in basso vedi figura 2 che assicurano una temperatura di lavoro interna al vano non superiore ai 50 C Prima di scollegare l apparecchio dalla ...

Page 6: ...tage is reached only if the battery is efficient Phase 3 battery charging at costant end of charge voltage for the time defined by the charging line with a progressive reduction Phase 4 Maintenance charging at constant voltage for a maximum time of 15 hours A high load leads to phase starting again Phase 5 The battery charger stops supplying power It will switch over to the phase when the battery ...

Page 7: ...TERY TEMPERATURE SENSOR optional BLACK 1 12V supply 12V CONNECTION 2 12V supply 12V CONNECTION 12V 30A F1 Fuse 12V Temperature sensor mod CTCB where it cannot be affected by other heat sources When connected the charging voltage is adapted according to the temperature measured by the sensor to be placed close to the battery Temperature sensor mod CTCB optional to be placed close to the battery ...

Page 8: ...al protection Signal AC power supply S Protection fuse ref F2 Safety switch 50 Hz 230V 10 T 3 15A glass 5x20 230V Luminous Float voltage IUoU Yes 12V 50 mA 86 Schuko plug M6 screw 180 x 140 x 85 mm 1kg 0 50 C Ventilation Efficiency Dimensions Frequency Weight 14 1V A 14 4V B 14 7V C 13 5V A 13 8V B 13 8V C 3 positions A B C Charging line selector Automatic regulation variable 2014 35 UE 2014 30 UE...

Page 9: ...stalled in a vertical position see figure 2 keeping the front at a minimum distance of 300 mm and the bottom and top at a minimum distance of 100 mm from the housing sides Do not cover air intakes To guarantee proper air exchange installation of two air intakes one placed on the top and one on the bottom see figure 2 ensure a working temperature inside the housing not exceeding 50 C Make sure that...

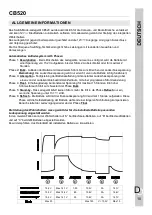
Page 10: ...adeschlussspannung über einen r kenn e bestimmten Zeitraum mit einer progressiven Stromreduzierung Phase 4 Erhaltungsladung bei konstanter Spannung für maximal 15 Stunden Ein hoher Stromverbrauch führt zum Neustart der Phase Phase 5 Das Ladegerät liefert keinen Strom mehr Es tritt in die Phase nur ein wenn die Spannung unter 13V sinkt Phase 6 Die Batterie wird mit der Bulk Ladespannung für maximal...

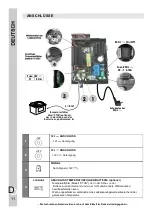
Page 11: ...ikett im Deckel wiedergegeben 230V On Off Fuse 230V F2 T 3 15A L 3mt B C A 4 2 1 3 30A F1 Fuse 12V Temperaturfühler Modell CTCB und wo er nicht durch andere Wärmequellen beeinflusst werden kann Wenn angeschlossen verändert er die Ladespannungswerte entsprechend der gemessenen Temperatur der in der Nähe von der Batterie su positionieren ist Temperaturfühler Mod CTCB optional der in der Nähe von der...

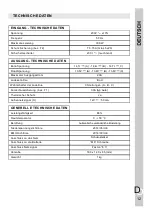
Page 12: ...ignal S Schutz Sicherung bez F2 Sicherheitsschalter 50 Hz 230V 10 T 3 15 Glas A 5x20 230V leuchtend Float Spannung IUoU Ja 12V 50 mA 86 Schukostecker M6 Schraube 180 x 140 x 85 mm 1kg 0 50 C TECHNISCHE DATEN Belüftung Leistungsfähigkeit Abmaße Frequenz Gewicht 14 1V A 14 4V B 14 7V C 13 5V A 13 8V B 13 8V C 3 Stellungen A B C Wahlschalter der Ladelinie Automatische veränderliche Einstellung 2014 3...

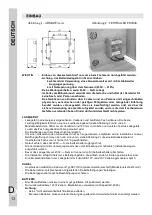
Page 13: ...teren Teil des Ladegeräts zu den das Fach umgebenden Teilen garantiert wird Die Belüftungen auf dem Deckel nicht verstopfen Um einen entsprechenden Luftaustausch im Fach zu garantieren empfehlen wir die Installation von zwei Belüftungsöffnungen eine oben und eine unten siehe Abbildung 2 die eine Betriebstemperatur innerhalb des Fachs von nicht über 50 C gewährleisten Darauf achten dass der 230V Si...

Page 14: ...rie avec une tension de fin de charge constante pour la durée définie par les lignes de charge avec une réduction progressive du courant Phase 4 Chargement de maintien à une tension constante pour une durée maximale de 15 heures Une consommation élevée de la batterie entraîne le redémarrage à partir de la phase de Phase 5 Le chargeur de batterie ne fournit plus d énergie et passe à la phase de uni...

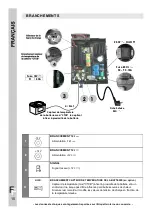
Page 15: ... Alimentation 12V BRANCHEMENT 12V 12V 230V On Off Fuse 230V F2 T 3 15A L 3mt B C A 4 2 1 3 30A F1 Fuse 12V Capteur de température et à un endroit où il ne risque pas d être influencé par d autres sources de chaleur Si celui ci est raccordé il modifie les valeurs de tension de charge en fonction de la température relevée mod CTCB à fixer à proximité de la batterie Capteur de température de la batte...

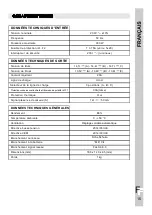
Page 16: ...f F1 Protection thermique Signal présence de réseau S Fusible de protection réf F2 Interrupteur de sécurité 50 Hz 230V 10 T 3 15A verre 5x20 230V lumineux Tension de Float IUoU Oui 12V 50 mA 86 Fiche Schuko M6 Vis 180 x 140 x 85 mm 1kg 0 50 C Ventilation Rendement Dimensions mm Fréquence Poids 14 1V A 14 4V B 14 7V C 13 5V A 13 8V B 13 8V C 3 positions A B C Sélecteur de la ligne de charge Réglage...

Page 17: ...sant une distance minimum de 300 mm à partir de la partie frontale et de 100 mm à partir de la partie inférieure et supérieure du chargeur de batterie aux environs du lieu en question Ne pas obstruer les prises d air situées sur le couvercle Pour garantir un renouvellement d air adéquat dans le lieu nous vous conseillons d installer deux bouches d aération une en haut et une en bas voir l image 2 ...

Page 18: ... ...

Page 19: ... ...

Page 20: ...Via Vienna 4 z i Spini settore D 38121 Trento Italy Tel 39 0461 991598 Fax 39 0461 960009 CBE S r l www cbe it E mail cbe cbe it ...

Reviews: