


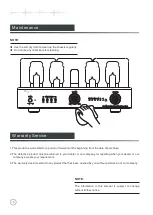


1. Unplug the power cord if you are not going to use the product for an extended period of time.
2. The machine will become hot after working for a long time. Please keep the unit's ventilation open and
install the amplifier at a well-ventilated place to avoid troubles and fire hazard.
3. Forbidden to operate when the output is open or shorted.
4. Do not attempt to service this product yourself. Opening the cover may expose you to dangerous
voltage or other hazards.
5. We are not responsible for any problems caused by checking and opening without permission of our
company. For service, Please contact a qualified service technician.
6. Do not place any objects filled with liquids such as vases or some others on the top or around.
7. Clean only with dry cloth.
8. Please move the amplifier carefully not to drop the unit or be subject to other strong shocks.
3
◆
Eighty
watts
per
channel
in
Class
AB
Ultra
-
linear
mode
,
Fifty
watts
per
channel
in
Triode
mode
,
push
pull
amplifier
design
.
◆
6SN7GTB
voltage
amplification
stage
,
12AU7EH
phase
invertor
and
voltage
amplification
,
12BH7EH
voltage
amplification
and
driver
stage
,
KT88
or
EL34
output
tubes
.
◆
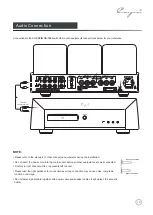
Three
pairs
of
line
inputs
,
one
pair
of
Pre
-
In
and
one
pair
of
Sub
Output
.
Standard
with
remote
volume
control
,
has
4
ohm
and
8
ohm
speaker
impedance
.
◆
Triode
or
ultra
-
linear
mode
switches
,
EL34
or
KT88
selection
,
external
bias
adjustment
with
meter
mo nitoring
.
◆
Anodized
aluminum
front
,
fully
vented
chassis
with
excellent
gorgeous
finish
,
hand
-
made
construction
with
the
finest
point
-
to
-
point
wiring
,
Soft
-
start
circuit
to
protect
the
amplifier
for
extended
life
of
sensitive
components
.
◆
With
Pre
-
In
input
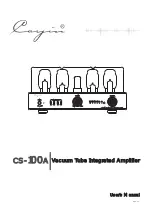
CS
-
100A
can
work
as
a
Power
amplifier
.
◆
Premium
Parts
:
Alps
volume
control
,
Audio
grade
capacitors
and
carbon
film
resistor
,
Toroid
transformer
for
power
supply
,
Wide
bandwidth
EI
output
transformer
,
Ceramic
tube
sockets
,
etc
.
◆
Available
front
finish
:
Silver
and
Black
.
Product Features
Safety precautions