background image


Page | 22  


MANUAL (UK) 


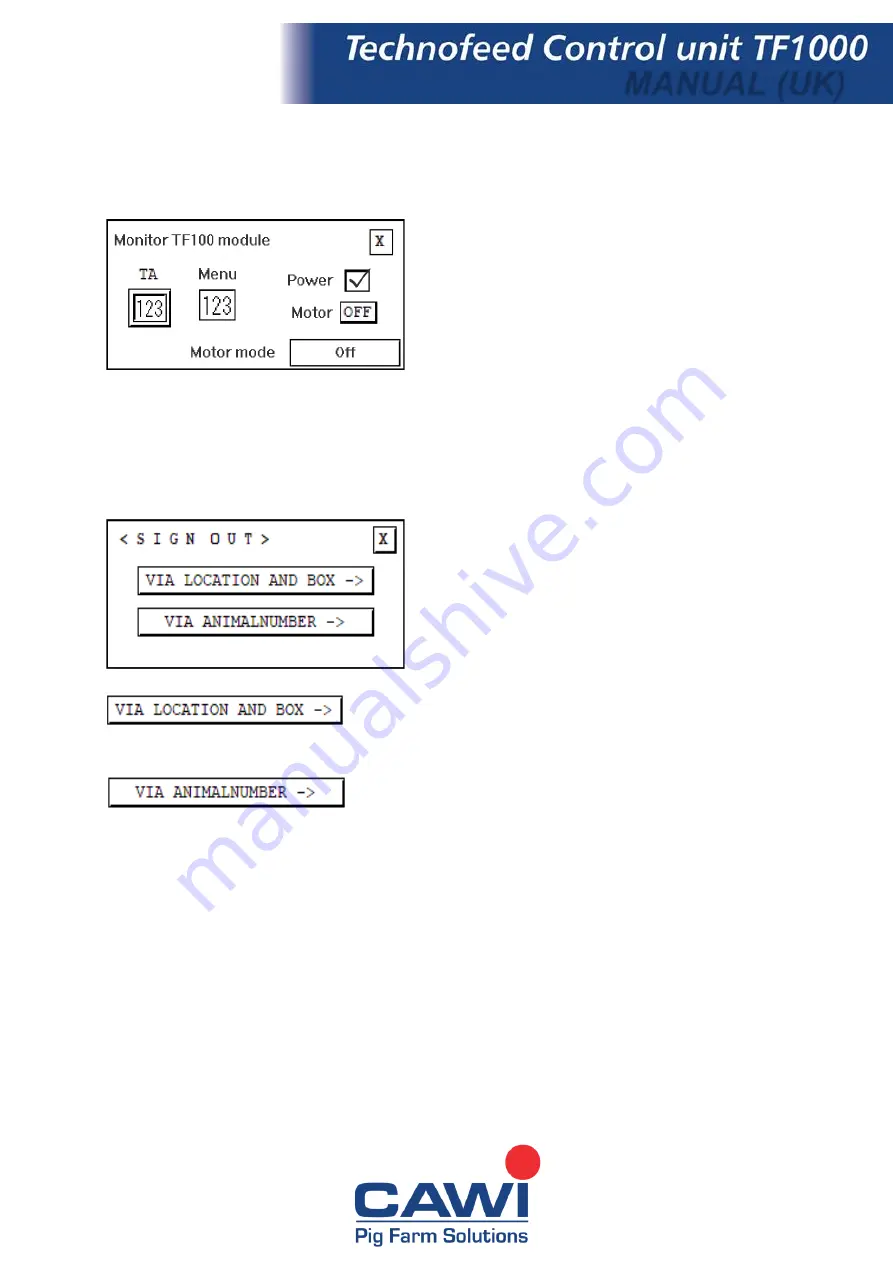
Monitor 

Here you can read the technical data of the dosators. 

At TA you can enter the technical address. Press the 
number for that. A keyboard appears with which you 
can enter the wanted location number. Then press 
[ENT] to confirm the number 

Then you can check this technical address for 
functionality. 


Sign out 

With this function you can clean a location / box and then be able to sign in another animal. 


In this menu you can sign out your animal by the 
location / box. The animal can be approached in two 
ways: By location and box number or by the animal 
number. 


With this function you approach the animal by the location and 
the box in which the animal is currently located. 


With this function you approach the animal by the animal 
number of the animal. 


Summary of Contents for TF1000

Page 1: ...Handleiding Technofeed control unit TF1000 Manual UK...

Page 2: ...Page 2 MANUAL UK...

Page 3: ...on box 8 Animal 9 Feed 10 Feedcurves 11 Curve 12 Check 12 Adjust 13 Locations 14 Location 15 Start times 16 Management 17 Sign in 18 Service 19 Backup 20 Service 21 Monitor 22 Sign out 22 By location...

Page 4: ...echnofeed control unit TF1000 Therefore read this user manual carefully before using the system This is to prevent unforeseen inconveniences The Technofeed control unit TF1000 may only be connected an...

Page 5: ...change or give service to your Technofeed installation This function is for your service engineer to be able to change settings in the software The code is only known by experienced technicians and i...

Page 6: ...n change the data of your animals that have been sign up in the locations function Such as Curve number Curve days correction percentages on the curve and Pre days only for nursery With this function...

Page 7: ...wanted animal by using the arrow keys next to the screen You also have the option of entering the number Press the number for that A keyboard appears with which you can enter the wanted animal number...

Page 8: ...ed animal number Then press ENT to confirm the number With this function you can select the correct box of the wanted animal by using the arrow keys next to the screen You also have the option of ente...

Page 9: ...f the Pre day is at 0 the feed curve starts automatically If the pre day number is 1 or higher feeding is done according to the pre days regardless of the number of the curve days During the pre days...

Page 10: ...eft With this function you can see the current feed calculation for the day You will also see the number of grams of food that has already been supplied to the animal this day Feed With this function...

Page 11: ...function The wanted curve of the animal can be selected by using the arrow keys above and below the screen You also have the option of entering the curve number Press the number for that A keyboard ap...

Page 12: ...elected pre day The requested pre day of the curve can be selected by using the arrow keys on the left and right of the screen You also have the option of entering the pre day Press the number for tha...

Page 13: ...then decreases until day 5 to the entered number of grams Then the system takes the next point and works towards the next point again In total you can indicate one starting point day 0 6 middle points...

Page 14: ...ected by using the arrow keys above and below the screen You also have the option of entering the location number Press the number for that A keyboard appears with which you can enter the wantedlocati...

Page 15: ...location The number of the location is shown in the right corner on the top If you press the start button you start the feeding at the selected location NOTE If you press the start button the feeding...

Page 16: ...age left can be changed as wanted You can specifie how many grams of the total daily portion should be fed at this time in percent Example On the left you have entered 40 on the right is 1200 and the...

Page 17: ...cation box This is only possible when the farm is configured and the locations are entered in the system With this function you can make a backup or read in check the dosators and your service technic...

Page 18: ...nted animal number Then press ENT to confirm the number If your configuration is correct press OK in the lower right corner You can then be notified that the configuration is not possible This may be...

Page 19: ...or from the USB stick With this function you can check the dosators and your service technician can use the screened part to give service Here you can read the technical data of the dosators If you p...

Page 20: ...RVICE STICK to back up or read in This stick is exclusively for your service engineer to perform service work If you have connected a USB stick you have the following options Backup for Animals Stable...

Page 21: ...x If you press Feed check you will enter this menu By entering the correct technical address or animal number and entering a portion size the dosator is started at that box Before performing this acti...

Page 22: ...technical address for functionality Sign out With this function you can clean a location box and then be able to sign in another animal In this menu you can sign out your animal by the location box Th...

Page 23: ...ith which you can enter the wanted location number Then press ENT to confirm the number With this function you can select the correct box of the wanted animal by press the box Press the number for tha...

Page 24: ...the wanted animal by entering the animal number Press the number for that A keyboard appears with which you can enter the wanted animal number Then press ENT to confirm the number Then close with the...

Page 25: ...the portion size of the intervals You can also program the length of the intervals With this function you can enter your weighted calibration weight With this function you can set your manual start se...

Page 26: ...A keyboard appears with which you can enter the wanted portion size in grams Then press ENT to confirm the number At pause sec you can enter the wanted seconds of the intervals between the feed portio...

Page 27: ...Press the number for that A keyboard appears with which you can enter the wanted portion size in grams Then press ENT to confirm the number You need a TF100 to calibrate After confirmation the system...

Page 28: ...e manual start the start times within this window are started If your default start time is at 12 00 AM and you activate manual operation at 11 30 AM the system will perform the feeding from 12 00 AM...

Page 29: ...function you can adjust the brightness of the background You can do this by using the arrows next to the screen In the lower part of the screen you can adjust the date and time Press the number for th...

Reviews: