10
EN
Installing the Software
Important!
•
Be sure to install the software on your computer before connecting the
Printer. You may experience problems with operation if you install the
software after connecting.
•
Exit all other programs currently running on your computer before installing
the software. Installation may not be performed correctly if there is another
program running.
The examples in this manual assume that D: drive is the CD drive.
1.
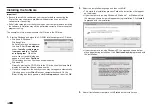
Start up Windows and place the CD-ROM into the computer’s CD drive.
•
Windows 8, Windows 7,
Windows Vista
An AutoPlay menu will appear at
this time. Select
Run setup.exe
under “
Install or run program
from your media
” or “
Install
or run program
”. When the
user account control dialog box
appears, click
Yes
or
Continue
.
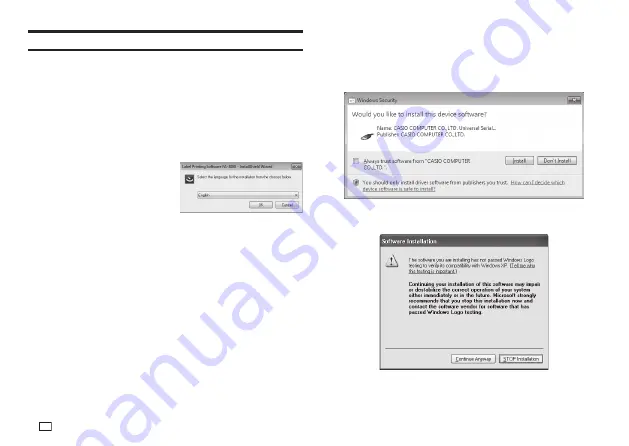
This displays a screen like the one shown nearby.
•
Windows XP
Normally, placing the CD-ROM into the CD drive should automatically
display a screen like the one shown nearby.
•
On some computers, the nearby screen may not appear automatically.
If this happens, press
Win+R
on your computer keyboard. On the
Run…
dialog box that appears, enter
D:\setup.exe
and then click
OK
.
2.
Select the installation language and then click
OK
.
•
This starts the installation process. Follow the instructions that appear
on the display.
•
If your computer is running Windows 8, Windows 7, or Windows Vista,
the message shown below will appear during installation. Click
Install
to proceed with the installation.
•
If your computer is running Windows XP, the message shown below
may appear during installation. Click
Continue Anyway
to proceed with
the installation.
3.
After all installation is complete, click
Finish
on the install menu.
Summary of Contents for KL-G2
Page 1: ...User s Guide KL G2 EN RJA532734 001V02 Supported Tape Widths 6 mm 9 mm 12 mm 18 mm 24 mm ...
Page 2: ...Important Be sure to keep all user documentation handy for future reference ...
Page 60: ...58 EN 7 8 9 10 11 12 13 14 15 16 17 18 19 20 WORK 1 2 3 4 5 6 7 8 9 10 ATTENTION 1 2 3 4 5 6 ...
Page 63: ...APP 1 Appendix Accented Characters A C D E G H I J K L N O R S T U Y Z ...
Page 64: ...APP 2 a c d e g h i j k l n o r s t u y z ...
Page 65: ...APP 3 GREEK RUSSIAN SUPER SUB Symbols SYMBOL DINGBAT NUMBER ...
Page 66: ...APP 4 Illustrations ILLUST 1 ILLUST 2 ...
Page 67: ...APP 5 Frames ...
Page 68: ...APP 6 ...


