E-4
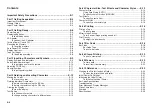
Contents
Important Safety Precautions .................................................... E-1
Part 1 Getting Acquainted .......................................................... E-5
Important Precautions ................................................................................. E-5
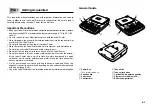
General Guide ............................................................................................. E-5
Label Printer Menus .................................................................................... E-6
Part 2 Getting Ready ................................................................... E-6
Power Supply .............................................................................................. E-6
Replacing Batteries ..................................................................................... E-6
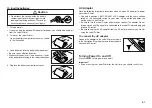
To load the batteries ........................................................................... E-7
AC Adaptor .................................................................................................. E-7
To connect the AC adaptor ................................................................. E-7
Turning Power On and Off .......................................................................... E-7
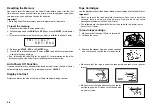
Resetting the Memory ................................................................................. E-8
To reset the memory ........................................................................... E-8
Auto Power Off Function ............................................................................. E-8
Display Contrast .......................................................................................... E-8
Tape Cartridges .......................................................................................... E-8
To load a tape cartridge ...................................................................... E-8
Part 3 Inputting Characters and Symbols ................................. E-9
Display Symbols and Indicators .................................................................. E-9
Basic Alpha-Numeric Input ........................................................................ E-10
To input alpha-numeric characters .................................................... E-10
About the CODE key… ............................................................................. E-11
Special Symbols ....................................................................................... E-11
To input special symbols ................................................................... E-11
Part 4 Deleting and Inserting Characters ............................... E-12
Moving the Cursor ..................................................................................... E-12
To move the cursor ........................................................................... E-12
Deleting Individual Characters .................................................................. E-12
To delete characters using the BS key ............................................. E-12
To delete characters using the DEL key ........................................... E-12
Clearing the Display .................................................................................. E-12
To clear the display ........................................................................... E-12
Text Editing ............................................................................................... E-12
To insert new characters ................................................................... E-12
To change existing characters to different ones ................................ E-12
Part 5 Character Size, Text Effects and Character Styles ..... E-13
Character Size .......................................................................................... E-13
Using Auto Sizing (AUTO) ................................................................ E-15
To specify character sizes (MANUAL) .............................................. E-15
Text Effects ............................................................................................... E-15
To specify a text effect ...................................................................... E-15
Character Styles ....................................................................................... E-16
To specify a character style .............................................................. E-16
Part 6 Printing ........................................................................... E-16
Printing a Tape .......................................................................................... E-16
To print a tape ................................................................................... E-16
Mirror Image Printing ................................................................................ E-17
To turn mirror image printing on and off ............................................ E-17
Print Density .............................................................................................. E-17
To adjust the print density ................................................................. E-17
Part 7 Bar Code ......................................................................... E-18
Bar Code ................................................................................................... E-18
Bar Code Tape .................................................................................. E-18
To print a bar code ............................................................................ E-18
Part 8 Stamp Printing ............................................................... E-19
To print a stamp tape ........................................................................ E-19
Part 9 Memory ........................................................................... E-19
To store data ..................................................................................... E-19
To recall text from memory ............................................................... E-20
Part 10 Reference ...................................................................... E-20
Cleaning the Printer Head and Roller ....................................................... E-20
To clean the printer head and roller .................................................. E-20
Initial Power On Settings ........................................................................... E-21
Initializing the Label Printer ....................................................................... E-21
To initialize the Label Printer ............................................................. E-21
Bar Code Specifications ............................................................................ E-21
Troubleshooting ........................................................................................ E-22
Error Messages/Display Messages .......................................................... E-23
Alpha Characters ...................................................................................... E-25
Symbols .................................................................................................... E-25
Specifications ............................................................................................ E-26


