○○○○○○○○○○○○○○○○○○○○○○○○○○○○○○○○○○○○○○○○○○○○○○○○○○○○○○○○○○○○○○○○○○○○○○○○○○○○○○○○○○○○○○○○○○○○○○○○○○○○○○○○○
○○○○○○○○○○○○○○○○
○○○○○○○○○○○○○○○○○○○○○○○○○○○○○○○○○○○○○○○○○○○○○○○○○○○○○○○○○○○○○○○○○○○○○○○○○○○○○○○○○○○○○○○○○○○○○○○○○○○○○○○○○
○○○○○○○○○○○○○○○○
1
2
2
1
2.
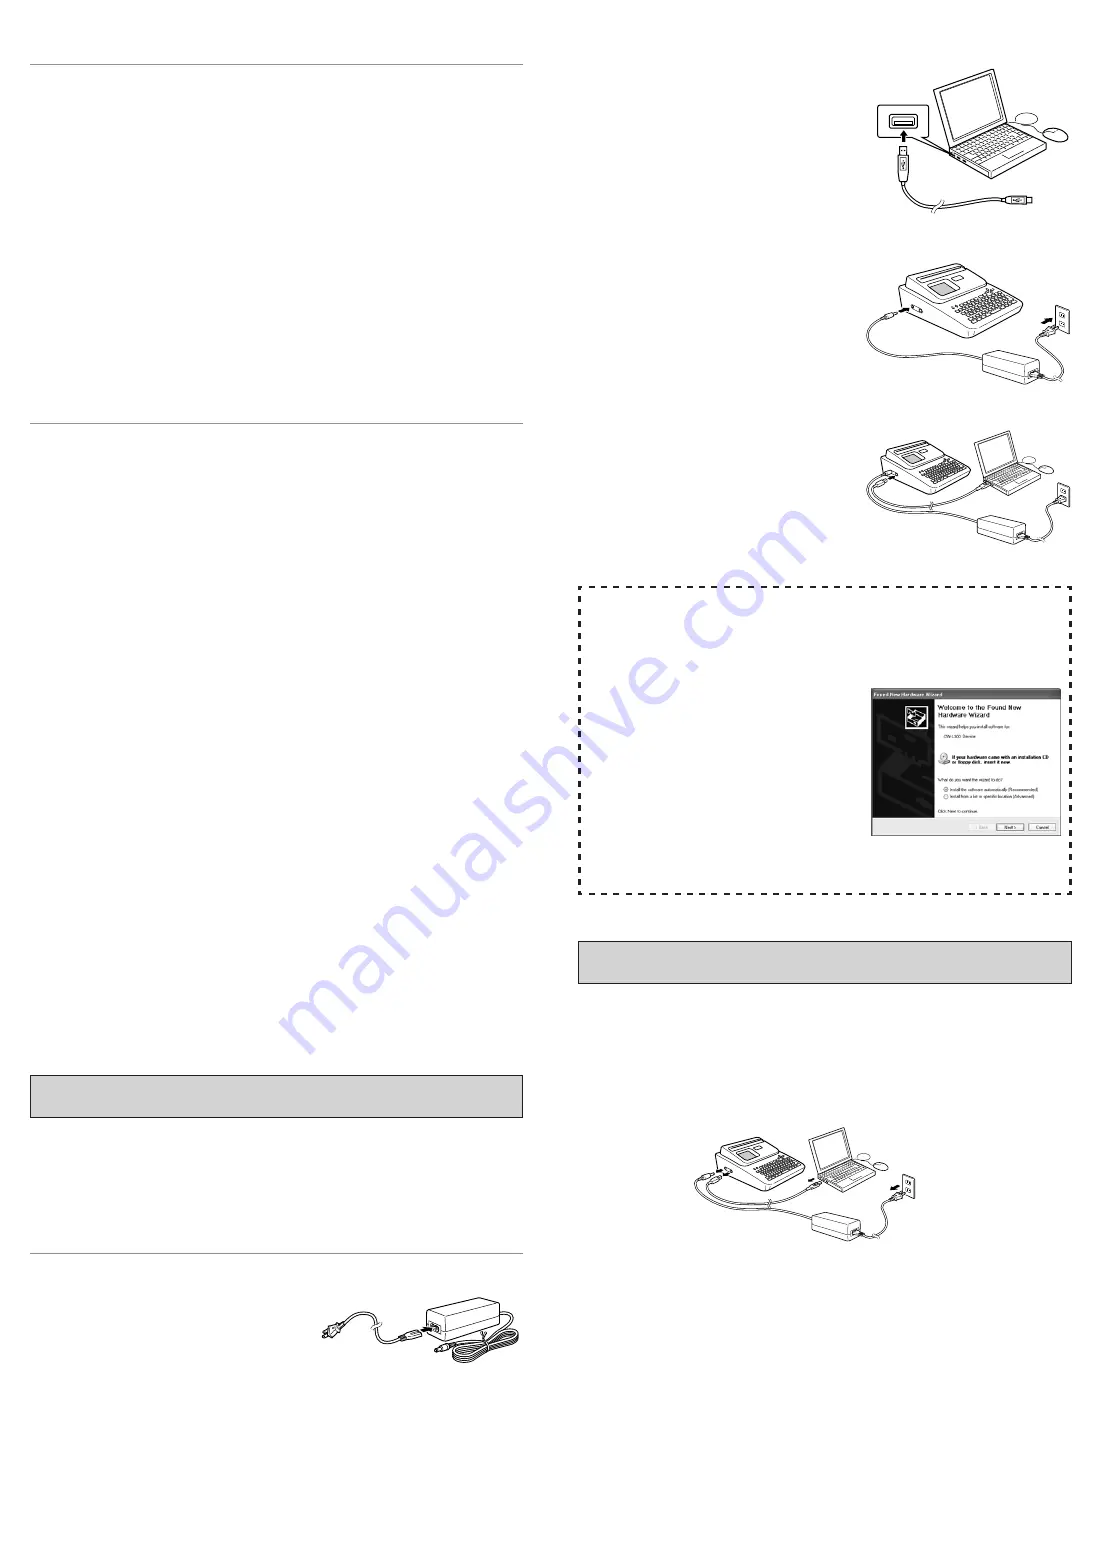
Connect the USB cable to the USB port of
your computer.
Important!
•
Be sure you connect directly to the USB
port of the computer. Connecting through
a hub or chaining through another USB
device may cause misoperation.
•
The first time you connect the USB cable,
you have to remove the sticker covering
the printer’s USB port.
3.
Plug the AC adaptor plug into the printer’s
AC adapter terminal (
1
), and then plug the
power cord into a household power outlet (
2
).
Important!
•
Use only the AC adaptor that comes bun-
dled with the printer.
4.
Connect the USB cable to the USB port of
the printer.
Installing the USB Driver
After installing the bundled software, connect the CW-L300 to your computer,
and then press the
COMPUTER LINK
button. This will start the USB driver
installation wizard. Follow the instructions that appear on the display to install
the USB driver.
•
If you are running Windows XP, the message
shown nearby will appear during USB driver
installation. When it does, click
Continue
to
proceed with the installation.
•
If you are running Windows 2000, the “Digital
Signature Not Found” error message may
appear during USB driver installation. If it
does, click
Yes
to proceed with the
installation.
•
The above messages do not appear on a
system running Windows ME, 98SE, or 98.
Disconnecting from a Computer
1.
Unplug the USB cable from the computer and printer.
2.
Unplug the power cord from the wall outlet (
1
), and then unplug the AC adaptor
from the printer (
2
).
Important!
•
Never disconnect the AC adaptor, power cord, or USB cable while a print
operation is in progress. Doing so creates the risk of printer malfunction.
To Read the Contents of a Manual in a PDF file
1.
Place the CD-ROM that comes with the printer into the CD drive of your computer.
2.
When the installer screen for the printing software appears, click
Cancel
to
cancel it.
3.
Navigate to the
User’s Guide
folder on the CD-ROM, where you will find folders
whose names indicate the language version: English, French, German, Italian,
Spanish. Open the folder whose language matches that of your computer oper-
ating system. Depending on the documentation you want to view, double-click
the PDF file in the folder you opened to view its contents.
•
The examples in the User’s Guide use the contents of the English-language
documentation.
To Uninstall Printing Software
1.
Click the Windows
Start
button, and then click
Control Panel
.
2.
Double click the
Add or Remove Programs
icon.
This causes the
Add or Remove Programs
dialog box to appear.
3.
In the list of installed software, click
DISC TITLE PRINTER
or
Basic
Label Printing Software FA-B30
to select it.
4.
Click the
Change/Remove
button.
5.
On the file delete confirmation dialog box that appears, perform one
of the following operations.
If you selected DISC TITLE PRINTER Application in step 3, click
Yes
to uninstall it.
If you selected FA-B30 Software in step 3, click
OK
to uninstall it.
Note
•
Some files may cause a separate confirmation dialog box to appear before
they can be deleted. If you are unsure about whether you should keep a file,
select
No
.
6.
On the dialog box that appears, perform one of the following
operations.
If you selected DISC TITLE PRINTER Application in step 3, click
OK.
If you selected FA-B30 Software in step 3, click
Finish
.
This completes the printing software uninstall operation.
Connecting to your Computer
Important!
•
Perform the following procedures only after you have installed the software on
your computer.
•
Use only the USB cable that comes bundled with the printer.
To Connect to Your Computer
1.
Connect the power cord to the AC adaptor.


