background image

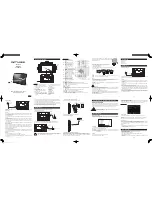
5. COMPONENTS:

1- Easy grip handle

2- Fuel filler cap

3- Fuel tank

4- Fuel cork

5- Recoil starter motor handle

6- Rubber foot

7- Choke

8- Power switch

9- Voltmeter

10- Reset switch

11- Mains power inlet

12- Sparkplug

13- Exhaust outlet

Please note that no grounding rod is supplied 

with this generator.

6. PRE-OPERATION CHECKS:

6.1. CHECKING THE ENGINE OIL:

6.1.1. The GEN1000 is a 2 stroke model which 

means that you have to mix 2-stroke oil to the 

unleaded petrol.

6.1.2. Mixing recommendation is for every 1 litre of 

unleaded petrol add 25ml of 2-stroke oil.

6.2. CHECKING THE ENGINE FUEL:

WARNING: Do not refuel while smoking or near 

an open flame or other potential fire hazards.

6.2.1. Remove the fuel cap at the top of the gen-

erator to check the fuel level.

6.2.2. If petrol is too low, only add the mixed fuel 

and 2-stroke oil solution.

6.2.3. Ensure that you use the fuel filter screen on 

the fuel filter.

6.3. FUEL CAPACITY FOR THE GEN1000:

6.3.1. GEN1000 – 4L

WARNING:

Make sure you review each warning in order to 

prevent fire hazards. Do not refill the fuel tank 

whilst the engine is running or hot. Please ensure 

that the fuel valve is closed before refuelling. Be 

careful not to contaminate the fuel with any dust, 

dirt, water or other foreign liquids/objects. Please 

clean all spilt fuel thoroughly before starting the 

generator.

Ensure that the generator is clear from any open 

flames. Do not smoke whist refuelling the genera

-

tor.

6.4. CHECKING COMPONENT PARTS:

Before starting the generator please check the 

following:

6.4.1. Check for any fuel leaking from any part of 

the generator.

6.4.2. Check that all the nuts and bolts are se-

curely tightened on the generator.

6.4.3. Check for any visible damaged components 

on the generator.

6.4.4. Check that the generator is not resting on or 

adjacent to any electrical wiring.

6.5. CHECK THE GENERATOR SURROUND-

INGS:

WARNING:

Make sure you review each warning in order to 

prevent fire hazards. Keep the surrounding area 

clear of flammables or other hazardous materials. 

Keep the generator at least 3 feet (1 meter) away 

from all buildings and or other structures. Only 

operate the generator in a dry, well-ventilated area. 

Keep the exhaust pipe clear of all foreign objects. 

Keep the generator away from open flames. Do 

not smoke in close proximity to the generator. 

Keep the generator on a flat and level surface.

Do not attempt to block the generator air vents with 

any paper or other material/objects.

7. OPERATING PROCEDURES:

7.1. STARTING THE GENERATOR ENGINE:

7.1.1. Turn the engine “KEY” to the “ON/START” 

position. FIG.1

7.1.2. Open the fuel valve. FIG.2

7.1.3. Turn the choke lever to “CLOSED” position if 

the generator engine is cold. Fig.3

7.1.4. Pull the recoil starter until resistance is felt. 

FIG.5

7.1.5. This is the “compression” point. Return the 

handle to its original position, and then pull swiftly.

7.1.6. If the generator engine fails to start after 

several attempts, repeat above the procedures 

with the choke knob returned to the “OPEN” posi-

tion. FIG.4

7.1.7. Do not pull the rope of the recoil starter out 

Summary of Contents for GEN1000

Page 1: ...GEN1000 GENERATOR GENERADOR GÉNÉRATEUR GERADOR ...

Page 2: ...2 3 4 5 7 8 10 11 6 1 9 12 13 Fig 3 Fig 4 Fig 1 Fig 2 Fig 5 Fig 7 ...

Page 3: ...e specified fuel when operating the generator 95 Unleaded mixed with 2 stroke oil Mix 1litre petrol with 25ml 2 stroke oil 1 6 Do not refuel whilst smoking or near naked flames Do not overfill or spill fuel If this happens clean the fuel on and around the generator prop erly before operating 1 7 Be careful around the generator as some parts of the internal combustion engine are hot and may cause b...

Page 4: ...vided that the cable is no longer than 25m 2 7 2 A 1 5mm2 flexible cable can draw a maxi mum of 10a provided that the cable is no longer than 35m 2 7 3 A 1 5mm2 flexible cable can draw a maxi mum of 16a provided that the cable is no longer than 20m 2 7 4 A 2 5mm2 flexible cable can draw a maxi mum of 10a provided the cable is no longer than 65m 2 7 5 A 2 5mm2 flexible cable can draw a maxi mum of ...

Page 5: ...RPM 3000 minute Nominal Performance of the engine HP 2 0 Type of engine 2 stroke Cubic capacity cm3 63 Cooling System Air cooled Protection degree IP23 Ignition system TCI Fuel consumption l h 1 3 Fuel tank l 4 Fuel type 1 50 mixture Weight kg 15 Dimensions cm 38x32x32 Noise level dB A 85 Protection class I Specifications are subject to change without notice ...

Page 6: ... tor 6 4 CHECKING COMPONENT PARTS Before starting the generator please check the following 6 4 1 Check for any fuel leaking from any part of the generator 6 4 2 Check that all the nuts and bolts are se curely tightened on the generator 6 4 3 Check for any visible damaged components on the generator 6 4 4 Check that the generator is not resting on or adjacent to any electrical wiring 6 5 CHECK THE ...

Page 7: ... and air compressors require a very large force to start They need 3 to 5 times the normal running wattage in order to start 9 MAINTENANCE SCHEDULE FOR ALL YOUR SERVICE MAINTENANCE AND WARRANTY QUERIES PLEASE CONTACT CREATIVE HOUSEWARES PLEASE REFER TO THE BACK PAGE FOR CONTACT DETAILS 9 1 DAILY INSPECTION Before staring the generator please check the fol lowing service items 9 9 1 Check if there ...

Page 8: ...ter elements more often when operating in dusty environments Maintanace Items Every 8 hours Daily Every 20 hours Every 100 hours Weekly Every 200 hours Monthly Every 500 hours Every 1000 hours Clean Generator and check bolts and nuts Clean spark plug Clean air filter Replace air filter element Clean fuel strainer Clean and adjust spark plug and electrodes Replace spark plug Remove carbon from cyli...

Page 9: ...s always allow for the engine to cool down prior to transporting and or storing Always ensure that the generator is transported and or stored in a flat horizontal position Tilting of the unit may cause fuel spillage which may result in a fire 11 2 Before storing the generator for an extended period of time please ensure that the area of stor age is free from excessive water dust and humid ity Plea...

Page 10: ...details When the engine fails to start Check if the choke lever is in it s proper posi tion Set the choke lever to the CLOSED position Check if the fuel cork is open If it is closed open it Check the fuel level If the fuel tank is empty refill it CAUTION Do not overfill Check if the engine switch is in the OFF position Turn the engine switch to the ON position Ensure that the generator is not conn...

Page 11: ...s físicas sensoriales o mentales reducidas o por falta de experiencia y conocimiento a menos que una persona responsable de su seguridad les haya dado supervisión o instrucciones sobre el uso del generador 1 2 El generador solo puede ser operado obser vando las regulaciones de la documentación de operación y bajo supervisión permanente 1 3 El generador no debe utilizarse en interiores 1 4 El combu...

Page 12: ...requisito legal que dichas conexiones o integración solo puedan ser realizadas por un técnico calificado 2 4 La protección contra descargas eléctricas depende de los interruptores automáticos espe cialmente adaptados al generador Si un disyuntor requiere reemplazo debe ser reemplazado por un disyuntor que tenga calificaciones y características de desempeño idénticas 2 5 Debido a las altas tensione...

Page 13: ...IP23 Sistema de encendido TCI El consumo de combustible l h 1 3 Depósito de combustible l 4 Tipo de combustible 1 50 mezcla Peso kg 15 Dimensiones cm 38x32x32 Nivel de ruido dB A 85 Clase de protección yo No permita llamas abiertas cerca del generador Etiqueta de advert encia de tipo de combustible Etiqueta de información de mantenimiento del filtro de aire Etiqueta de adverten cia de calor Etique...

Page 14: ... caliente Asegúrese de que la válvula de combus tible esté cerrada antes de repostar Ten cuidado de no contaminar el combustible con polvo suciedad agua u otros líquidos u objetos extraños Limpie bien todo el combustible derramado antes de encender el generador Asegúrese de que el generador esté libre de llamas abiertas No fume whist repostando el generador 6 4 COMPROBACIÓN DE PARTES COMPO NENTES ...

Page 15: ...ria para mantener su uso Esto se conoce comúnmente como una carga LÍDER 8 6 Las cargas como las lámparas fluorescentes que utilizan los arrancadores requieren de 1 5 a 2 veces el vataje indicado durante el arranque 8 7 Los motores eléctricos requieren una gran corriente de arranque Los requisitos de potencia dependen del tipo de motor y su uso Una vez que se alcanza la potencia suficiente para arr...

Page 16: ...n detergente de limpieza Después de limpiarlo asegúrese de que esté seco adecu adamente antes de volver a instalarlo Por favor limpie cada 100 horas 10 1 2 Limpie el elemento de papel tocándolo y soplando suavemente para eliminar la suciedad y el polvo Nunca utilice aceite para limpiar el elemento de papel Por favor limpie cada 50 horas y reemplace cada 200 horas Articulos de Main tanace Cada 8 ho...

Page 17: ...osa NO FUME NI EXPONGA A LAS LLAMAS ABIER TAS mientras hace esto 10 4 1 Asegúrese de cambiar la manguera de combustible cada 500 horas No intente hacer esto mientras la válvula de combustible esté abierta 10 4 2 Reemplace la manguera de combustible inmediatamente si se produce una fuga o si la manguera de combustible se ha perdido 11 TRANSPORTE Y ALMACENAMIENTO 11 1 Antes de transportar el generad...

Page 18: ...e Después de haber apagado el corcho de com bustible retire la taza de sedimentación vacíe el combustible vuelva a instalar la taza y asegúrela correctamente NUNCA GUARDE EL GENERADOR DENTRO DE UNA CASA O OFICINA NO GUARDE EL GENERADOR DONDE ES SUSTENTABLE A LA LLUVIA O AL AGUA 12 SOLUCIÓN DE PROBLEMAS Si el motor del generador no arranca después de varios intentos y si no hay electricidad disponi...

Page 19: ...n tales réduites ou manquant d expérience et de connaissances à moins qu une surveillance ou des instructions concernant leur utilisation par une personne responsable de leur sécurité ne leur ait été fournies 1 2 La génératrice ne doit être utilisée que dans le respect des prescriptions de la documentation de fonctionnement et sous surveillance permanente 1 3 Le générateur ne doit pas être utilisé...

Page 20: ...ces connexions ou cette intégration ne puissent être effectuées que par un technicien qualifié 2 4 La protection contre les chocs électriques dépend des disjoncteurs spécialement adaptés à la génératrice Si un disjoncteur doit être remplacé il doit être remplacé par un disjoncteur ayant des caractéristiques nominales et des performances identiques 2 5 En raison de fortes contraintes mécaniques n u...

Page 21: ...Hz Performancenominale maximale W 750 Perforationpermanentemance W 650 Rotation ralenti 5 RPM 3000 minute Performancenominale du mo teur HP 2 0 Type de moteur 2 temps Cylindrée cm3 63 Système de refroidissement Air conditionné Degré de protection IP23 Système de mise à feu TCI Consommation de carburant l h 1 3 Réservoir d essence l 4 Type de carburant 1 50 mélange Poids kg 15 Dimensions cm 38x32x3...

Page 22: ... carburant avec de la poussière de la saleté de l eau ou d autres liquides objets étrangers Veuillez nettoyer soigneusement tout le carburant renversé avant de démarrer le générateur Assurez vous que le générateur est à l écart des flammes nues Ne pas fumer pendant le ravitaillement en carburant du générateur 6 4 VÉRIFICATION DES ÉLÉMENTS COM POSANTS Avant de démarrer le générateur veuillez vérifi...

Page 23: ...nt une charge LEADING 8 6 Les charges telles que les lampes fluores centes qui utilisent des démarreurs nécessitent 1 5 à 2 fois la puissance en watts indiquée au démarrage 8 7 Les moteurs électriques nécessitent un courant de démarrage important Les besoins en puissance dépendent du type de moteur et de son utilisation Une fois que la puissance nécessaire au démarrage du moteur est atteinte l app...

Page 24: ...s le nettoyage assurez vous qu il est correctement séché avant de le réinstaller S il vous plaît nettoyer toutes les 100 heures 10 1 2 Nettoyez l élément en papier en tapotant dessus et en soufflant doucement pour enlever la saleté et la poussière N utilisez jamais d huile pour nettoyer l élément en papier Veuillez nettoyer toutes les 50 heures et les remplacer toutes les 200 heures Articles de ma...

Page 25: ... PAS FUMER NI EXPOSER AUX FLAMMES NÉCESSAIRES 10 4 1 Veuillez vous assurer que le tuyau d essence est remplacé toutes les 500 heures N essayez pas de le faire tant que la soupape de carburant est ouverte 10 4 2 Veuillez remplacer le tuyau d essence immédiatement si une fuite se développait ou si le tuyau d essence était périmé 11 TRANSPORT ET STOCKAGE 11 1 Avant de transporter le générateur veuill...

Page 26: ... Retirez la bougie d allumage et versez une cuillère à thé d huile moteur 2 temps dans le cylindre Faites tourner le moteur lente ment en tirant sur lelanceur à rappel Réinstallez la bougie Après le stockage vidangez le carburant stocké dans un récipientapproprié et remplacez le par du carburant frais avant de commencer Vidanger le carburateur en desserrant la vis de vidange Videz le carburant dan...

Page 27: ...zidas ou falta de experiência e conhecimento a menos que tenham recebido supervisão ou instruções relativas ao uso do gerador por uma pessoa responsável pela sua segurança 1 2 O gerador só pode ser operado observando os regulamentos da documentação de operação e sob supervisão permanente 1 3 O gerador não deve ser usado em ambientes fechados 1 4 Combustível gasolina é combustível e facil mente inf...

Page 28: ...adas por um técnico qualificado 2 4 A proteção contra choques elétricos depende de disjuntores especialmente adaptados ao gerador Se um disjuntor precisar ser substituído ele deverá ser substituído por um disjuntor que possua classificações e características de desem penho idênticas 2 5 Devido a tensões mecânicas elevadas ap enas deve ser usado um cabo flexível 2 6 Se o gerador for da classe II en...

Page 29: ...entado a gasoline Gen1000 Potência gerada AC 220V 50Hz Desempenhonominal máximo W 750 Perforpermanentemance W 650 Rotação ocioso 5 RPM 3000 minuto Desempenhonominal do motor HP 2 0 Tipo de motor 2 tempos Capacidade cúbica cm3 63 Sistema de refrigeração Refrigerado a ar Grau de proteção IP23 Sistema de ignição TCI Consumo de combustível l h 1 3 Tanque de combustível Eu 4 Tipo de combustível 1 50 mi...

Page 30: ...uer poeira sujeira água ou outros líquidos objetos estranhos Por favor limpe todo o combus tível derramado antes de ligar o gerador Certifique se de que o gerador esteja livre de chamas abertas Não fume whist reabastecer o gerador 6 4 VERIFICANDO PEÇAS DE COMPONENTE Antes de ligar o gerador verifique o seguinte 6 4 1 Verifique se há vazamento de combustível em qualquer parte do gerador 6 4 2 Verif...

Page 31: ...te a partida 8 7 Motores elétricos requerem uma grande corrente de partida Os requisitos de energia dependem do tipo de motor e seu uso Quando for atingido o poder suficiente para ligar o motor o aparelho exigirá apenas 50 da potência para continuar a funcionar 8 8 A maioria das ferramentas elétricas requer 1 5 a 3 vezes sua potência para funcionar sob carga durante o uso Cargas como bombas submer...

Page 32: ...mpe a cada 100 horas 10 1 2 Limpe o elemento de papel tocando e soprando suavemente para remover sujeira e poeira Nunca use óleo para limpar o elemento de papel Por favor limpe a cada 50 horas e substitua a cada 200 horas Itens Maintanace A cada 8 horas dia riamente A cada 20horas A cada 100horas semanal mente A cada 200 horas mensal mente A cada 500 horas A cada 1000 horas Limpe o gerador e verif...

Page 33: ...PARA ABRIR CHA MAS enquanto estiver fazendo isso 10 4 1 Por favor verifique se a mangueira de combustível é substituída a cada 500 horas Não tente fazer isso enquanto a válvula de combustível estiver aberta 10 4 2 Por favor substitua a mangueira de combustível imediatamente se ocorrer um vaza mento ou se a mangueira de combustível estiver queimada 11 TRANSPORTE E ARMAZENAMENTO 11 1 Antes de transp...

Page 34: ...combustível volte a instalar o copo e fixe o bem Verifique se a ala vanca do afogador está em sua posição correta Coloque a alavanca do afogador a posição CLOSED Verifique se a cor tiça de combustível está aberto Se estiver fechado abra o Verifique o nível de combustível Se o tanque de com bustível estiver vazio Encha o CUIDADO não transbordar Verifique se o mo torinterruptor está no OFF posição L...

Page 35: ...bly s are specifically excluded from this warranty Extended 24 Month Limited Warranty Casals takes pride in their product quality and therefore offer an extended 24 month limited warranty from the original date of purchase to offer the consumer peace of mind on their purchase Should defects due to faulty material or workmanship develop under normal domestic use within 24 months from the original d...

Page 36: ...CSC36 Be on the look out for these Casals products at your local outlet ID500REA BS76810 AG115500 SA650PEL CSC12 1500 32QREAK C OS150 AG2302000A CS184L Casals Power Tools S L AV Barcelona s n 25790 Oliana Lleida Spain Casals Power Tools 20 Tekstiel St Parow Cape Town 7493 RSA ...

Reviews: