CasaCam CM825735 User Manual Download Page 16

16 


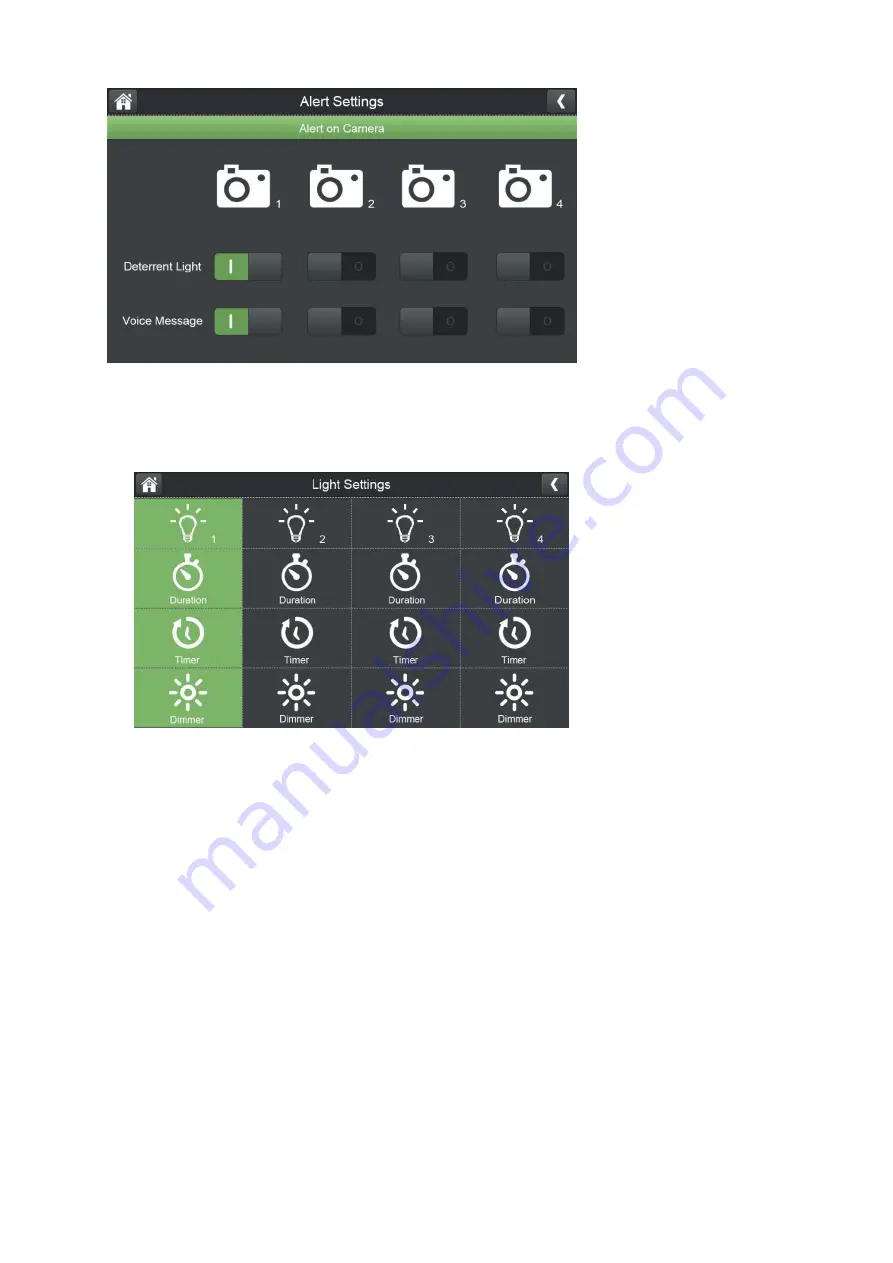
Turn on/off alerts (Deterrent Light & Voice Message) for each camera.   


5.6  Light Settings 


*Please note that the Light Setting is not available for this model. It is available 

only when monitor connects to floodlight camera (RDI CL794).   


Set up light on duration, create a schedule for automatic light on/off, and adjust 

the brightness of the floodlight.   

6. 

Adding New Cameras 

Your monitor supports a total of four active cameras at a time. When you add a 

camera,  you  have  to  pair  it 

to  the  monitor  (that  is,  you  have  to  “introduce”  the 

camera and monitor to each other so they can communicate). 
• If a camera is already assigned to the channel you want to assign the new camera 
to, the monitor will overwrite the existing camera and link with the new one. 
• Only pair one camera at a time! The monitor links to the first camera it detects. If 

Summary of Contents for CM825735

Page 1: ...1 7 Wireless System with Night Vision Camera CM825735 USER MANUAL...

Page 2: ...em Settings 13 5 4 Motion Detection Settings 14 5 5 Alert 15 5 6 Light Settings 16 6 Adding New Cameras 16 7 Monitor Basic Operation Quick Guide 17 8 Operating the DeluxeCam App 18 8 1 Android 19 8 1...

Page 3: ...3 1 What s Included in the Box 2 Overview 2 1 Wireless Receiver 7 Touchscreen Monitor...

Page 4: ...the video in front of the lens and transmits video from camera to Monitor 3 IR LED Infrared LEDs provide viewing in no low light conditions 4 PIR sensor Detects motion in front of the lens and emits d...

Page 5: ...power button to turn on the monitor 5 The monitor displays the start up UI for a few seconds and then transitions to the LIVE view 3 2 Camera 3 2 1 General The cameras included with your monitor are w...

Page 6: ...tree shrub leaves blowing in the wind and the shadows they create can generate motion detection false alarms 3 2 3 Install Cameras When positioning the camera better to bring the monitor along with i...

Page 7: ...ngle channel display Signal Strength Shows how strong the camera s signal is Signal ranges from 4 bars down to 0 bars out of range Camera Number Displays the current channel number you are currently v...

Page 8: ...t Indication Means spotlight is off means spotlight is on by motion trigger or schedule means spotlight is turned on manually Only available when connected to spotlight camera SD Card Overwrite If thi...

Page 9: ...se to stop siren Zoom Touch this button will go to zoom display select five areas top left top right bottom left bottom right and center to zoom specific area Touch button to exit zoom mode Manual rec...

Page 10: ...is in auto switch mode it will change channels automatically 5 Menu In live view or quad touch to get shortcut buttons touch the menu button to open the main menu 5 1 Camera Setup 1 Pairing This syst...

Page 11: ...ra power frequency 50Hz or 60Hz to avoid flickering 5 2 Recording Setup 1 Duration Set the length of time the camera records once motion triggers the camera to record Choices are 15 seconds 30 seconds...

Page 12: ...n in the schedule you set If you don t select Motion the button in grey background means system will record in the schedule you set no matter if there is motion or not To delete a schedule From Menu R...

Page 13: ...no audio when playback 5 Motion Recording On Off Turn on off auto recording for individual camera independently 5 3 System Settings 1 Time Setup Set up Time Zone date time You can also synchronize sys...

Page 14: ...o Please note that formatting will delete all recorded files 6 Firmware upgrade Choose to upgrade system firmware from SD card or from server If there s new firmware available on server you can see th...

Page 15: ...and HMD to off 5 5 Alert Alert settings for Monitor and Camera 1 Alert on Monitor 1 Alert Volume Adjust alert volume on monitor 2 Channel Alert On Off Turn on off alert on monitor for each camera sep...

Page 16: ...t the brightness of the floodlight 6 Adding New Cameras Your monitor supports a total of four active cameras at a time When you add a camera you have to pair it to the monitor that is you have to intr...

Page 17: ...ws no bars Make sure the camera powered up Make sure that the camera s antenna is attached tightly Flip up monitor s antenna Move the monitor closer to the camera The camera won t pair with the monito...

Page 18: ...Watch recorded video Press button and press to open calendar for you to select recordings from different date Delete recorded videos In Play File list touch button to delete file Two way talk From the...

Page 19: ...enter any name for the camera Enter the password default 000000 4 Tap OK 5 You can see a list of the devices with their UID numbers and the online status 6 Tap the name of the system You will be asked...

Page 20: ...ith the back button of your mobile phone during the live image display you can make the following settings Reconnect to the camera if the connection is broken Edit device settings The UID of the camer...

Page 21: ...e on the back of the monitor If you tapped QRCode this field populates automatically Enter the password default 000000 3 Tap Save The system will show in your device list with an Online status 4 Tap t...

Page 22: ...able for this model only available when the monitor connects to Floodlight camera If you have access to several cameras with the APP you can use the icons etc at the top of the display to select the d...

Page 23: ...PCM Two way audio Yes Record Recording resolution 1008p 720p Recording mode VMD HMD Manual schedule Hard Disk Type TF Card Micro SD card Max capacity 256GB Wireless parameter Wireless transmission 350...

Page 24: ...noise reduction 2D Digital noise reduction Wireless 2 4GHz IEEE 802 11b g External interface Antenna 2 4GHz External 2dBi Power supply DC 9V 600mA Others Power consumption 3W ICR Switching moment 4 5...

Page 25: ...apter plug is not obstructed by furniture or such Pay attention that the plug and cable are in perfect condition Kinked or worn cable represents the risk of a fatal accident 12 Trouble Shooting 12 1 F...

Page 26: ...rsuant to part 15 of the FCC rules These limits are designed to provide reasonable protection against harmful interference in a residential installation This equipment generates uses and can radiate r...

Page 27: ...and 2 This device must accept any interference received including interference that may cause undesired operation RF warning statement The device has been evaluated to meet general RF exposure requir...

Reviews: