13
INTELI•TOUCH OPERATION
♦
POWER
+
+
+
+
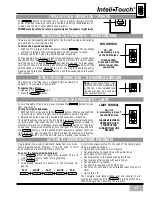
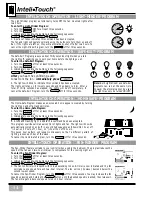
Programmed into every Inteli-Touch Series fan is an Auto-
matic Demonstration Program. It can be used to fully
demonstrate and test the operation of the fan.
To enter the demonstration program:
1. Turn
off for at least three seconds. This will
clear the fan memory ready for programming.
2. Turn
on.
3. Immediately operate the buttons in the following se-
quence:
FAN - LIGHT - FAN - LIGHT - FAN
A multi-tone signal will verify the start of the test program
which proceeds as follows:
• Lights slowly increase to full intensity.
• Fan accelerates to speed three with audio tones.
• Light dims to half intensity.
• Fan accelerates to full speed with audio tones.
• Fan reverses at full speed with audio tones.
• Fan operates at full speed.
• Fan power is reversed with audio tones.
• Fan turns off with audio tones (blades coast for a short
time).
• Lights turn off.
The complete cycle lasts slightly over one minute. It will
continue to repeat until the
is turned off for more
than three seconds, cancelling the program.
The
button is normally left in the on position. Always turn the
power off during cleaning or servicing the fan and during thunderstorms. It
is also used to exit or enter additional programs.
POWER
must be left on to retain a previously set fan speed or light level.
INTELI•TOUCH OPERATION
♦
SPEED CONTROL
R
FAN CONTROL
ON - OFF:
A momentary press
of the FAN button
CHANGE SPEED:
Press and hold FAN
button longer than
one second
There are six individual speed settings for the fan; each speed is indicated by
an audible tone of increasing pitch.
To select the desired fan speed:
1. With fan off, press and hold the button labeled
.
The fan blades
will start rotating at the slowest speed, and will increase in steps.
2. Release the button when the desired speed is reached.
The fan speed is now in memory and will automatically come on at the same
speed each time the
button is used. To maintain this level of speed,
turn the fan on by pressing
less than one second. To lower speed,
turn fan off, then on by pressing and holding the
button until the
desired speed is reached. When the fan is on, you may increase the speed by
pressing and holding the
button until the desired speed is reached,
then release it.
INTELI•TOUCH OPERATION
♦
REVERSING AIRFLOW
The direction of airflow can be changed from downward to
upward or from upward to downward.
To reverse the airflow:
1. Make sure the
is on.
2. Press the
button.
Note:
A four-toned signal indi-
cates the command was accepted
by the fan. A few seconds later
the fan will slow to a stop and
then reverse direction.
INTELI•TOUCH OPERATION
♦
LIGHT
R
LIGHT CONTROL
ON - OFF:
A momentary press of
the LIGHT button
CHANGE BRIGHTNESS:
PRESS AND HOLD
LIGHT BUTTON
LONGER THAN ONE
SECOND
To turn the lights off and on, press and release the
button for less
than one second.
To vary the light brightness:
1. With lights off, press and hold the
button. After one second the
lights come on at their lowest level and gradually become brighter.
2. Release the button when the desired brightness level is reached.
The brightness level is now in the fan memory and will automatically come
on at the same brightness the next time the
button is used. To
maintain this level of brightness, press the
button for less than
one second. To lower the brightness, turn the lights off, then press and hold
the
button until the desired brightness level is reached. When the
light is on, you may increase the brightness level by pressing and holding
the
button until the desired level is reached, then release it.
AUTOMATIC DEMONSTRATION PROGRAM
R
Summary of Contents for Nouvelle
Page 1: ...NOUVELLE OWNER S MANUAL...

