46
CAS ELECTRICS CO.,LTD
4.3 Printer Hardware
No.
Sub-menus
Description
1
Print Mode
Select label, ticket, continuous label mode.
2
Label / Ticket
Size
Lable mode:
“Width(60)”
,
“Height(40)”
and
“Gap length(2)”
Ticket mode:
“Width(60)”
,
“Feed(20)”
and
“End Margin(5)”
Continous Label:
“Width(60)”
,
“Feed(40)”
and
“End Margin(2)”
* ( ) are default value.
3
Sensor
Calibration
Enter the “
Gap(128)”
and
“Peel(128)”
values for printing sensor calibration.
* The values in ( ) are default.
* If you press “TEST” key, Gap and Peel values are adjusted automatically.
* In case of Ticket mode, Gap value is not saved.
4
Sensor & Motor
Setting Peel-off sensor, Rewind Motor, Label Paper type.
5
Print Intensity
Set the extent of intensity of label (ticket) printed.
6
Adjust Feed
Length
Set adjusting values of feed length.
This value can be from -200 to +200. You can change sign(+,-) by pressing
ZERO key.
+ value will print higher than THP.
* Pressing “TEST” key automatically feeds to adjust the feed length.
7
Label Pre-print
You can set preprint length.
8
Printer Initialize
You can reset printer.
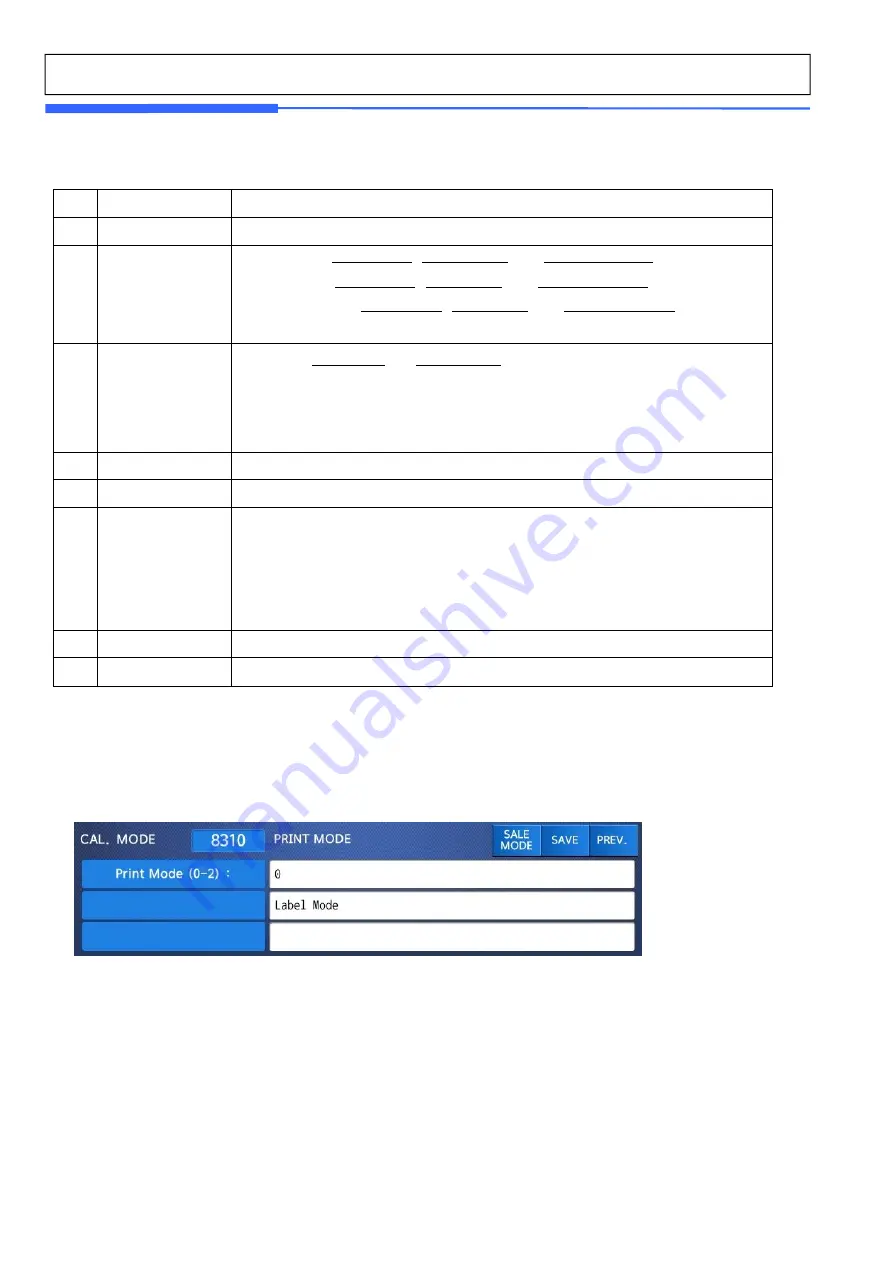
4.3.1 Print Mode (Menu Code 8310)
(Calibration MENU -> 3. Printer Hardware -> 1. Print Mode)
- You can select [0] for Label mode, [1] for Ticket mode or [2] for Continuous Label mode.
- Press [ENTER] to save current selection.
4.3.2 Label/Ticket Size (Menu Code 8320)
(Calibration MENU -> 3. Printer Hardware -> 2. Label/Ticket Size)
- You can input “Width,” “Height,” “Gap Length” of label manually.
- Case of label mode press “TEST” key will automatically measures current label.
- In Continuous Label Mode, [TEST] key will not operate and “End Margin” will be shown instead of “Gap
Length”.
- In Ticket Mode, “Width”,”Feed”,”End Margin”will be shown and [TEST] will not operate.


