background image

10 

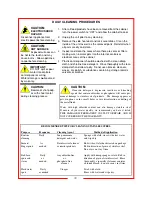
DAILY CLEANING PROCEDURES 

1.  After all food products have been removed from the cabinet, 

turn the power switch to “OFF” and allow the cabinet to cool. 

2.  Unplug the unit prior to any cleaning. 

3.  Remove the side heat duct and rack assemblies. Clean the 

inside of the unit as well as the removed parts. Reinstall when 
all parts are dry and clean.  

4. 

Inspect and clean the areas where there are vents or filters, 
making sure no water gets into the internal controls or          
electrical areas of the cabinet. 


5. 

Plastic control panel should be washed with a clean damp 
cloth and chlorine-free detergent.  Rinse thoroughly with clean 
damp cloth and allow to dry. Do not use abrasive cleaners, 
waxes, car polish, or substances containing strong aromatic 
solvents or alcohol.


RECOMMENDED TIPS FOR CLEANING STAINLESS STEEL 


Purpose  

Frequency 

Cleaning Agent   

                Method of Application                   

Routine   

Daily 


Soap, ammonia    

Sponge with cloth, rinse with clear water  

cleaning 

   detergent 

and 

water 

and 

wipe 

dry. 

 
Smears/   

  As  


Stainless steel cleaner 

Rub with soft cloth as directed on package.   

Fingerprints 

needed   

or similar products 

Rub in direction of grain of stainless steel.     

       Do 

not 

use 

on 

vinyl 

trim. 

 
Stubborn 

  Daily   

Any chloride-free  

Apply with damp sponge or cloth. Rub in    

spots and 

    as  

                         or  


direction of grain of stainless steel.  Rinse   

stains 


needed   

phosphate-free      

 thoroughly, especially if cleaner contains  


       cleaner 


 chlorine bleach,  do not use on vinyl trim. 


Hard water 

  Daily   

     Vinegar 


Swab with cloth.   


spots 


as needed 


Rinse with water and wipe dry. 

CAUTION: 

ELECTRIC SHOCK   
HAZARD 

Disconnect appliance from     
electric power before cleaning.


CAUTION: 

HOT SURFACE 

Exposed surfaces can 

be hot to the touch and may 
cause burns.  Allow appliance 
to cool before cleaning. 


IMPORTANT:   

DO NOT spill or pour 
water into controls, 

control panel or wiring.    
Water damage is 

not 

covered 

by warranty. 

CAUTION

Beware of sharp edg-
es with sheet metal 

during cleaning process. 

CAUTION: 

 Cleansers, detergents, degreasers, sanitizers, or bleaching 
agents that contain chlorides or phosphates will cause per-

manent damage to stainless steel products.  The damage appears as 
pits, eruptions, voids, small holes, severe discoloration or dulling of 
the metal finish.   
 
Water with high chloride content can also damage stainless steel.        
If unsure of your water quality, we recommend you have it tested.     
THIS DAMAGE IS PERMANENT, COSTLY TO REPAIR, AND IS 
NOT COVERED BY THE WARRANTY

Summary of Contents for HL7-14

Page 1: ...S 2 FEATURES SPECIFICATIONS 3 UNPACKING INSPECTION FREIGHT DAMAGE 4 INSTALLATION STARTUP 5 CONTROL PANEL LAYOUT 6 NORMAL OPERATION 7 FOOD HOLDING GUIDE 8 REGULAR CLEANING PROCEDURES 9 CABINET MAINTENA...

Page 2: ...rounded outlet 3 Use this appliance only for its intended purpose as described in the manual a This equipment is specifically designed to hold pre cooked food at temperature b This equipment is intend...

Page 3: ...97 5 127 438 199 MODELS HL7 5 HL7 8 Cabinets with Adjustable Universal Slides for 12 x20 Pans 18 x 26 Trays and Gastronorm Pans NSF ANSI 4 Features Benefits Precision engineered heat ducts with blower...

Page 4: ...REIGHT DAMAGE CLAIM PROCEDURE NOTE For your protection please note that equipment in this shipment was carefully inspected and packaged by skilled personnel before leaving the factory Upon acceptance...

Page 5: ...esult in personal injury and proper ty damage Damage to unit due to being connected to the wrong voltage or phase is NOT covered by warranty START UP 1 Prior to use thoroughly clean the interior of th...

Page 6: ...panel layout Power Switch Temperature setting dial turn clockwise to increase temperature and counter clockwise to decrease temperature Temperature dial shows actual cabinet temperature Power indicati...

Page 7: ...g rotate the HEAT dial to the desired set point It will take approximately 30 minutes for the cabinet to preheat to your setting Once cabinet reaches temperature setting power indicating light will go...

Page 8: ...Pastries 165 F 74 C 30 Pizza uncovered 180 F 82 C 15 Pizza boxed 180 F 82 C 60 Poppers Deep Fried uncovered 190 F 88 C 25 Poultry Whole bone in 175 F 79 C 60 Poultry Cut up bone in 175 F 79 C 60 Ribs...

Page 9: ...in direction of grain of stainless steel Do not use on vinyl trim Stubborn Daily Any chloride free Apply with damp sponge or cloth Rub in spots and as or direction of grain of stainless steel Rinse st...

Page 10: ...T REMOVE THE SCREWS THAT HOLD THE HINGES TO THE DOOR Remove the door tak ing care not to let it fall 2 Remove the door strike plate and screws adjacent to the door opening on the cabinet Reinstall doo...

Page 11: ...HL7 SERIES WITH ANALOG CONTROL 120 VOLT 2100 WATT 17 5 AMP 1 PH 60 HZ or 120 VOLT 1100 WATT 9 2 AMP 1 PH 60HZ 12 WIRING DIAGRAM...

Page 12: ...limit trip defective Call service technician Takes too long to get to temperature Improper voltage Call service technician to verify incoming voltage matches cabinet specifications Unit is hot but low...

Page 13: ...CARTER HOFFMANN to be defective CARTER HOFFMANN neither makes nor assumes and does not authorize any other person to make or assume any obligation or liability in connection with its products other th...

Reviews: