background image

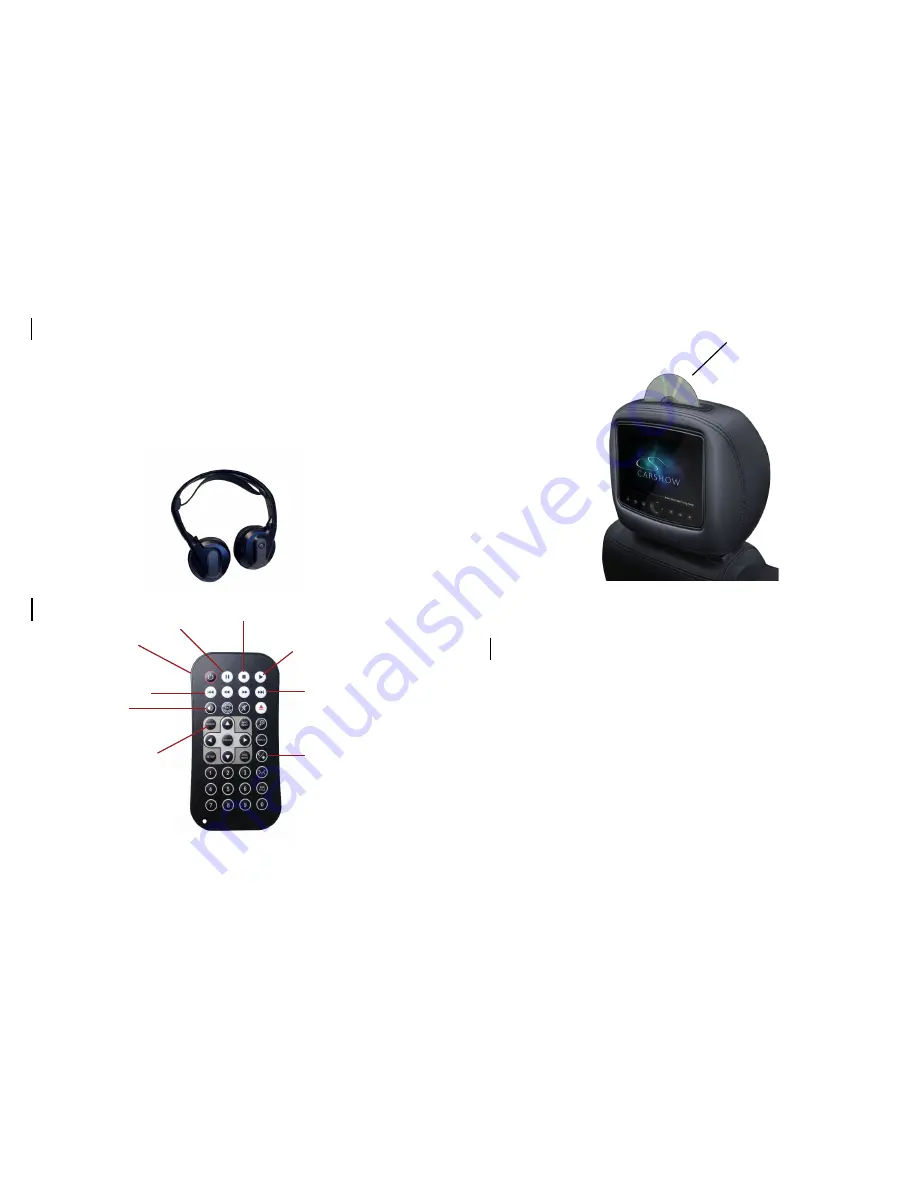
Pause

Stop 

Play

Day/Night

Power

Speaker

Source

A) Turn on by pressing the OFF/ON button located on the ear piece.  The power 

LED on the ear piece should illuminate.   If not, check that the batteries are 

inserted properly and have a charge.

A) Press the SOURCE button on the front control panel or remote control until 

“DVD Player” appears.

B) With the label facing away from you, insert a disc into the disc slot.  Do not 

force disc into slot.  If a DVD/CD menu appears on the screen, press PLAY or 

ENTER as instructed on the screen.  Most disc will load and play automatically.

C) To obtain best viewing angle, adjust the screen display as needed by pressing 

the bottom corners.

Note: Not all discs are supported by this system.  You may find a disc that will not play 

on this system, but works fine on other players.  Various manufacturers of discs change 

technology from time to time which may create compatibility issues.  This is not a probelm 

with the unit and is not covered by warranty.
Please check with the Owner’s Manual for more detailed information.

3

2

Use The Headphones

Remote Control

Play A Disc

Label side facing away

C) To adjust the volume, use the knob on the ear piece.

B) The headphones each have a two-position slide switch labeled “Ch.A/

Ch.B”.  They must have a clear line of sight to the headrest monitor and must be 

switched to the designated A/B Channel to operate properly

(Does not apply for Monitor Only systems)

Next

Previous

(Functions as Mute on 

Monitor Only systems)

Summary of Contents for Dual Mutimedia Headrest Replacement Entertainment System

Page 1: ...Dual Mutimedia Headrest Replacement Entertainment System Quick Start Guide ...

Page 2: ...ms any liability for any bodily injury or property damage that might result from any im proper or unintended use About the Registered Marks This item incorporates copy protection technology that is protected by U S patents and other intellectual property rights of Rovi Corporation Reverse engineering and disassembly are prohibited NOTE Features and specifications listed in this manual are subject ...

Page 3: ... MUTE SOURCE PLAY PAUSE N A DIMMER PREVIOUS Turn On The System A Turn vehicle ignition to ON or ACC NEXT Source Button A Short Press Switches internal sources between Main and Aux 1 B Long Press Enables CarShow supported Dash System to be accessed by the monitor only system Please contact an authorized CarShow dealer for a list of supported sys tems B Press POWER on the front display or wireless r...

Page 4: ... pressing the bottom corners Note Not all discs are supported by this system You may find a disc that will not play on this system but works fine on other players Various manufacturers of discs change technology from time to time which may create compatibility issues This is not a probelm with the unit and is not covered by warranty Please check with the Owner s Manual for more detailed informatio...

Page 5: ... does not support chapters then the next video will play Long press to Rewind or Fast Forward Play Pause Viewing Photos While the iPhone or iPod is not inserted in the DOC select the photo app and start the slideshow Once the slideshow is on insert the iPhone or iPod into the DOC and select Video In from the menu and press PLAY Your photos will now be displayed on the unit screen App Support Discl...

Page 6: ... view a widescreen DVD press the DISPLAY button on the remote until WIDE is displayed on the screen To watch a fullscreen DVD the internal game system or broadcast television select STANDARD Change the Display Adjustments Remote Control Only The display has adjustable video settings To change these settings press and hold the DISPLAY button on the remote control to bring up the following menu BRIG...

Page 7: ...All rights reserved Copyright 2012 CarShow Electronics PN CS1012 Rev B ...

Reviews: