


3
Programming Schedules —
The Comfort Pro pro-
grammable thermostat gives the user the option of program-
ming for all days, weekdays, or weekends. The thermostat is
preprogrammed at the factory with the same settings for all
seven days. See Table 2.
Table 2 — Schedule Factory Settings
Prior to programming a customized schedule, fill out the
Daily Schedule Planner in Table 3.
Table 3 — Daily Schedule Planner
NOTE: The cooling temperature set point must be higher than the heating
temperature set point. (The temperature difference may be changed in the
advanced set up configuration by the installer.)
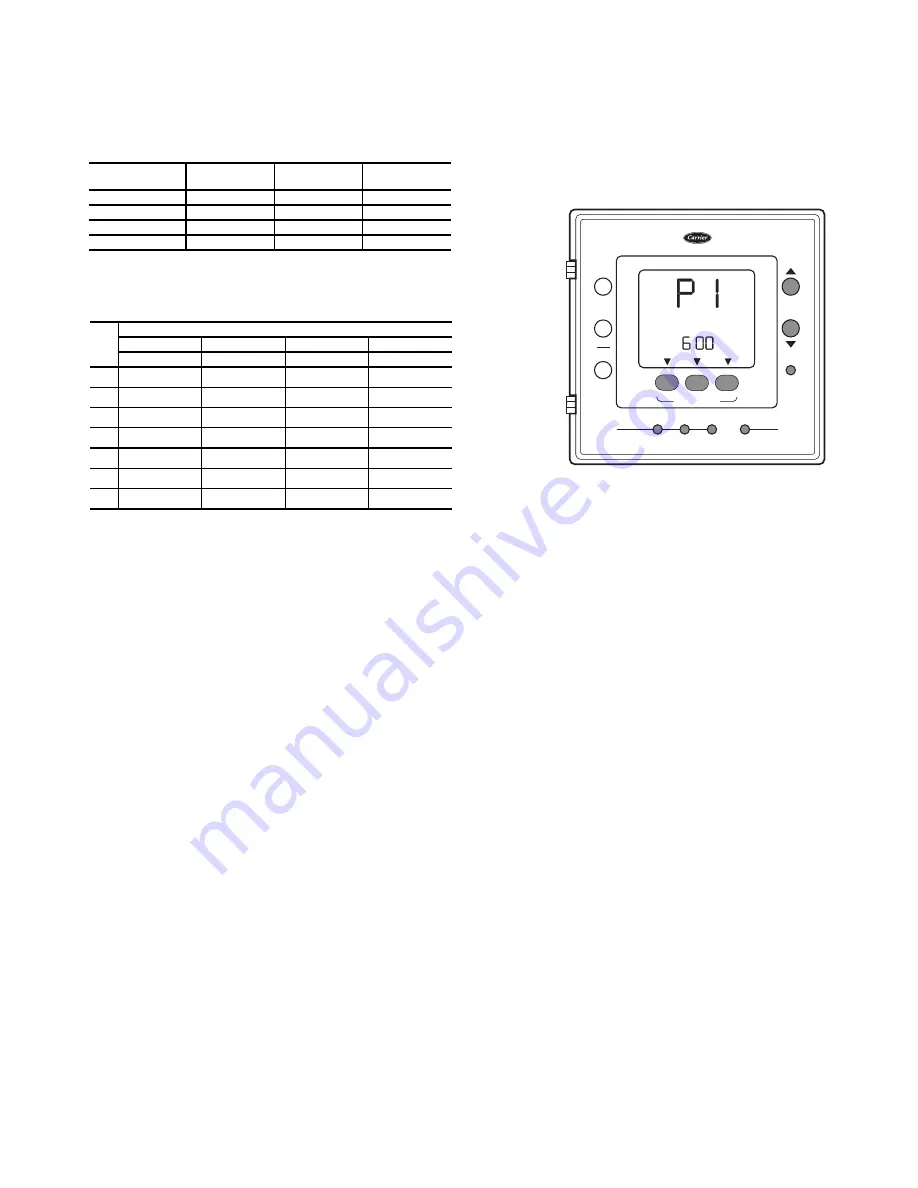
To set up a different schedule, perform the following proce-
dure (see Fig. 3):
1. Open the thermostat front panel door.
2. Press the
set schedule days
button until the screen dis-
plays the programming method of
all days
,
weekdays
or
weekend
icons at the right of the screen. Press the
up
or
down
button to change as necessary to the desired pro-
gramming selection icon.
3. Press the
period
button to continue programming the
thermostat. The periods are displayed as
P1
through
P4
if
Option 25 was set to 4 periods/day or
P1
through
P2
if
Option 25 was set to 2 periods/day. Press the
period
but-
ton to display the next programmable period.
4. As each period is displayed, the comfort setting that is
used for that period is displayed, along with whether it is
in the occupied, unoccupied or limit configuration as
shown by the triangle over the
OCC
,
UNOCC
or
LIM-
IT
buttons. Change the
OCC,
UNOCC
or
LIMIT
con-
figuration by pressing the appropriate button and the tri-
angle will move to that setting.
5. To change the time for a period, press the
start time
but-
ton and use the
up
and
down
buttons to change the hours.
6. Press the
start time
button again to change the minutes
using the
up
and
down
buttons.
7. To go to the next programming period press the
period
button twice. Enter in the changes for all of the periods as
described in Steps 4, 5 and 6 above.
8. Press the
done
button when complete.
9. Close the thermostat door.
NOTE: Once a change is made to the programming schedule,
it is saved when the user moves along to the next programming
interval or level. Changes within a given programming period
are considered temporary changes that require user confirma-
tion by either closing the door or pressing the
done
button
which would confirm any changes made up to that point.
If dashes "--:--" appear in the display this is an indication
that the start time in the period displayed is not the same start
time in all periods. Press the
start time
button and update the
time for the HVAC equipment to start.
Temporary Hold Override —
The user can temporar-
ily change the temperature from the programmed set points.
Perform the following steps to temporarily override the ther-
mostat:
1. Open the thermostat front panel door.
2. Press the
up
or
down
button. This will cause the set point
to be displayed.
3. Press the
up
or
down
button again to increment or decre-
ment the displayed set point. This will cause the tempo-
rary hold icon to be displayed below the temperature and
replace the clock with the 0:15 minute override time.
4. The temporary hold remains active until a power cycle is
encountered, the override time has expired, off mode is
selected, or the user presses the
hold
button.
5. To change the override time displayed in the clock loca-
tion, press the
start time
button. Each press of the
start
time
button increments the override time by 15 minutes
up to the maximum value set by the installer.
6. Once the temporary hold is cleared, the override will be
considered inactive and the set point will reflect the pro-
gram schedule set point.
7. Close the thermostat door.
Holding Temperature Set Points —
The user can
override the programmed temperature settings and hold the
temperature at a specific setting. To override the temperatures,
perform the following procedure:
1. Open the thermostat front panel door.
2. Press the
hold
button (see Fig. 4). This will hold the cur-
rent comfort setting and the program schedule will be ig-
nored as long as the hold remains active.
3. Pressing the
hold
button again will return the thermostat
to the current programming schedule.
4. Close the thermostat door.
PERIOD
START
TIME
HEAT SET
POINT
COOL SET
POINT
P1 (OCC)
6 AM
68
78
P2 (OCC)
8 AM
68
78
P3 (OCC)
3 PM
68
78
P4 (UNOCC)
6 PM
60
85
DAY
SCHEDULE
P1 Occ
P2 Occ2
P3 Occ3
P4 Unocc
Start/Heat/Cool Start/Heat/Cool Start/Heat/Cool Start/Heat/Cool
Mon
/ /
/ /
/ /
/ /
Tue
/ /
/ /
/ /
/ /
Wed
/ /
/ /
/ /
/ /
Thu
/ /
/ /
/ /
/ /
Fri
/ /
/ /
/ /
/ /
Sat
/ /
/ /
/ /
/ /
Sun
/ /
/ /
/ /
/ /
OCC
LIMIT
UNOCC
push and hold to set
set
schedule
days
period start time
set
clock
d/h/m
mode
fan
done
all days
start
at
hold
run
:
Fig. 3 — Programming the Thermostat
a33-9221


