der Ausgangspegel der Signalquelle min.
1,5 V betragen.
7) Mit dem Regler LEVEL (6) die Lautstärke des
Subwoofers an die der Hauptlautsprecher anpas-
sen. Den Regler maximal so weit aufdrehen,
dass keine Verzerrungen auftreten.
8) Soll im Frequenzbereich des Subwoofers eine
bestimmte Frequenz angehoben werden, diese
mit dem Regler BASS EQ (10) einstellen und mit
dem Regler BASS BOOST (9) anheben.
9) Mit dem Schalter PHASE (12) die Phasenlage zu
den Hauptlautsprechern einstellen. Besonders
bei zusätzlich installierten Kickbasslautsprechern
wirkt sich eine falsche Phasenlage negativ auf
den Klang aus (zu geringer Bass). Den Schalter
PHASE auf beste Basswiedergabe stellen.
8
Fehlerbeseitigung
Ist nach dem Einschalten der Car-HiFi-Anlage kein
Ton zu hören, den Fehler mithilfe der beiden LEDs
POWER (14) und PROTECT (15) näher lokalisieren.
LED POWER leuchtet nicht
1) Die Sicherungen (19) der Car-HiFi-Endstufe (5 x
40 A) und die Vorsicherung an der Autobatterie
überprüfen. Defekte Sicherungen auswechseln.
Nur Sicherungen mit den angegebenen Werten
verwenden. Auf keinen Fall einen höheren Wert
einsetzen. Die Endstufe kann beschädigt werden
und die Garantie erlischt.
2) Das 12-V-Stromversorgungskabel sowie das
Massekabel auf korrekten Anschluss und Unter-
brechung kontrollieren.
3) An der Klemme REM (16) der Endstufe messen,
ob +12 V anliegt. Wenn nicht, die Leitung an der
Klemme REM entfernen und vorübergehend die
Klemmen REM und BATT (18) überbrücken.
Schaltet die Endstufe jetzt ein, liegt der Fehler in
der fehlenden Steuerspannung. Den 12-V-Schalt-
output level of the signal source should be
1.5 V as a minimum.
7) With the control LEVEL (6) match the volume of
the subwoofer to that of the main speakers. Turn
up the control so far as a maximum that no distor-
tions occur.
8) For boosting a certain frequency in the frequency
range of the subwoofer, adjust it with the control
BASS EQ (10) and boost it with the control BASS
BOOST (9).
9) With the control PHASE (12) adjust the phase to
the main speakers. Especially if kick bass speak-
ers are additionally installed, an incorrect phase
shows a negative sound effect (bass frequencies
are too poor). Set the switch PHASE to optimum
bass reproduction.
8
Trouble Shooting
If there is no sound after switching on the car HiFi
system, locate the fault more precisely by means of
the two LEDs POWER (10) and PROTECT (15).
The LED POWER does not light up
1) Check the fuses (19) of the car HiFi amplifier (5 x
40 A) and the additional fuse at the car battery.
Replace defective fuses. Only use fuses with the
indicated values. Do not insert a higher value in
any case. The power amplifier may be damaged
and the guarantee expires.
2) Check the 12 V power supply cable and the ground
cable for correct connection and for interruption.
3) Check at the terminal REM (16) of the power
amplifier if +12 V is present. If not, remove the
cable at the terminal REM and temporarily short-
circuit the terminals REM and BATT (18). If the
power amplifier switches on now, the fault is due
to the missing control voltage. Check the 12 V
control output of the car radio and the correspond-
ing connection cable to the power amplifier.
7
GB
D
A
CH
Diese Bedienungsanleitung ist urheberrechtlich für MONACOR
®
INTERNATIONAL GmbH & Co. KG
geschützt. Eine Reproduktion für eigene kommerzielle Zwecke – auch auszugsweise – ist untersagt.
All rights reserved by MONACOR
®
INTERNATIONAL GmbH & Co. KG. No part of this instruction manual
may be reproduced in any form or by any means for any commercial use.
ausgang des Autoradios und das entsprechende
Anschlusskabel zur Endstufe überprüfen.
LED POWER leuchtet
1) Ist die Fernbedienung (20) nicht angeschlossen,
den Schalter LEVEL REMOTE (1) in die Position
OFF stellen, sonst ist die Endstufe stumm ge-
schaltet.
2) Stehen die Schalter CONFIG (11) und PHASE
(12) in der richtigen Position? Für den Normalbe-
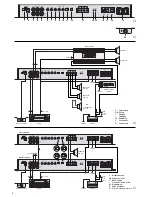
trieb (kein Brückenbetrieb) den Schalter CON-
FIG in die Position MASTER stellen. Für den
Brückenbetrieb siehe Abb. 4 und Kapitel 6.3.2.
3) Die Verbindungskabel von der Signalquelle zur
Car-HiFi-Endstufe überprüfen. Sind die Stecker
richtig eingesteckt? Sind die Leitungen unter-
brochen?
4) Die Signalquelle überprüfen. Ist die Signalquelle
eingeschaltet? Sind die richtigen Ausgänge ver-
wendet worden? Ist die Signalquelle defekt?
5) Die Lautsprecherkabel auf Unterbrechung über-
prüfen.
6) Die angeschlossenen Lautsprecher überprüfen.
LED PROTECT leuchtet
Die Endstufe ist mit einer Schutzschaltung gegen
Kurzschluss am Lautsprecherausgang und gegen
Überhitzung gesichert. Ist die Schutzschaltung akti-
viert, leuchtet die Anzeige PROTECT (15) und der
Lautsprecherausgang ist stumm geschaltet.
Bei einer Überhitzung schaltet die Endstufe
nach dem Abkühlen automatisch wieder ein. Bei
einem Kurzschluss am Lautsprecherausgang muss
nach der Fehlerbeseitigung zum Zurücksetzen der
Schutzschaltung die 12-V-Steuerspannung kurz ab-
geschaltet werden (z. B. Autoradio ausschalten).
9
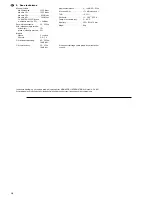
Technische Daten
Ausgangsleistung
Maximale Leistung: . . . . . . 1500 W
MAX
Sinusleistung an 1
Ω
: . . . . . 1300 W
RMS
Sinusleistung an 2
Ω
: . . . . . 850 W
RMS
Sinusleistung an 4
Ω
: . . . . . 500 W
RMS
zwei SYNTEX-1000D im
Brückenbetrieb an 2
Ω
: . . . > 2 kW
RMS
Frequenzbereich: . . . . . . . . . 20 – 300 Hz
min. Lautsprecherimpedanz
Normalbetrieb: . . . . . . . . . . 1
Ω
Brückenbetrieb: . . . . . . . . . 2
Ω
Eingänge
Anschlüsse: . . . . . . . . . . . . 2
×
Cinch
Empfindlichkeit: . . . . . . . . . 0,3 – 7 V
Tiefpass: . . . . . . . . . . . . . . . . 40 – 300 Hz,
18 dB/Oktave
Subsonic-Filter: . . . . . . . . . . . 20 – 55 Hz,
18 dB/Oktave
Bassanhebung: . . . . . . . . . . . 0 – 12 dB bei
30 – 65 Hz
Störabstand: . . . . . . . . . . . . . > 75 dB (A-bewertet)
Klirrfaktor: . . . . . . . . . . . . . . . < 0,15 %
Stromversorgung: . . . . . . . . . 11 – 16 V
/200 A
Einsatztemperatur: . . . . . . . . 0 – 40 °C
Abmessungen: . . . . . . . . . . . 230
×
60
×
470 mm
Gewicht: . . . . . . . . . . . . . . . . 6 kg
Änderungen vorbehalten.
The LED POWER lights up
1) If the remote control (20) is not connected, set
the switch LEVEL REMOTE (1) to position OFF,
otherwise the power amplifier is muted.
2) Are the switches CONFIG (11) and PHASE (12)
in the correct position? For normal operation (no
bridge operation) set the switch CONFIG to posi-
tion MASTER. For bridge operation see fig. 4 and
chapter 6.3.2.
3) Check the connection cables from the signal
source to the car HiFi power amplifier. Are the
plugs correctly connected? Are the cables inter-
rupted?
4) Check the signal source. Is the signal source
switched on? Have the correct outputs been
used? Is the signal source defective?
5) Check the speaker cables for interruption.
6) Check the connected speakers.
The LED PROTECT lights up
The power amplifier is protected with a protective
circuit against short circuit at the speaker output and
against overheating. If the protective circuit is acti-
vated, the red LED PROTECT (15) lights up and the
speaker output is muted.
In case of overheating, the power amplifier auto-
matically switches on again after cooling-down. In
case of a short circuit at the speaker output, after eli-
minating the error, the 12 V control voltage must
shortly be switched off (e. g. switch off the car radio)
to reset the protective circuit.
9
Specifications
Output power
Max. power: . . . . . . . . . . . . 1500 W
MAX
rms power at 1
Ω
: . . . . . . . . 1300 W
RMS
rms power at 2
Ω
: . . . . . . . . 850 W
RMS
rms power at 4
Ω
: . . . . . . . . 500 W
RMS
two SNYTEX-1000D in
bridge operation at 2
Ω
: . . . > 2 kW
RMS
Frequency range: . . . . . . . . . 20 – 300 Hz
Min. speaker impedance
normal operation: . . . . . . . . 1
Ω
bridge operation: . . . . . . . . 2
Ω
Inputs
connections . . . . . . . . . . . . 2
×
phono
sensitivity: . . . . . . . . . . . . . 0.3 – 7 V
Low pass: . . . . . . . . . . . . . . . 40 – 300 Hz,
18 dB/octave
Subsonic filter: . . . . . . . . . . . . 20 – 55 Hz,
18 dB/octave
Bass boosting: . . . . . . . . . . . . 0 – 12 dB at
30 – 65 Hz
S/N ratio: . . . . . . . . . . . . . . . > 75 dB (A weighted)
THD: . . . . . . . . . . . . . . . . . . . < 0.15 %
Power supply: . . . . . . . . . . . . 11 – 16 V
/200 A
Ambient temperature: . . . . . . 0 – 40 °C
Dimensions: . . . . . . . . . . . . . 230
×
60
×
470 mm
Weight: . . . . . . . . . . . . . . . . . 6 kg
Subject to technical modification.
Summary of Contents for Syntex-1000D
Page 19: ...19 ...


