background image

General information

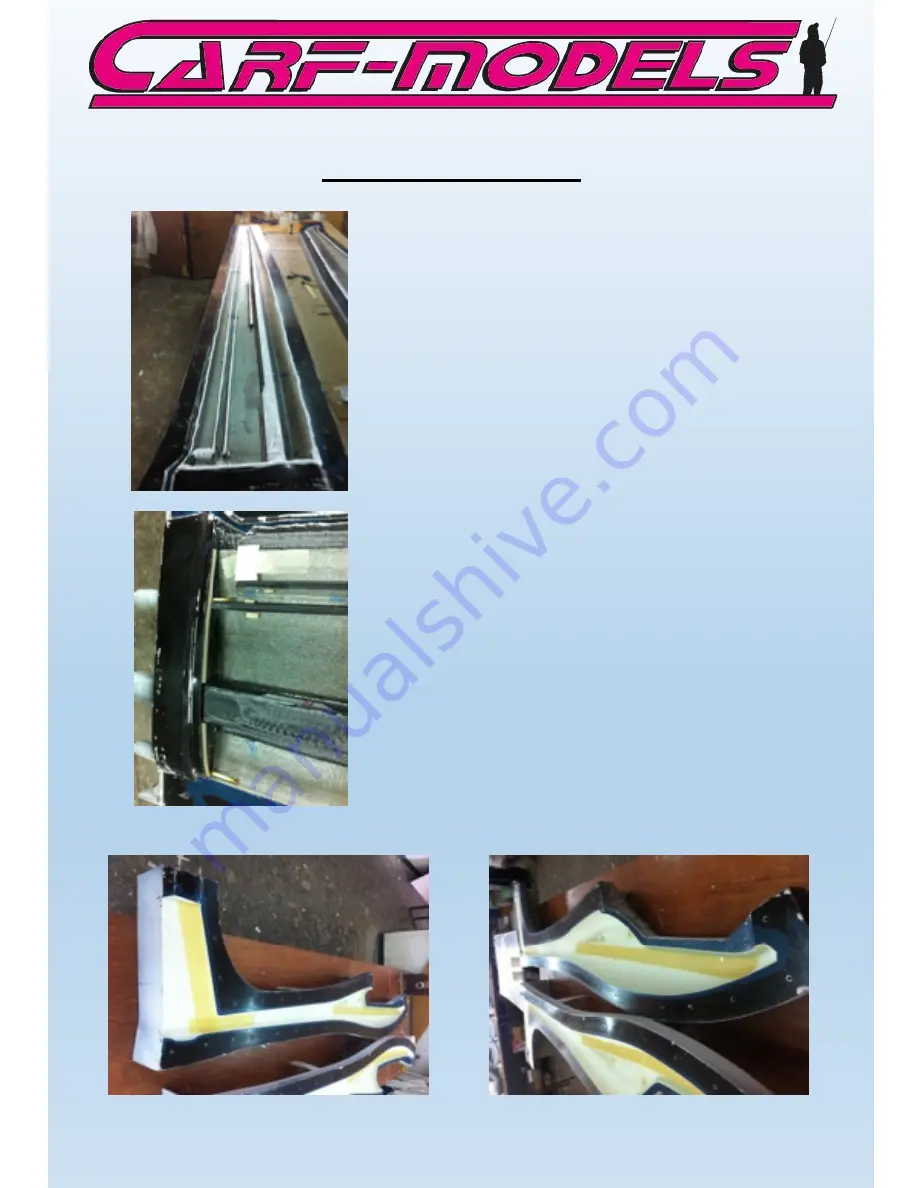
The wing of your CARF-Models DG-800S 

is a so called all carbon wing. The skin 

has several layers of carbon fibre as 

well as the C-spars. These are laminated 

in separate molds, all carbon, of course.  

The fuselage is made from various glass 

fibre layers, responsibly and well 

engineered with Kevlar reinforcements 

in the canopy and fin area. 

This extensive use of high end materials 

is unique in the industry and responsbile 

for the incredible strength and overall 

performance of the aircraft.

Summary of Contents for DG 800 S

Page 1: ...DG 800 S Instruction Manual F W 28 7 2014 Vers 1 0...

Page 2: ...actually paid for this model BY OPERATING THIS MODEL YOU ASSUME FULL RESPONSIBILITY FOR YOUR ACTIONS It is important to understand that CARF Models Ltd is unable to monitor whether you follow the ins...

Page 3: ...is very important for the proper function and the designed efficiency of all control surfaces Servo Choice We strongly advise that you use the recommended high torque digital metal geared servos on a...

Page 4: ...all types of glues are suited to working with composite parts Here is a selection of what we normally use and what we can truly recommend Please don t use inferior quality glues you will end up with a...

Page 5: ...F Models we try our best to offer you a high quality kit with outstanding value for money and as complete as possible However if you feel that some additional or different hardware should be included...

Page 6: ...rs These are laminated in separate molds all carbon of course The fuselage is made from various glass fibre layers responsibly and well engineered with Kevlar reinforcements in the canopy and fin area...

Page 7: ...LL THREAD M3 x 30 mm 2 Wing THREADEDPUSHRODM2 200 2 Wing Clevis M2 2 Wing Nut M2 2 Wing Celvis M 3 8 Wing Swasher M3 4 for 20 mm Aileron Servo ALLENSCREWM3 12 4 for 20 mm Aileron Servo T Nut M3 4 for...

Page 8: ...milled wood parts and hardware Rudder servo tray Retract mounts Retract Servo tray milled parts for RC equipment Cockpit tub and parts Milled instrument panel...

Page 9: ...Milled wood parts and hardware Tow release Retract Horizotal Stab Rudder Wing 20mm standard size servo mount parts 16 mm mini size servo mount parts...

Page 10: ...h the included 2 9 x 13 mm self tapping screws Use washers if necessary The elevator linkage is assembled from the 20 mm M3 all thread and 2 spring steel clevises NOTE Since space is very tight these...

Page 11: ...tend the servo wire either by soldering an extension or connecting a pigtail socket Secure the extension so that it cannot disconnect under any circumstances It is helpful to use the tailwheel opening...

Page 12: ...eel you need to trim down elevator Please sand or grind the spacer highlighted on the photo down to zero thickness at the rear This will reduce the incidence of the stab just the right amount to allow...

Page 13: ...oles for the servo are drilled Use 2 9 x 13 mm self tapping screws and washers to install your standard size servo preferrably of the same type as the elevator servo Then bolt the servo tray from the...

Page 14: ...Also the rudder has the hinge pin sleeves and the cut outs preinstalled It can be attached to the fin immediately Attach the steel wires by looping them through the control horns and crimp them with...

Page 15: ...it the hinge pin either conventionally from the top where you can always see it or from the bottom like shown in the photo In that case it is important to secure the pin against accidental loss Bend t...

Page 16: ...Tail Wheel Installation The tail wheel axle can be made from either M3 or M4 bolt 35 mm long depending on the wheel used The predrilled hole might have to be adjusted slightly to fit...

Page 17: ...Wing Servo Installation The wings are completely finished The slot cover tape is attached control horns are installed and the speed brake cover is precisely attached...

Page 18: ...urn on two spring steel clevises Use Loctite or CA glue just like you did with the elevator linkage because there is no room for counter nuts Important Note A 16mm Servo can be used if it is one of th...

Page 19: ...in place Trial fit with the servo to make sure it fits the recess without binding and the servo horn aligns with the control horn Once the frame is glued fit the servo use a dot of clear silicone to h...

Page 20: ...Installation of 20 mm standard size aileron servos...

Page 21: ...tly like the aileron and elevator linkage For the spoiler linkage please use the 2mm threaded end and one M2 spring steel clevis The limited space requires a Z bend on the servo side Do not experiment...

Page 22: ...ways and preferences you might have your own style It is important that the wires don t rub against the edges of the cut outs The floating spar wing mount is completely finished Install the massive 30...

Page 23: ...doors Glue stops from scrap plywood and trial fit hooks for two rubber bands Even though this seems a very simple method to keep the gear doors closed it is a very efficient one The retractable gear...

Page 24: ...aluminum frame of the retract As usual use the 2 9 mm sheet metal screws and washers to mount the servo in the frame As linkage use the M3 all thread and two spring steel clevises You might have to a...

Page 25: ...de the retract unit into the slots of the two formers and secure it with the two wood boards bolted on with each two of M3 x 16 allen bolts as shown on the photos above Gear door and retract installat...

Page 26: ...of the fuselage is used as equipment bay The photos show only a sample installation since most have their own ideas and methods how to install receiver powerbox batteries switches The photos also sho...

Page 27: ...ion will cover this slot and make it invisible The kit contains the base parts for an individual cockpit detailing by yourself However we highly recommend to purchase the scale cockpit available as an...

Page 28: ...Settings...

Reviews: