


Cephalometric Modality User guide for CS 8100 Family and CS 8100 3D Family_SM987_Ed04
45
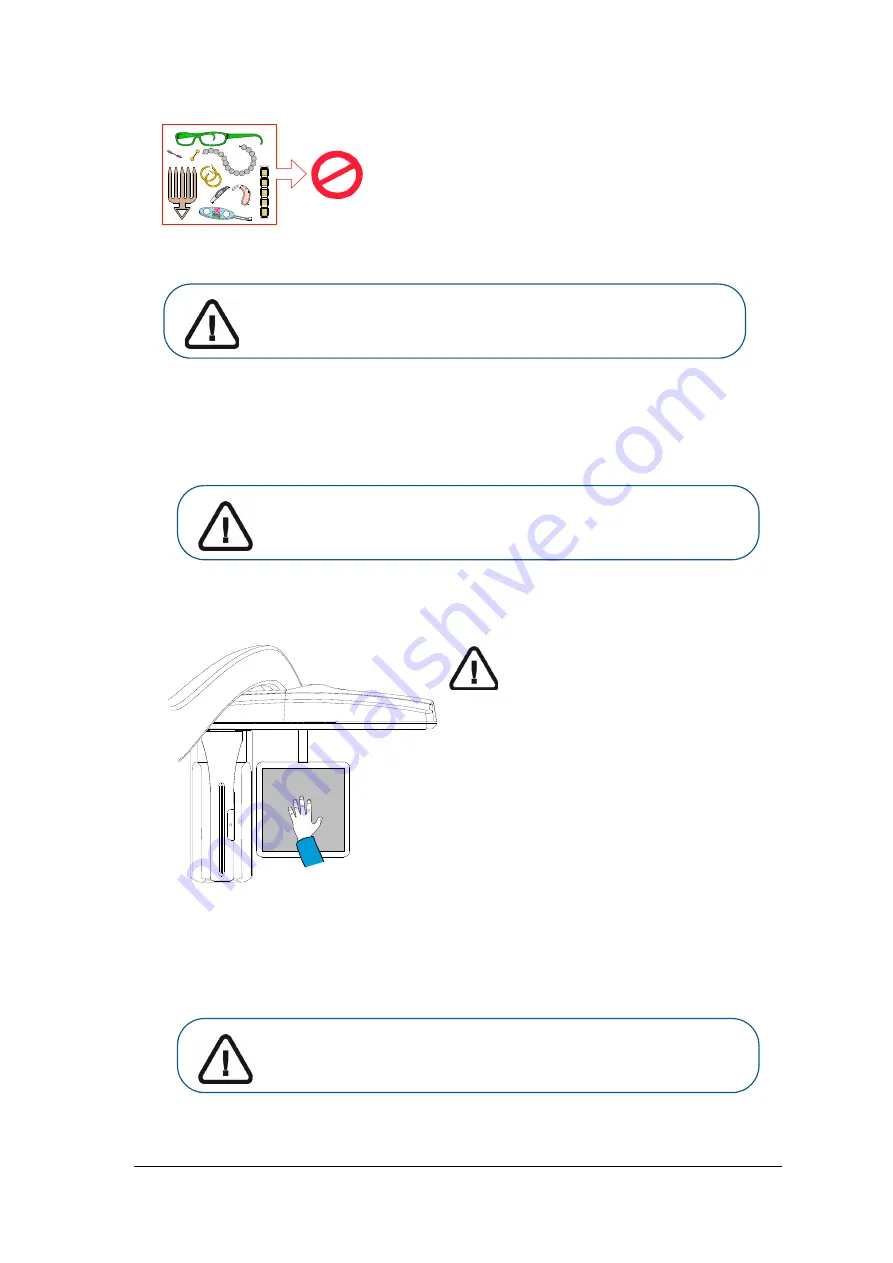
1
Ask the patient to remove all metal objects.
2
Ask the patient to wear a lead apron.
For Carpus acquisitions, ask the patient to wear a lead
apron with thyroid collar.
Ensure that the apron lays flat across the patient’s shoulders.
3
Ask the patient to do the following:
Stand to the side and as far as possible from the Cephalometric unit.
Open the hand fully and place it flat on the carpus panel.
Launching the X-ray
To launch the X-ray, follow these steps:
IMPORTANT
Make sure that the:
hand, wrist, and forearm are in a
completely vertical position.
hand is approximately in the
middle of the carpus panel.
Important: For Carpus acquisitions, the pediatric patient must wear
a lead apron with thyroid collar.
WARNING: To avoid exposure to other parts of the body, make sure
the patient stands as far away as possible from the X-ray emission
range and extends the hand to the carpus panel.
WARNING: To avoid exposure to other parts of the body, make sure
the patient stands as far away as possible from the X-ray emission
range and extends the hand to the carpus panel.
Summary of Contents for CS 8100 Access
Page 6: ...2 Chapter 1 Conventions in This Guide...
Page 26: ...22 Chapter 4 Getting Started...
Page 52: ...48 Chapter 6 Maintenance 3 Select the desired test and follow the on screen instructions...
Page 54: ...50 Chapter 7 Troubleshooting...
Page 56: ...SM987 Ed04 2019 02 For more information visit www carestreamdental com...


