background image


2.


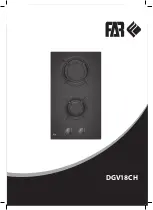
Wok burner 

3.


Rapid Burner   

4.


Semi-rapid Burners   

5.


Auxiliary Burner   

6.


Control knobs   

Operation 

Lighting Burners

 – 

Simply press the knob in, turn anticlockwise to maximum and the burner will ignite. Before releasing knob, 

ensure a flame is established, if the burner fails to ignite, put into off position and try again.   

If in case of a power failure or failure of the ignition, a match or lighting devise can be used. Care must be taken when using this method. 

The device shall not be operated for more than 15s. If after 15s the burner has not lit, stop operating the device and open the compartment 

door and/ or wait at least 1 min before attempting a further ignition of the burner. 

In the event of the burner flames being accidentally extinguished, turn off the burner control and do not attempt to re-ignite the burner for 

at least 1 min. 

If you cannot light the flame even after several attempts, check the "cap" and “crown” (see diagram – figure 1) are in the correct position. 

To put the flame out, turn the knob to the symbol 

” 

1. Burner Cap 

2. Burner crown 

3. Burner plate 

4. Ignition electrode 

5. Thermocouple (See Figure 2*) 

When switching on the mains, after installation or a power cut, it is quite normal for the spark generator to be activated automatically. 

To ensure maximum burner efficiency, you had better use pots and pans with a flat bottom fitting the size of the burner used (see table). 

Burner 

Minimum Diameter 

Maximum diameter 

Wok 

Large (rapid) 

Medium (semi-rapid) 

Small (auxiliary) 

240mm 

180 mm   

120 mm 

  80 mm 

260mm 

260 mm 

220 mm 

160 mm 

If you using a saucepan which is smaller than the recommended size, the flame will spread beyond the bottom of the vessel, causing the 

handle to overheat.   

Take care when frying food in hot oil or fat, as the overheated splashes could easily ignite.   

Warning: As soon as a liquid starts boiling, turn down the flame so that it will barely keep the liquid simmering. If the control knobs 

become difficult to turn, please contact your local service centre. (See figure 3*) 

Maintenance and Cleaning 

Before any maintenance or cleaning can be carried out, you must DISCONNECT the hob from the electricity supply.   

The hob is best cleaned whilst it is still warm; as spillage can be removed more easily than if it is left to cool. 

The Hob Panel 

Regularly  wipe  over the hob  top using  a  soft  cloth  well  wrung  out in warm water to  which a little  washing up  liquid  has been  added. 

Avoid  the  use  of  the  following:1)  household  detergent  and  bleaches;2)  pads  unsuitable  for  non-stick  saucepans;3)  steel  wool  pads;4) 

bath/sink stain removers.   

Pan Supports 

If washing them by hand, take care when drying the

m as the enameling and drying 

process occasionally leaves rough edges. If necessary, 

remove stubborn stains using a paste cleaner.   


Summary of Contents for C742G

Page 1: ......

Page 2: ...laced by the manufacturer its service agent or similarly qualified persons in order to avoid a hazard This appliance is not intended for use by persons including children with reduced physical sensory or mental capabilities or lack of experience and knowledge unless they have been given supervision or instruction concerning use of the appliance by a person responsible for their safety Children sho...

Page 3: ... the control knobs are in the closed position when not in use When using other electrical appliances ensure the cable does not come into contact with the hot surfaces of the cooking appliance Unstable or misshapen pans should not be used on the hob as unstable pans can cause an accident by tipping or spillage Never leave the hob unattended when cooking with oil and fats Never use plastic or alumin...

Page 4: ... burner efficiency you had better use pots and pans with a flat bottom fitting the size of the burner used see table Burner Minimum Diameter Maximum diameter Wok Large rapid Medium semi rapid Small auxiliary 240mm 180 mm 120 mm 80 mm 260mm 260 mm 220 mm 160 mm If you using a saucepan which is smaller than the recommended size the flame will spread beyond the bottom of the vessel causing the handle...

Page 5: ...orrective action Check that the unit is plugged in and the electrical supply is switched on Check the mains fuse has not blown Check the burner cap and crown have been replaced correctly e g after cleaning The gas ring burns unevenly Check the main jet is not blocked and the burner crown is clear of food particles Check the burner cap and crown have been replaced correctly e g after cleaning Instr...

Page 6: ...in a room of volume between 5m and 10m an air vent of effective area of 50cm is required while if the volume exceeds 11m no air vent is required However if the room has a door which opens directly to the outside no air vent is required even if the volume is between 5m and 11m 3 If there are other fuel burning appliances in the same room which should be consulted to determine the requisite air vent...

Page 7: ...tely Gas Connection Connection to the gas supply should be with either rigid or semi rigid pipe i e steel or copper The connection should be suitable for connecting to RC 1 2 1 2 BSP male thread When the final connection has been made it is essential that a thorough leak test is carried out on the hob and installation Ensure that the main connection pipe does not exert any strain on the hob When a...

Page 8: ...port and front left burner cap and crown Fit manometer tube over the injector Turn on the burner gas supply and ignite another burner Turn off the burner supplies Conversion form NG to LPG or from LPG to NG Important The replacement conversion of the gas hob should only be undertaken by a competent person It is important to note that this model is designed for use with which gas category Please ch...

Page 9: ...9 Figure 3 Figure 4 Figure5 Figure6 Figure7 Figure8 ...

Reviews: