20
USING YOUR OVEN
chops and hamburgers would typically be broiled
on rack position 4. If top browning casseroles or
bread, the thickness of the food will indicate the posi-
tion. Casseroles and bread would typically be
browned on rack position 2 (see instructions below
for more information).
CONVECTION BROIL
Convection broil is cooking by intense infrared radiant
heat supplied by the broil burner while fan at the back
of the oven circulates hot air in a continuous pattern
around the food. Convection broil cooks the food with
better results for thicker cuts of meat. The meat sears
on the outside and retains more juices and natural
flavor inside with less shrinkage.
FOODS SUITABLE FOR CONVECTION BROILING:
Thicker Cuts of Meat (1" or more)
Rack position #3 (same position for broiling)
Thicker, Irregular-sized Pieces of Poultry (1" or more),
Rack position #2 or #3 (same position for broiling)
Thicker, Pieces of Fish (1" or more)
Rack position #3 (same position for broiling)
Top Browning: Casseroles and Breads
Rack position #2 or #3 (same position for broiling)
REGULAR BROIL
Broil is cooking by intense infrared radiant heat supplied by
the broil burner located at the top of the oven.
FOODS SUITABLE FOR BROILING:
Appetizers
Rack position #3 or #4
Meats, Poultry, Fish (under 1")
Rack position #4
Top Browning: Casseroles and breads
Rack position #2 or #3
NOTE: The broiler pan for both broiling and convection
broiling should be placed all the way to the back of the
oven and centered on the rack for best results.
USING A MEAT THERMOMETER TO BROIL AND
CONVECTION BROIL
To accurately determine the doneness of a thick steak or
chop (1-1/2) inches thick or more), use a meat ther-
mometer. Insert the point of the thermometer into the
side of the meat to the center. Cook the first to 90°F for
rare meat. Cook the first side 100°F for medium to
well done. Cook the second side to the desired de-
gree for the doneness you want, 140°F to 145°F for
rare, and 150°F to 155°F for medium and 160°F to
165°F for well done. If you are cooking pork, cook to
160°F.
A large two-piece broil pan comes with your new
range. When you are broiling, always use both
pieces. Do not cover the grid with aluminum foil.
This slotted grid allows the grease drippings to flow
into the bottom of the pan keeping it away from the
intense heat of the infra-red broiler burner. This help to
minimize the smoking and spattering of the grease.
TO GET THE BEST RESULTS
OPEN DOOR BROILING
NOTE: Open Door
Broiling is also possible with the
Precision Series oven. However, the oven door hinge
DOES NOT have a dedicated Broil-Stop position. To
achieve the best results for Open-Door Broiling, open
oven door approximately 6-8 Inches.
WARNING! NEVER leave pets and/or small children
unattended while oven is in the Open Door Broiling
position. Front panel and knobs may get hot to
the touch as the heat is directly escaping to the
front section of the oven. Wear oven mitts and
always use Caution!
NOTE: It is not recommended to use the convection
fan if Open Door Broiling.
Defrost the food before starting to cook.
Put food on broiler pan, center and push broiler pan
to the very back of the oven rack.
Set a minute timer for the minimum time to check the
food.
Steaks should be at least one inch thick, if rare doneness
is desired. It is difficult to get rare with meat that is thin-
ner.
After half the total cooking time, turn the food over only
once. It is not necessary to turn over thin foods (fillet
of fish, Ham slices, etc.). Liver slices must be turned
over.
Use a two-piece broil pan. Two-piece broil pans are
designed to minimize smoke and spatter. DO NOT
cover the slotted grid with aluminum foil. This will
catch the grease and could cause a fire.
When top browning use metal or glass-ceramic bake
ware. DO NOT use heat-proof Glass or pottery as this
type of glassware cannot withstand the intense heat
of the broiler burner.Place the vertical positioning
rod into the hole located on the bottom left side of
the oven can.
NOTE: You cannot use the broiler burner and
the bake burner at the same time. When one is
on, the other cannot be turned on!
LGR SERIES
Summary of Contents for LGSCR304
Page 1: ...USE AND CARE INSTALLATION GUIDE GAS SELF CLEAN...
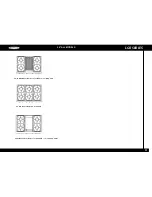
Page 4: ...LGR SERIES 4 30 MODELS LGSCR304 LGSCR304 30 LGR MSELF CLEAN MODELS...
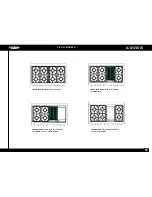
Page 5: ...5 36 MODELSS LGR SERIES LGSCR366 LGSCR364G LGSCR364B LGSCR366 36 LGR MSELF CLEAN MODELS...
Page 7: ...7 60 MODELS NOT AVAILABLE LGR SERIES...
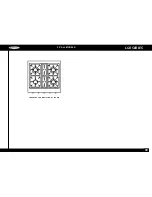
Page 30: ...30 30 ALL MODELS LGR SERIES LGSCR304 FOUR Burners At 17 000 btu...
Page 33: ...33 60 ALL MODELS NOT AVAILABLE LGR SERIES...
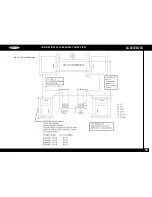
Page 35: ...35 CABINET INSTALL DRAWING FRONT VIEW FIG 1A Cabinet Clearances LGR SERIES...
Page 36: ...36 CABINET INSTALL DRAWING SIDE VIEW LGR SERIES...

