background image

 Menu Options Lists

Advanced Functions

41

according to the type of television to 
which you will connect the camcorder.
[NORMAL TV]: TV sets with 4:3 aspect 
ratio.
[WIDE TV]: TV sets with 16:9 aspect 
ratio.

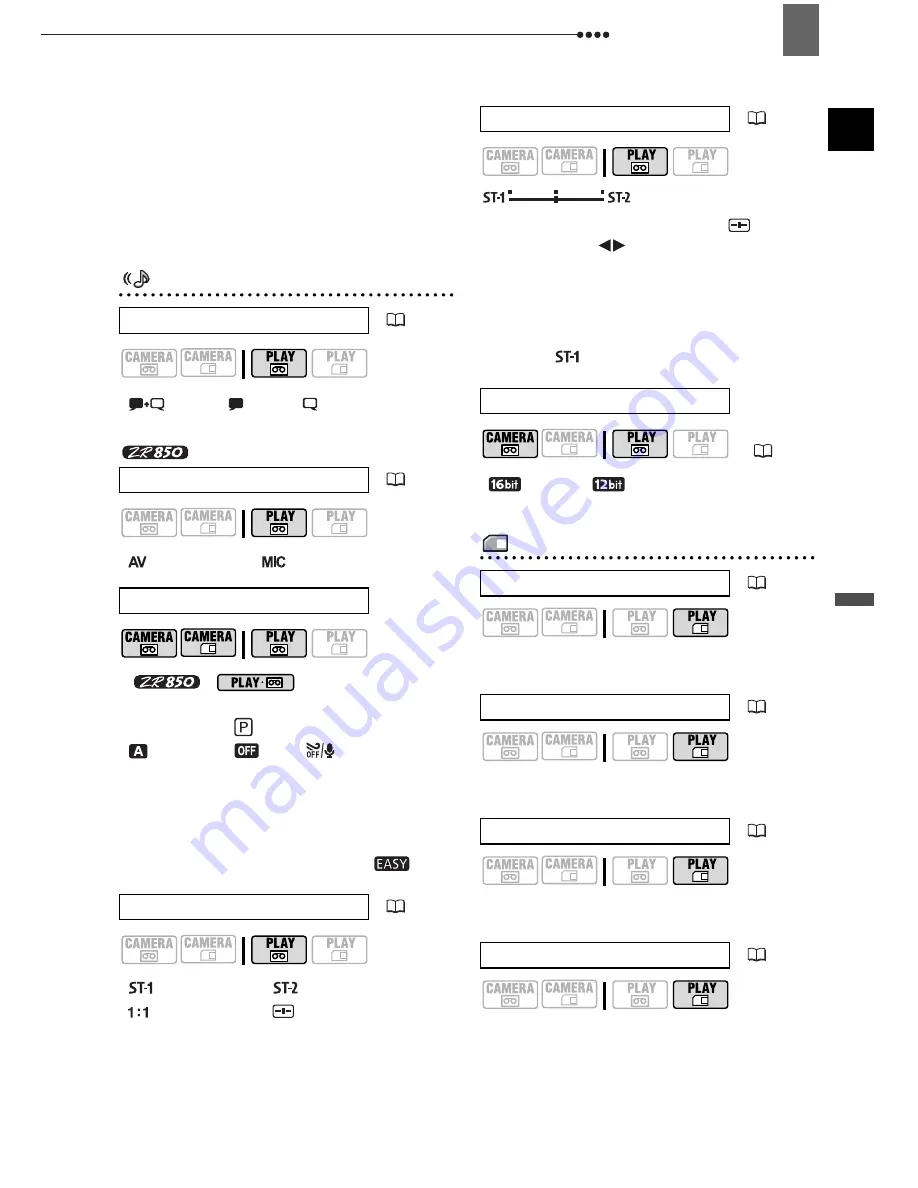
Audio Setup (Audio Mode, Wind Screen, etc.)

 AUDIO SETUP 

[


L/R]

, [

 L/L], [

 R/R]

[

 AUDIO IN]

, [

 MIC.IN]

 only when dubbing 

audio with the built-in microphone.
Mode switch: 

[

AUTO]

, [

OFF

]

The camcorder automatically reduces the 
background sound of wind when 
recording outdoors.


The wind screen cannot be turned off 

when the mode switch is set to 

.

[

 STEREO1]

, [

 STEREO2], 

[

MIX/FIXED], [

 MIX/VAR.]

When [12bit AUDIO] is set to [

 MIX/

VAR.], adjust (

) the sound balance 

with the joystick.


The camcorder will retain the audio 

balance adjustment, however if you turn 
off the camcorder, [12bit AUDIO] will be 
reset to [

 STEREO1].

[

16bit], 

[

12bit]

Card Operations (Initialization, Erase All Images, etc.)

 CARD OPERATIONS 

[NO], [YES]

[NO], [YES]

[NO], [YES]

[NO], [YES]

OUTPUT CH

 (

51)

AUDIO DUB.

 (

66)

WIND SCREEN

12bit AUDIO

 (

51)

*

MIX BALANCE 


(

51)

AUDIO MODE

(

50

)

PRINT ORD.ALL ERASE

 (

75)

TRANS.ORD.ALL ERASE

 (

72)

ERASE ALL IMAGES

 (

60)

INITIALIZE

 (

62)

Summary of Contents for ZR 830

Page 1: ...ual electronic version on PDF file For further details refer to the installation guide Veuillez lire aussi le manuel d instruction suivant version électronique sur fichier PDF Pour d autres détails référez vous au guide d installation Lea también el siguiente manual de instrucciones versión electrónica en archivo PDF Para mayores detalles refiérase a la guía de instalación Digital Video Software E...

Page 2: ...assette If the symptoms reappear shortly after the cleaning the videocassette may be defective Stop using it Availability differs from area to area Video heads may become dirty under the following conditions When using the camcorder in humid or hot places When using cassettes with damaged or dirty tape When using the camcorder in dusty places When using the video heads without cleaning them for a ...

Page 3: ...uipment does cause harmful interference to radio or television reception which can be determined by turning the equipment off and on the user is encouraged to try to correct the interference by one or more of the following measures Reorient or relocate the receiving antenna Increase the separation between the equipment and receiver Connect the equipment into an outlet on a circuit different from t...

Page 4: ...fall causing serious injury to a child or adult and serious damage to the product A product and cart combination should be moved with care Quick stops excessive force and uneven surfaces may cause the product and cart combination to overturn 18 Power Sources The product should be operated only from the type of power source indicated on the marking label If you are not sure of the type of power sup...

Page 5: ...ce technician has used replacement parts that are specified by Canon or that have the same characteristics as the original part Unauthorized substitutions may result in fire electric shock or other hazards 27 Safety Check Upon completion of any service or repairs to this product ask the service technician to perform safety checks to determine that the product is in safe operating order When replac...

Page 6: ...he Date and Time 27 Basic Functions Recording Recording Movies 28 Recording Still Images on the Memory Card 29 Recording Movie Clips on the Memory Card 30 Zooming 31 Quick Start Function 31 Playback Playing Back Movies 32 Returning to a Pre marked Position 33 Locating the End of the Last Scene 34 Locating Scenes by Recording Date 34 Playing Back Still Images and Movie Clips from a Memory Card 34 M...

Page 7: ...ding Movies 53 Capturing a Still Image or Movie Clip from the Playback Picture 54 Automatic Focus Priority 54 Other Functions Data Code 55 LED Light 56 Self Timer 56 Digital Effects 56 Editing Functions Still Image Options Erasing Still Images 60 Protecting Still Images 61 Initializing the Memory Card 62 External Connections Connecting to a TV or VCR Connection Diagrams 63 Playback on a TV Screen ...

Page 8: ...roubleshooting 77 List of Messages 80 Do s and Don ts Handling Precautions 83 Maintenance Others 86 Using the Camcorder Abroad 87 General Information System Diagram 88 Optional Accessories 89 Product Codes 91 Specifications 92 Index 94 ...

Page 9: ...is Manual Push the joystick up down left or right to select an item or change settings Press the joystick itself to save the settings or confirm an action On menu screens this is indicated by the joystick icon First Time Settings Changing the Language The language for on screen and menu displays can be changed The list of available languages depends on the region where you purchased the camcorder ...

Page 10: ...logo is a trademark The SDHC logo is a trademark Windows is a registered trademark of Microsoft Corporation in the United States and or other countries Macintosh and Mac OS are trademarks of Apple Computer Inc registered in the United States and other countries Other names and products not mentioned above may be trademarks or registered trademarks of their respective companies Recording movies Pla...

Page 11: ...uct online at www registercanon com 9 Protect your product We will keep the model number and date of purchase of your new Canon product on file to help you refer to this information in the event of an insurance claim such as loss or theft 9 Receive information on new products and promotions Upon your request we will send you information on Canon new products and promotions The serial number of thi...

Page 12: ...Left side view Front view Right Side View Lens cover switch 28 29 open closed CARD access indicator 29 30 CHARGE indicator 19 Speaker Memory card slot 22 AV terminal 63 USB terminal 68 DV terminal 63 68 Terminal cover Grip belt 22 Strap mount 90 Lock button switch 10 QUICK START button 31 Remote sensor 23 LED light assist lamp 56 Stereo microphone FUNC ...

Page 13: ...22 BATT battery release switch 19 LCD screen 23 Backup battery compartment 30 Start stop button 28 29 Serial number Battery attachment unit 19 DC IN terminal 19 D EFFECTS button 56 P SET button 72 FUNC button 24 37 Joystick 9 PHOTO button 29 Zoom lever 31 Mode switch 45 Easy recording Recording programs tape card switch 10 Cassette compartment 21 OPEN EJECT switch 21 Cassette compartment cover 21 ...

Page 14: ...AY FF STOP PAUSE SLOW AUDIO DUB ZERO SET MEMORY TV SCREEN START STOP button 28 CARD buttons 34 DATE SEARCH buttons 34 REW button 32 button 32 PAUSE button 32 SLOW button 32 AUDIO DUB button 66 ZERO SET MEMORY button 33 PHOTO button 29 Zoom buttons 31 PLAY button 32 FF button 32 STOP button 32 button 32 button 32 TV SCREEN button 42 ...

Page 15: ...cus 48 Image stabilizer 40 Recording mode 40 Tape operation Time code hours minutes seconds Remaining tape Remaining battery charge Widescreen 16 9 mode 40 Wind screen off 41 Audio recording mode 50 Remote sensor off 43 Backup battery warning Level marker 42 Recording reminder Operating mode 10 Audio playback mode 51 Search function display END SEARCH 34 DATE SEARCH 34 Movie size for capturing vid...

Page 16: ... may not appear Depending on the type of tape the remaining time displayed may not be correct In any case you will be able to record on the tape the number of minutes that appears on the videocassette s label for example 85 minutes Remaining battery charge When starts flashing in red replace the battery pack with a fully charged one When you attach an empty battery pack the power may turn off with...

Page 17: ... card 29 Still image quality size 52 Self timer 56 Number of still images available on the memory card Movie recording time available on the memory card Wind screen off 41 AF frame 54 Joystick guide 9 Camcorder shake warning 39 Viewing Still Images Slideshow 35 Image protection mark 61 Image number 44 Current image Total number of images Still image size Data code 55 Movie clip length movie record...

Page 18: ... still images at once Card Access Display is displayed next to the number of images available while the camcorder is writing on the memory card Movie recording time on the memory card Indicates the remaining time in hours minutes At less than 1 minute the remaining time will be displayed in 10 second steps at less than 10 seconds in 1 second steps Depending on the recording conditions the actual r...

Page 19: ...erminal The CHARGE indicator starts flashing The indicator will stay on when the charging is completed You can also use the compact power adapter without attaching a battery pack When the compact power adapter is connected even if a battery is attached its power will not be consumed ONCE THE BATTERY IS FULLY CHARGED 1 Disconnect the compact power adapter from the camcorder 2 Unplug the compact pow...

Page 20: ... 3 times longer than you think you might need U S A and Canada only The lithium ion polymer battery that powers this product is recyclable Please call 1 800 8 BATTERY for information on how to recycle this battery Charging Recording and Playback Times The times given in the table below are approximate and vary depending on the actual charging recording or playback conditions Approximate times for ...

Page 21: ...de facing out 4 Close the cover NOTES The backup battery has a life span of about a year flashes in red to inform you that it needs to be replaced Inserting and Removing a Tape Use only videocassettes marked with the logo 1 Slide fully in the direction of the arrow and open the cassette compartment cover The cassette compartment opens automatically 2 Insert the cassette Insert the cassette with th...

Page 22: ...erted TO REMOVE THE MEMORY CARD First push the memory card once to release it and then pull the card out IMPORTANT Make sure to initialize all memory cards before using them with this camcorder for the first time 62 Memory cards have front and back sides that are not interchangeable Inserting a memory card facing the wrong direction can cause a malfunction of the camcorder NOTES Proper operation c...

Page 23: ...holder Using the Wireless Controller Point the controller at the camcorder s remote sensor when you press the buttons NOTES The wireless controller may not work properly when the remote sensor is situated under strong light sources or direct sunlight If the wireless controller does not work check that WL REMOTE is not set to OFF 43 Otherwise replace the battery Adjusting the LCD Screen Rotating th...

Page 24: ...ffective usage time of the battery pack Using the Menus Many of the camcorder s functions can be adjusted from the menus that open after pressing the FUNC button For details about the available menu options and settings refer to Menu Options Lists 37 Selecting a FUNC Menu Option 1 Press 2 Select the icon of the function you want to change from the left side column 3 Select the desired setting from...

Page 25: ...u can also hold pressed down for more than 2 seconds to open directly the setup menus screen 3 Select the desired menu from the left side column and press The title of the selected menu appears on top of the screen and under it the list of settings 4 Select the setting you want to change and press An orange frame will indicate the menu item currently selected Menu items not available will appear g...

Page 26: ...Default value 1 Press 2 Select the icon and press to open the setup menus 3 Select DATE TIME SETUP and press 4 Select T ZONE DST and press The time zone setting appears The default setting is New York or Singapore depending on the region of purchase 5 Select your time zone and press To adjust for daylight saving time select the time zone with the mark next to the area 6 Press to close the menu Tim...

Page 27: ...press 4 Select DATE TIME and press Blinking arrows will be displayed around the first field of the date 5 Change each field of the date and time with the joystick s and move to the next field 6 Press to start the clock 7 Press to close the menu NOTES You can also change the date format 44 DATE TIME SETUP DATE TIME JAN 1 2007 12 00 AM FUNC 24 FUNC FUNC ...

Page 28: ...and release it The camcorder will play back a few seconds of the last recording made and return to record pause mode You can also hold the joystick pressed towards or towards to play back the tape reverse or forward respectively to locate the point where you want to start recording WHEN YOU HAVE FINISHED RECORDING 1 Close the lens cover and the LCD panel 2 Turn off the camcorder 3 Remove the tape ...

Page 29: ...ess than 0 01 of the pixels may occasionally misfire or appear as black red blue or green dots This has no effect on the recorded image and does not constitute a malfunction When using a tripod Do not leave the viewfinder exposed to direct sunlight as it may melt due to concentration of the light by the lens Do not use tripods with fastening screws longer than 5 5 mm 0 2 inch Doing so may damage t...

Page 30: ...E CLIP 7 Press to begin recording Press again to pause the recording SD SDHC memory cards You can record until CARD FULL appears approx 33 minutes with a 512 MB SD Memory Card MultiMedia cards The recording time is limited to 10 seconds at 320x240 or 30 seconds at 160x120 IMPORTANT Avoid the following actions while the card access display appears on screen and when the CARD access indicator is on ...

Page 31: ...ster in the record pause mode Keep at least 1 m 3 3 ft to the subject At wide angle you can focus on a subject as close as 1 cm 0 39 in Quick Start Function Using the Quick Start function you ll never have to miss out on those great and fleeting opportunities to take a picture or record video When you press instead of turning off the camcorder you can get it ready to start recording within approx ...

Page 32: ...the camcorder off and then on again The camcorder will shut off if left in the Quick Start ready mode for 30 minutes regardless of the POWER SAVE setting 43 To restore the power turn the camcorder off and then on again If you open the cassette compartment cover the camcorder will return to record pause mode Playback Playing Back Movies Play back the tape on the LCD display or close the LCD panel t...

Page 33: ...layback Slow Playback During normal or reverse playback press Double Speed Playback During normal or reverse playback press NOTES You can display the date and time of the recording 55 During some special playback modes you may notice some video problems blocky video artifacts banding etc in the playback picture To protect the tape and video heads the camcorder will enter the stop mode if left in p...

Page 34: ... NOTES End search cannot be used once you remove the cassette If there are blank sections between recordings the end search may not work correctly You cannot use the end search to locate the end of a scene that was audio dubbed Locating Scenes by Recording Date You can locate the change of the date time zone with the date search function Press or on the wireless controller Press more than once to ...

Page 35: ... memory card Do not disconnect the power source or turn off the camcorder Do not change the position of the switch or the operating mode The following may not be displayed correctly Images not recorded with this camcorder Images edited on or uploaded from a computer except for the sample images for the Card Mix function 58 Images whose file names have been changed Image Jump You can jump ahead to ...

Page 36: ... of the magnified area To further enlarge the image move the zoom lever toward T To reduce the magnification move the zoom lever toward W will appear for images that cannot be enlarged 2 Select the enlarged area of the picture with the joystick To cancel the magnification move the zoom lever toward W until the frame disappears IMPORTANT Movie clips on the memory card cannot be magnified While the ...

Page 37: ...switch AUTO DAYLIGHT TUNGSTEN SET Mode switch IMAGE EFFECT OFF VIVID NEUTRAL SOFT SKIN DETAIL LIGHT OFF LIGHT ON Mode switch D EFFECT OFF FADER EFFECT CARD MIX Mode switch D EFFECT OFF BLK WHT Mode switch D EFFECT OFF FADER EFFECT STILL I REC OFF S FINE 640x480 S NORMAL 640x480 MOVIE REC OFF 320x240 160x120 320x240 160x120 Menu Options Lists Recording programs 45 White balance 49 Image effect 50 L...

Page 38: ... the memory card This option will appear only when you press within the time set for the REVIEW option or immediately after recording the still image if set to OFF 0 99 COPIES Set a print order for a still image on the memory card TRANS ORDER OFF TRANS ORDER ON Set a transfer order for a still image on the memory card Still image size quality 52 Still image capturing 54 SPEAKER VOLUME 32 REC PAUSE...

Page 39: ...ed the camcorder will switch automatically to the digital zoom when you zoom in beyond the optical zoom range With the digital zoom the image is digitally processed so the image resolution will deteriorate the more you zoom in The digital zoom indicator will appear in light blue from 35x up to 105x and dark blue from 105x up to 1000x The digital zoom cannot be used with the NIGHT recording program...

Page 40: ...ble with the Video ID 1 system will automatically switch to wide 16 9 mode Otherwise change the aspect ratio of the TV manually To play back on a TV with normal aspect ratio 4 3 change the TV TYPE setting accordingly 40 ON OFF VCR Setup Recording Mode TV Type etc VCR SETUP STD PLAY LONG PLAY Recording in LP mode extends the available recording time on the tape 1 5 times Depending on the condition ...

Page 41: ... wind when recording outdoors The wind screen cannot be turned off when the mode switch is set to STEREO1 STEREO2 MIX FIXED MIX VAR When 12bit AUDIO is set to MIX VAR adjust the sound balance with the joystick The camcorder will retain the audio balance adjustment however if you turn off the camcorder 12bit AUDIO will be reset to STEREO1 16bit 12bit Card Operations Initialization Erase All Images ...

Page 42: ...nnected TV or monitor When the date and time are displayed on the camcorder s screen they will also appear on a connected TV regardless of the TV SCREEN setting Turn off the date time display with the DATA CODE setting 43 OFF LEVEL WHT LEVEL GRY GRID WHT GRID GRY You can display a grid or a horizontal line at the center of the screen The markers are available in white or gray Use the markers as a ...

Page 43: ...rts automatically when the camcorder is powered with the power adapter if you leave it turned on without loading a recording media for more than 5 minutes To cancel the demo mode once it started press any button turn off the camcorder or insert a videocassette System Setup Beep etc SYSTEM SETUP ON OFF Allows the camcorder to be operated with the wireless controller HIGH VOLUME LOW VOLUME OFF A bee...

Page 44: ... number following that of the last image recorded with the camcorder If the memory card you insert already contains an image with a larger number a new image will be assigned a number one higher than that of the last image on the memory card We recommend using the CONTINUOUS setting You can verify the current version of the camcorder s firmware This menu option is usually grayed out Date Time Setu...

Page 45: ... conditions SUNSET Use this mode to record sunsets in vibrant colors PORTRAIT The camcorder uses a large aperture achieving a focus on the subject while blurring other distracting details SNOW Use this mode to record in bright ski resorts It prevents the subject from being underexposed SPOTLIGHT Use this mode to record spotlit scenes SPORTS Use this mode to record sports scenes such as tennis or g...

Page 46: ...e a slow shutter speed in dark places you can obtain a brighter image but the image quality may be lower and the autofocus may not work well The image may flicker when recording with high shutter speeds Recording movies under fluorescent lights If the screen starts to flicker select PROGRAM AE and set the shutter speed to 1 100 The shutter speed resets to AUTO when you set the mode switch to or ch...

Page 47: ... too dark underexposed or subjects under very strong lights may appear too bright or glaring overexposed To correct this you can manually adjust the exposure POINTS TO CHECK Mode switch except for the FIREWORKS recording program 1 If the joystick guide does not appear on screen press to display it 2 Push the joystick towards EXP EXP on the joystick guide changes to light blue and the exposure adju...

Page 48: ...ush the joystick towards for a farther focal distance or push it towards for a closer focal distance Pushing the joystick towards FOCUS again will return the camcorder to autofocus 5 Push the joystick towards BACK to save the focus adjustment NOTES The camcorder will automatically return to autofocus when you set the mode switch to Infinity Focus Use this function when you wish to focus on faraway...

Page 49: ... Set D ZOOM to OFF 39 Readjust the white balance if the lighting conditions change Very rarely and depending on the light source may keep on flashing instead of staying on Even in that case the white balance would be properly adjusted and the results should be better than with AUTO Custom white balance may provide better results in the following cases Changing lighting conditions Close ups Subject...

Page 50: ...when you want the microphone to be as sensitive as possible 41 10 IMAGE EFFECT OFF Records with no image enhancing effects VIVID Emphasizes the contrast and color saturation NEUTRAL Tones down the contrast and color saturation SOFT SKIN DETAIL Softens the details in the skin tone area for a more complimentary appearance FUNC 24 Icon of the currently selected Image Effect Desired option FUNC FUNC A...

Page 51: ...recorded audio Stereo 1 POINTS TO CHECK Options Default value When you select MIX VAR adjust the mix balance with the MIX BALANCE setting 41 10 L R Left and Right channels stereo Main Sub signals bilingual L L Left channel only stereo Main signal only bilingual R R Right channel only stereo Sub signal only bilingual FUNC 24 MENU AUDIO SETUP OUTPUT CH Desired option FUNC FUNC 10 STEREO1 Original so...

Page 52: ... the current quality size setting NOTES Depending on the number of images on the memory card Windows more than 1 800 images Macintosh more than 1 000 images you may not be able to download images to a computer Try using a card reader Connection to a PictBridge compatible printer will not work when the memory card contains more than 1 800 images For best performance we recommend to keep the number ...

Page 53: ...image will be S 640x480 and cannot be changed but the quality of the still image can be selected POINTS TO CHECK Select the size and quality of the still image in record pause mode before you start recording Default value The number displayed on the right corner indicates the approximate number of images that can be recorded with the current quality size setting TO CAPTURE THE STILL IMAGE While yo...

Page 54: ...de of the captured still image movie clip will reflect the date and time when it was recorded on the memory card Automatic Focus Priority When the focus priority is activated the camcorder records a still image only after the focus has been adjusted automatically When the mode switch is set to you can also select the AF autofocus frame Options Default value Except for the FIREWORKS recording progr...

Page 55: ... the date and time of recording You can select the data to be displayed Options Default value FUNC 24 MENU CAMERA SETUP FOCUS PRI Desired option FUNC FUNC Other Functions OFF No data code display DATE TIME Displays the date or time when the scene or still image was recorded DATE TIME Displays both the date and time of the recording FUNC 24 MENU DISPLAY SETUP DATA CODE Desired option FUNC FUNC ...

Page 56: ...l image after a 10 second countdown The countdown appears on the screen 2 seconds when using the wireless controller NOTES Once the countdown has begun you can also press when recording movies or press fully when recording still images to cancel the self timer The self timer will also be canceled if you turn off the camcorder Digital Effects FADER Faders Begin or end scenes with a fade to or from ...

Page 57: ...ng The icon of the selected effect appears Applying 1 Press to activate the fader effect The icon of the selected effect turns green Press again to deactivate the fader effect TO FADE IN Press in record pause mode then press to start recording with a fade in in playback pause mode then push the joystick towards to fade in and start the playback BLK WHT black and white SEPIA ART MOSAIC BALL CUBE WA...

Page 58: ...d DIGITAL VIDEO SOLUTION DISK and combine it with your live video recording to add a note of playfulness to your movies The card mix combines illustrations or titles with your recordings The live video recording will appear instead of the light area of the card mix image Mix level adjustment Light area of the still image POINTS TO CHECK Upload to the memory card a sample image from the supplied DI...

Page 59: ...Other Functions Advanced Functions 59 Applying Press changes to green and the combined image appears Still images cannot be recorded on the memory card while the Card Mix function is activated D EFFECTS ...

Page 60: ...ide does not appear on screen press to display it 2 Select the image you want to erase 3 Push the joystick towards to erase the image 4 Select ERASE and press Erasing a Single Image Just After Recording You can erase the last recorded still image while reviewing it within the time set for the REVIEW option or immediately after recording it if REVIEW is set to OFF While reviewing the image immediat...

Page 61: ...age not during playback Protecting a Single Image appears and the image cannot be erased To cancel the image protection select PROTECT OFF instead Protecting a Single Image Just After Recording You can protect the last recorded still image while reviewing it within the time set for the REVIEW option or immediately after recording it if REVIEW is set to OFF appears and the image cannot be erased To...

Page 62: ...You may also have to initialize a card if you get the CARD ERROR message or you may choose to do so to erase all data recorded on it IMPORTANT Initializing the memory card will erase all still images and movie clips even the protected ones The original image files cannot be recovered Initialize all memory cards before using them with this camcorder 10 FUNC 24 CARD OPERATIONS PROTECT Bring the curs...

Page 63: ...he Camcorder Connecting Cable Terminal on the Connected Device 1 VIDEO AUDIO R L Output connection Signal Flow to a TV or VCR with AV Terminals Input connection Audio only Signal flow from an analog source for audio dubbing STV 250N Stereo Video Cable Supplied Yellow White Red 2 Output connection Signal Flow to an HDTV with a DV IEEE1394 terminal Input connection Signal Flow from a TV or other dig...

Page 64: ...s with virtually no generation loss in video and sound quality Connect the camcorder to the external device following one of the connection diagrams shown in the previous section Connection Diagrams 63 Connecting Connect the camcorder to a VCR or other analog device using connection type or to a DVD recorder or other digital recording device using connection type as shown in the previous section C...

Page 65: ...n the camcorder s screen 6 When the scene you wish to record appears push the joystick towards to begin recording Recording starts 7 While recording push the joystick towards to pause the recording In record pause push the joystick towards again to resume recording 8 Push the joystick towards to stop recording 9 Connected device Stop the playback IMPORTANT Blank sections may be recorded as anomalo...

Page 66: ...Refer also to the instruction manual of the connected device TO SELECT THE AUDIO SOURCE Options Default value Dubbing POINTS TO CHECK You can only dub audio on tapes recorded in SD mode with 12bit audio This function is operated with the wireless controller 1 Locate the scene you wish to start audio dubbing Before locating the starting point you can also set the zero set memory 33 at the point whe...

Page 67: ... a tape that was not recorded with this camcorder or after having dubbed audio over the same scene more than 3 times NOTES While dubbing audio using the built in microphone You can connect the camcorder to a TV to check the picture on the TV screen and check the sound through headphones connected to the TV While dubbing audio using an external audio device You can check the picture on the camcorde...

Page 68: ...inal on the Camcorder Connecting Cable Terminal on the Connected Device 1 Output connection Signal Flow to a computer with a DV IEEE1394 terminal or a DV capture board DV Cable Commercially available 4 pin 6 pin Be careful to correctly insert the 6 pin plug into the DV terminal Inserting it in the wrong direction can result in damage to the camcorder 2 Output connection Signal Flow to a PC or Pict...

Page 69: ...ter using a DV cable make sure that the camcorder and computer are not connected with a USB cable and that no other IEEE1394 device is connected to the computer Depending on the video editing software you may need to set the switch on the camcorder to a mode other than PLAY Refer to the instruction manual of the editing software NOTES We recommend powering the camcorder using the compact power ada...

Page 70: ...ng on the software and the specifications settings of your computer The image files on your memory card are valuable original data files If you wish to use the image files on your computer make copies of them first and use the copied file retaining the original NOTES We recommend powering the camcorder using the compact power adapter Refer also to the computer s instruction manual Users of Windows...

Page 71: ...ER The selected image is transferred to the computer and displayed as the desktop s background Press to return to the transfer menu NOTES When the camcorder is connected to the computer and the image selection screen is displayed press to return to the transfer menu Transfer Orders You can mark the still images you want to transfer to the computer as a transfer order You can set transfer orders fo...

Page 72: ...he camcorder to the printer using the USB connection connection type 68 shown in the previous section PC Connection Diagrams appears and changes to IMPORTANT If continues to flash for more than 1 minute or if does not appear the camcorder is not correctly connected to the printer In such case disconnect the USB cable and turn off the camcorder and the printer After a short while turn them on again...

Page 73: ...on the same sheet by selecting 2 UP or 4 UP When you are using the specially designed wide sized photo paper you can set the paper size to DEFAULT and print 2 or 4 copies on the same sheet by selecting 2 UP or 4 UP PAPER PAPER SIZE Available paper sizes vary depending on the printer model PAPER TYPE Select PHOTO FAST PHOTO or DEFAULT PAGE LAYOUT Select DEFAULT or one of the following available pag...

Page 74: ...y select CONTINUE and press If CONTINUE cannot be selected select STOP press and retry printing Refer also to the printer s instruction manual for details If the error still persists and printing does not restart disconnect the USB cable and turn off the camcorder and the printer After a short while turn them on again set the camcorder to mode and restore the connection WHEN YOU HAVE FINISHED PRIN...

Page 75: ... order set the number of copies to 0 Setting Print Orders from the Index Screen Move the zoom lever toward W to enter the still image index screen and the number of copies appear on images marked with a print order To cancel the print order set the number of copies to 0 After closing the menu the camcorder returns to the index screen Erasing All Print Orders 10 FUNC 24 PRINT ORDER Select the numbe...

Page 76: ...t any print orders 4 Make sure that PRINT is selected and press Printing starts The print setting menu disappears when the printing is completed NOTES Depending on the connected printer you can change some print settings before step 4 73 Cancel Printing Printing Errors 74 Restarting Printing Open the print menu as explained in steps 2 3 above Select RESUME in the print setting menu and press The r...

Page 77: ... once the battery pack temperature is below 40 C 104 F The battery pack is damaged Use a different battery pack If you connect a faulty power adapter or battery pack the CHARGE indicator flashes approx twice per second and the charging stops Check that the compact power adapter is correctly connected to the camcorder Problem Solution Buttons will not work Turn on the camcorder Load a cassette 21 A...

Page 78: ... the time zone date and time 21 Pressing the start stop button will not start recording Set the camcorder to 28 Load a cassette 21 Tape reached the end END appears on the screen Rewind the tape or replace the cassette 21 Cassette is protected flashes on the screen Change the position of the protect switch 84 Camcorder will not focus Autofocus does not work on that subject Focus manually 48 If you ...

Page 79: ...as not initialized Initialize the memory card 62 The folder and file numbers have reached their maximum value Set FILE NOS to RESET and insert a new memory card 44 Memory card cannot be played back Set the camcorder to 34 Image cannot be erased Image is protected Cancel the protection 61 The write protect switch on an SD or SDHC memory card is set to prevent accidental erasure Change the position ...

Page 80: ...tape or replace the cassette CHECK THE CASSETTE REC MODE You attempted to dub audio on a tape recorded in a recording mode other than SP 66 CHECK THE CASSETTE AUDIO MODE You attempted to dub audio on a tape recorded with an audio mode other than 16bit 66 CHECK THE CASSETTE BLANK You attempted to dub audio on a tape with a blank section 66 CHECK THE CASSETTE INCORRECT TAPE SPECIFICATION You attempt...

Page 81: ...pted or it was saved using a compression method other than that compatible with this camcorder JPEG TRANSFER ORDER ERROR You attempted to set more than 998 transfer orders 71 PRINT ORDER ERROR You attempted to set more than 998 still images in the print order 75 CANNOT TRANSFER You attempted to transfer a still image that cannot be displayed with this camcorder THIS IMAGE CANNOT BE RECORDED Some a...

Page 82: ...After a while turn the printer back on and reconnect the USB cable Check the printer status HARDWARE ERROR Cancel printing Turn off the printer and turn it back on Check the printer status If the printer is equipped with a battery it might be exhausted In such case turn off the printer replace the battery and turn it back on COMMUNICATION ERROR The printer is experiencing a data transfer error Can...

Page 83: ...e or the day before to ensure a full charge Attach the terminal cover whenever a battery pack is not in use Contact with metallic objects may cause a short circuit and damage the battery pack Dirty terminals may cause a poor contact between the battery pack and the camcorder Wipe the terminals with a soft cloth Since storing a charged battery pack for a long time about 1 year can shorten its lifec...

Page 84: ... as this may damage the cassettes With cassettes equipped with a memory function metal plated terminals may become dirty with use Clean the terminals with a cotton swab after about 10 times of removing and reinserting the cassette The memory function is not supported by the camcorder Protecting Tapes from Accidental Erasure To protect your recordings from accidental erasure slide the tab on the ca...

Page 85: ...ery case may break and the battery fluids may cause internal damage Do not disassemble heat or immerse the battery in water to avoid the risk of explosion For California USA only Included lithium battery contains Perchlorate Material special handling may apply See www dtsc ca gov hazardouswaste perchlorate for details WARNING The battery used in this device may present a fire or chemical burn haza...

Page 86: ...screen when the temperature changes suddenly Wipe it with a soft dry cloth Storage If you do not intend to use the camcorder for a long time store it in a place free of dust in low humidity and at temperatures not higher than 30 C 86 F Condensation Moving the camcorder rapidly between hot and cold temperatures may cause condensation water droplets to form on its internal surfaces Stop using the ca...

Page 87: ...ets to evaporate will vary depending on the location and weather conditions After the condensation warning stops flashing wait for 1 more hour before resuming use Using the Camcorder Abroad Power Sources You can use the compact power adapter to operate the camcorder and to charge battery packs in any country with power supply between 100 and 240 V AC 50 60 Hz Consult the Canon Service Center for i...

Page 88: ...tereo Video Cable CA 590 Compact Power Adapter Commercially available DV Cable SC 2000 Soft Carrying Case WS 20 Wrist Strap SS600 SS650 Shoulder Strap SD SDHC Memory Card MultiMediaCard NB 2L NB 2LH BP 2L5 BP 2L12 BP 2L14 Battery Pack TV Computer VCR DVD Recorder Digital Device with DV Terminal MiniDV Video Cassette WL D85 Wireless Controller Card Adapter Reader Writer PictBridge Compatible Printe...

Page 89: ...ger to charge battery packs on the move The car battery cable plugs into your car s cigarette lighter and runs off a 12 24 V DC negative ground battery Optional Accessories Use of genuine Canon accessories is recommended This product is designed to achieve excellent performance when used with genuine Canon accessories Canon shall not be liable for any damage to this product and or accidents such a...

Page 90: ...th of the strap WS 20 Wrist Strap Use this for extra additional protection for active shooting SC 2000 Soft Carrying Case A handy camcorder bag with padded compartments and plenty of space for accessories This mark identifies genuine Canon video accessories When you use Canon video equipment we recommend Canon brand accessories or products bearing the same mark ...

Page 91: ...eo Cable 3067A002AA D82 0590 201 IFC 300PCU USB Cable 6906A001AA Optional Accessories BP 2L12 Battery Pack 7871A002AA BP 2L14 Battery Pack 9582A002AA NB 2L Battery Pack 7302A001AA CB 2LW Battery Charger 0763B001AA CBC NB2 Car Battery Charger 7873A002AA WS 20 Wrist Strap 3118A002AA D81 0190 202 SC 2000 Soft Carrying Case 9389A001AA DVM CL DV Cleaning Cassette 3134A002AA D36 0032 201 ...

Page 92: ...90 minutes LCD Screen 2 7 in wide TFT color approx 112 000 pixels Viewfinder 0 35 in wide TFT color approx 114 000 pixels Microphone Stereo electret condenser microphone Lens f 2 6 91 mm F 2 0 5 0 35x power zoom 35 mm equivalent 16 9 Movies Image stabilizer ON 47 1 1 649 16 9 Movies Image stabilizer OFF 41 7 1 460 4 3 Movies 44 6 1 561 Still images 41 5 1 453 35 mm equivalent 16 9 Movies Image sta...

Page 93: ... shooting is used and optimized yielding extremely high quality prints Input Output Terminals AV Terminal 3 5 mm minijack Video output only Audio input output output only Video 1 Vp p 75 ohms unbalanced Audio output 10 dBV 47 kohms load 3 kohms or less Audio input 10 dBV 40 kohms or more only DV Terminal 4 pin IEEE1394 standard input output USB Terminal mini B Power Others Power supply rated 7 4 V...

Page 94: ...igital effects 56 Digital video input DV dubbing 65 Digital zoom 39 Direct print 72 Direct transfer 69 DV terminal 63 68 E Easy recording recording program 45 Effects 57 End Search 34 Erasing still images movie clips 60 Error messages 80 F Faders 56 File numbers 44 Fireworks recording program 45 Focus 48 Focus priority 54 FUNC menu 24 37 G Grip belt 23 I Image effects 50 Image jump 35 Image stabil...

Page 95: ...arkers 42 SD SDHC card 22 84 Selecting the on screen displays 55 Self timer 56 Serial number 12 Setup menus 25 Shoulder strap 90 Shutter speed 46 Simultaneous recording tape memory card 53 Slideshow 35 Snow recording program 45 SP mode 40 Sports recording program 45 Spotlight recording program 45 Still image quality 52 Still image size 52 Sunset recording program 45 T Telephoto 31 Time zone 26 Tra...

Page 96: ...o follow operating instructions B If the equipment is defective as a result of leaking batteries sand dirt or water damage C If defects or damages are caused by the use of unauthorized parts or by service other than our authorized agent D If the equipment is used for commercial or industrial use This Limited Warranty does not cover cabinet exterior finish video cassette tape head cleanings nor doe...

Page 97: ...gital video equipment is used for commercial professional or industrial purposes This limited warranty does not cover the cabinet exterior finish of the digital video equipment video cassette tapes head cleanings nor does it apply to digital video equipment purchased outside Canada TO OBTAIN WARRANTY SERVICE Ship your Canon digital video equipment in its original carton box or equivalent properly ...

Page 98: ...on Center toll free at 1 800 828 4040 CANADA only Q Si vous avez des questions veuillez téléphoner sand frais au Canada 1 800 828 4040 CANADA seulement MEXICO CANON MEXICANA S DE R L DE C V Periferico Sur No 4124 Col Ex Rancho de Anzaldo C P 01900 México D F México CANON U S A INC NEW JERSEY OFFICE 100 Jamesburg Road Jamesburg NJ 08831 USA CENTRO Y CANON LATIN AMERICA INC SURAMÉRICA 703 Waterford ...

Page 99: ... enclosed CD ROM before connecting the video camcorder to your computer with this cable STOP Veillez ainstaller Ie logiciel apartir du CD fourni avant de brancher Ie cable de connexion du camescope aI ordinateur iATENCION Asegurese de haber instalado el software que contiene el CD ROM antes de conectar la videocamera al ordenador con este cable ...

Page 100: ......

Page 101: ...E Digital Video Software Version 24 Instruction Manual Canon Fiease select the area in which you live USA Canada South America Europe Middle East Africa Asia Oceania Exit ...

Page 102: ...Auto Downloading 29 Auto Downloading Settings 30 Downloading the Selected Still Images from the CameraWindow 33 Using a Card Reader Writer 36 Using the Camcorder to Download Still Images Direct Transfer Function 37 Setting the Direct Transfer Download Destination Folder 37 Direct Transfer 38 Printing Still Images 39 Printing Still Images Recorded on the Memory Card 39 Printing Still Images Downloa...

Page 103: ...Images to the Memory Card 77 Using Various Functions 80 Attaching Still Images to E mail Messages 80 Running a Slide Show 83 Adding Sound to a Still Image 85 Reviewing and Changing the Owner Name of the Camcorder 86 Uninstalling the Software 88 Uninstalling ZoomBrowser EX 88 Uninstalling the TWAIN Driver WIA Driver 89 Troubleshooting 90 ...

Page 104: ...cknowledgments QuickTime is a trademark of Apple Computer Inc Microsoft and Windows are either registered trademarks or trademarks of Microsoft Corporation in the United States and or other countries and are trademarks of SD Card Association Other names and products not mentioned above may be registered trademarks or trademarks of their respective companies Canon Inc 2007 All rights reserved Safet...

Page 105: ...teed on an OS that has been upgraded from a previous version Computer Model Computers that come with above OS preinstalled and have built in USB ports CPU Pentium 500 MHz or better RAM Windows 98 Windows Me 128 MB or more Windows 2000 Windows XP 256 MB or more Interface USB only preinstalled Windows 98 Windows Me Windows 2000 Windows XP systems with built in USB ports Free Hard Disk Space Canon Ut...

Page 106: ...your computer Viewing still images recorded on a memory card Printing still images recorded on a memory card without downloading the still images to the computer USB Driver Driver software that enables you to download still images from a memory card to a computer Users of Windows XP do not need to install this driver software An OS standard driver will be installed automatically Windows 98 Windows...

Page 107: ...mote capture function is not supported by the camcorder Acquire Images Tab This tab is used for downloading still images recorded on the memory card by connecting a camcorder or a card reader writer to the computer Camera Control window Images will be downloaded to the computer and ZoomBrowser EX starts Images in the camcorder are displayed allowing you to select images Placing a check mark here m...

Page 108: ... Images Recorded on the Memory Card 39 Prints all still images in the card one image per page Prints all still images in the card as an index page rows of images with file names and image information Prints according to the DPOF print settings set by the camcorder to the still images recorded on the card Displays a list of the still images in the card allowing you to select which ones to print Cam...

Page 109: ...he My Camera window If you click Creating My Camera data in the My Camera window My Camera Maker will be launched My Camera Maker is a program that enables you to create and import My Camera contents Start up images Start up sound Shutter sound Operation sound and Self timer sound to camcorders that support this function Your camcorder does not support the My Camera function Uploading the images f...

Page 110: ... 9 images The sample images used on this instruction manual are normal size still images 4 3 Prints the selected still images Starts ZoomBrowser EX Selects the still image selection method Changes the size of the thumbnail Selects whether to show or hide the image frame and file name Still image information and a histogram This will not be displayed when using a card reader writer ...

Page 111: ...u 1 Task Area Acquire Camera Settings Use this to display the Camera Control window to download still images to print still images without having them downloaded to the computer and to configure the camcorder settings View Classify Use this to view and organize still images Edit Use this to edit still images Export Use this to change the data for still images and save them as new files extract sti...

Page 112: ... on different images while holding down the Ctrl key selects multiple images 4 Browser Area Tool Bar The menu items vary depending on the View Mode When the All Folders tab is selected Select a folder and click Add to Favorites When the Favorite Folders tab is selected Click Add and select a folder 1 Previous Next Displays the previous next image in the current folder 2 Up Displays the folder in t...

Page 113: ...rences from the Tools menu opens the Preferences window on which you can select the hierarchy of folders In the screenshot below Maximum scroll mode folder depth hierarchy of folders is set to two Preview Mode Double clicking the folders at the bottom of the window opens the folder and shows a large still image in the folder along with detailed information You can change file name and comments To ...

Page 114: ...t a different image while the Properties window is open the information switches to the one of the selected image The Properties window cannot be displayed in Preview Mode 3 Slide Show Displays still images in a slide show 4 Search Allows you to search for images 53 5 Delete Deletes selected images 6 Rotate Rotates selected still images A movie cannot be rotated 1 2 3 4 5 6 ...

Page 115: ...s red eye correction auto correct color and brightness correction sharpness adjustment trimming inserting texts or registering external image editing applications 6 Auto Focus Frame This function cannot be used for the images recorded by the camcorder 7 Shooting Information The shooting information of the image will be displayed 8 Show Allows you to display multiple images at the same time 9 Synch...

Page 116: ...window 13 Show Image Full Screen Displays an image in full screen size 14 Change the Star Rating Allows you to change the star rating 15 Capturing Frames Extracts still images from movies Windows XP only 1 Auto Mode Clicking Start corrects the red eye effect automatically 2 Manual Mode Point the cursor on a red eye so that the area is highlighted green and left click the mouse 1 2 ...

Page 117: ...t allows you to automatically correct the color balance of the still image Color Brightness Adjustment Window Selecting Color Brightness Adjustment from the Edit menu or clicking the icon and selecting Color Brightness Adjustment allows you to adjust the brightness saturation contrast intensity levels tone curve and RGB of the still image ...

Page 118: ...e icon and selecting Sharpness allows you to emphasize and clarify the outlines of people and objects Trim Image Window Selecting Trim from the Edit menu or the icon allows you to crop a still image Either drag the mouse on the image or specify the cropping area and click Trim Image ...

Page 119: ...indow Selecting Insert Text from the Edit menu or clicking the icon and select Insert Text allows you to write text on still images These image correction tools can be selected by clicking Edit Edit Image in Task Area of the Main Window ...

Page 120: ...amcorder until you can download still images Still images protected on the camcorder may lose this setting once they are downloaded to the computer 1 Check a camcorder is not connected to the computer While a camcorder is connected to the computer the software cannot be installed normally If a camcorder is connected detach the USB cable from the computer 2 Set the DIGITAL VIDEO SOLUTION DISK in th...

Page 121: ...e Digital Video Software Windows 5 Click Digital Video Software Easy Installation To select the installing software click Custom Installation 6 If other software is running close all programs and click OK Installer Panel ...

Page 122: ...all the appropriate driver Windows 98 Windows 2000 Canon DV TWAIN Driver Windows Me Canon DV WIA Driver Windows XP No driver is necessary to be installed When installing the software on Windows 2000 or XP by selecting Easy Installation EOS Utility a software for downloading still images from the Canon EOS Digital SLR Cameras will be installed This software is used only for compatible Canon EOS Dig...

Page 123: ...23 E Installing the Digital Video Software Windows 8 Read the license agreement and click Yes to accept the terms and to start installation 9 Click OK ...

Page 124: ... 11When the computer has restarted and the regular desktop screen is displayed remove the DIGITAL VIDEO SOLUTION DISK from the CD ROM drive When installation is complete remove the DIGITAL VIDEO SOLUTION DISK before you connect the camcorder to the computer Windows 98 Windows Me Windows 2000 At this point the files for the TWAIN Driver or WIA Driver have only been copied to your computer To downlo...

Page 125: ... go into standby sleep mode while a camcorder is connected via the USB interface Refer to your computer manual for the location of the computer s USB ports See your camcorder instruction manual for connecting instructions 1 Insert a memory card containing images into the camcorder 2 Connect the power adapter to the camcorder 3 Turn the POWER switch to PLAY and move the TAPE CARD switch to CARD Wai...

Page 126: ...Images For instructions on how to start ZoomBrowser EX and download images to the computer see Downloading Still Images ZoomBrowser EX 27 USB Cable USB Terminal on the Camcorder Camcorder End Computer End USB Port on the Computer ...

Page 127: ...oaded to the hard disk are important original data files Create a copy of the file first before working on it on your computer Do not rotate the image in the Windows Picture and Fax Viewer or in the explorer view The data for the original image will be changed and the image can no longer be displayed in ZoomBrowser EX or on the camcorder If the Server Busy window appears when you connect the camco...

Page 128: ...ng you to select the camcorder model Confirm that Canon Camera or your camcorder model name is displayed and click OK The Camera Control window opens If the camcorder is already connected to the computer you can start the CameraWindow and display the Camera Control window by clicking Acquire Camera Settings followed by Connect to Camera in the ZoomBrowser EX Main Window The Remote shooting functio...

Page 129: ...an select a downloading method in the Camera Control window Auto Downloading 1 Click Starts to download images in the Camera Control window For instructions on how to set the Auto download settings see Auto Downloading Settings 30 Click Finish to close the Camera Control window after downloading images ...

Page 130: ...ings Select the setting for downloading images by operating your computer You can change the image type and the destination folder 1 In the Camera Control window click the Acquire Images tab and click Preferences 2 Select Change auto download settings and click Next ...

Page 131: ...ed and click Next 4 Specify the destination folder settings and click Next Place a check mark here if you wish the original image in the camcorder to be deleted after downloading Click this button to specify the destination folder Destination Folder Select to specify the name of the subfolder ...

Page 132: ... process to perform after the image is downloaded Below window will be displayed when you select Perform selected processes consecutively You can redisplay the window by clicking Select Select a process to perform after the image is downloaded and click OK ...

Page 133: ...wnloading the Selected Still Images from the CameraWindow 1 Click Lets you select and download images in the Camera Control window The CameraWindow opens Placing a check mark here makes images in the camcorder to be automatically downloaded when the camcorder is connected ...

Page 134: ... images Clicking on different images while holding down the Ctrl key selects multiple images 3 Confirm the settings and click Starts Download ZoomBrowser EX starts and the downloaded images appear in the Main Window To make changes click Change Settings A blue frame appears around the selected image Settings for the file prefix and the consecutive numbers Setting for the folder and the subfolder f...

Page 135: ...35 E Downloading Still Images ZoomBrowser EX Windows Specify Folder Tab Specify File Name Tab Specify the settings of the folder and subfolder Specify the file name at which to save the images ...

Page 136: ...indows 2000 Click the Windows Start menu and select Programs Canon Utilities CameraWindow CameraWindowMC and CameraWindow Windows XP When a window appears allowing you to select an application program to start select View Download Images using Canon CameraWindow and click OK Clicking Acquire Camera Settings Acquire Images from Memory Card in the Task Area of the Main Window of ZoomBrowser EX also ...

Page 137: ...ction If your camcorder supports the Direct Transfer Function you can use the camcorder to download images Setting the Direct Transfer Download Destination Folder 1 In the Camera Control window click the Acquire Images tab and click Preferences 2 Select Change direct transfer download destination folder and click Next ...

Page 138: ... the action that is carried out for direct transfer Right click the CameraWindow Launcher icon on the taskbar and select an action from the displayed menu Show image s in fullscreen mode Displays downloaded images in full screen mode Launch ZoomBrowser EX Starts ZoomBrowser EX after downloading the images Show Window The Camera Control window appears when you connect the camcorder to the computer ...

Page 139: ...act Sheet with All Photos Prints all still images recorded on a memory card in the connected camcorder or in a card reader writer in an index rows of images with file names and image information Print according to DPOF settings Prints according to the DPOF print settings set by the camcorder Select an image and print A list of the still images recorded on a memory card in the connected camcorder o...

Page 140: ...40 Printing Still Images 3 Click one of the 4 printing methods 4 Specify the print settings and click Print The window varies depending on the selected printing method in step 3 ...

Page 141: ... still image Selects the printer Sets the paper size and orientation Sets the auto trim crops image edges according to the page proportions or borderless print settings Sets the shooting date time imprint and color settings Click this button to switch between still images if multiple images are selected Sets the number of print copies of the displayed image ...

Page 142: ...ed in the previous section When you have selected Print All Photos 41 will be displayed Rotates still images Click this to use the trimming function crops a portion of the still image Selects the printer Sets the paper size and orientation Click these buttons to switch between pages Sets the print settings for shooting information comments headers footers and page numbers Sets the number of print ...

Page 143: ... print and click Print If you selected Contact Sheet Print the same window described in the previous section When you have selected Print Contact Sheet with All Photos 42 will be displayed If you selected One Photo Per Page Print the same window described in the previous section When you have selected Print All Photos 41 will be displayed instead Set the print settings and print the still images ...

Page 144: ... one still image per page Index Print Prints selected images in rows with file names and image information You can select the program to use for printing by clicking Print in the Main Window and selecting Print Using Other Software One Photo per Page Print 1 Click Print in the Main Window and click One Photo per Page Print 2 Select still images you wish to print and click Printer and Layout Settin...

Page 145: ... Selects the printer Click this to use the trimming function crops a portion of the still image Rotates still images Sets the shooting date time imprint and color settings Sets the auto trim crops image edges according to the page proportions or borderless print settings Sets the paper size and orientation Sets the number of print copies of the displayed image ...

Page 146: ...46 Printing Still Images Index Print 1 Click Print in the Main Window and click Index Print 2 Select the still images you wish to print and click Printer and Layout Settings ...

Page 147: ...ects the printer Click this to use the trimming function crops a portion of the still image Rotates still images Sets the print settings for shooting information comments headers footers and page numbers Sets the paper size and orientation Sets the number of print copies of the contact sheets Sets the number of rows and columns ...

Page 148: ...wser Window The keyword can be used as one of the search conditions 1 Select the image to which you wish to apply the Star Rating or Keyword and select View Modify Keywords from the Tools menu 2 Place a check mark next to the keyword you wish to apply or click on the stars for rating The default setting of the Star Rating is two stars You can add and delete keywords or change the keyword list in t...

Page 149: ... the Images This task allows you to classify selected images according to the shooting date 1 Click View Classify in the Main Window 2 Click Classify into Folder 3 Select the images you wish to classify and click Specify Classification Settings ...

Page 150: ...50 Organizing Images 4 Specify the folder structure and the saving folder and click Finish The selected images are classified into the specified folder ...

Page 151: ... Files This task allows you to rename multiple files at the same time or to rename and copy multiple files 1 Click View Classify in the Main Window 2 Click Rename Multiple Files 3 Select the images you wish to rename and click Specify Rename Settings ...

Page 152: ...ish To rename a folder select a folder and open the Rename Folder window by selecting Rename from the File menu Input the new name and click OK Placing a check mark here makes copies of images with new names The name of the original images will not be changed ...

Page 153: ...ages by Star Rating Modification Date Shooting Date Comment or Keywords 1 Click View Classify in the Main Window You can also search for images by clicking Search on Application Tool Bar Please skip forward to step 3 2 Select folders and images from which you wish to search and click Search ...

Page 154: ...conditions and click Start Search The search results are displayed as thumbnails Select at least one search condition 4 Click Finish To change the search parameters and perform another search click Specify Search Conditions and repeat steps 3 4 ...

Page 155: ...h Results folder You can print or copy these images to another folder The searched images will remain in this folder until ZoomBrowser EX is closed or another search is performed but if you delete an image in this folder the corresponding original image will be deleted as well Folders Area ...

Page 156: ...ave them as new files If you are not using Windows XP QuickTime 6 5 or higher is required to edit movies If it is not already installed on your computer install it from the DIGITAL VIDEO SOLUTION DISK Place the disk in the CD ROM drive and click QuickTime 6 5 Install in the installer panel If you have an AVI file in your computer you can use this function to edit the file 1 Click Edit in the Main ...

Page 157: ...r 4 Arrange images and click Apply Effect To change the order of images select an image in the Storyboard Area and click Move Left or Move Right Storyboard Area Displays thumbnails of the selected images The images will be linked from left to right Transition Box Displays the symbol of the transition effect between linked images Plays back the movies being edited ...

Page 158: ...ge in enlarged size Transition Effect Opens the Transition Effect Settings window You can set the transition effect type and display time and preview the effect To set a transition effect you need to select a transition box in the Storyboard Area 6 Set the audio and click Save When you select Set audio you can use the following functions Add Audio Opens the Add Audio window You can add a MP3 or a ...

Page 159: ...ovies are saved in DCF type files with Motion JPEG AVI compression 8 Click Exit Select this to save as Motion JPEG compressed AVI Selecting Specify a save image type and clicking Advanced Settings allows you to set Image Size Frame Rate or Audio settings of the movie ...

Page 160: ...r is not already installed on your computer install QuickTime 6 5 from the DIGITAL VIDEO SOLUTION DISK Do not double click a movie file AVI extension in Windows Explorer That will start Windows Media Player which may not support this file type To play back movies double click the thumbnail with a movie icon in the Main Window s Browser Area 1 In the Main Window double click a thumbnail with a movi...

Page 161: ... Stop FF RW the movie being played back with the buttons shown at the left bottom of the window If you are using Windows XP you can extract still images from the movie For details please refer to Extracting Still Images from Movies Windows XP Only 69 You can play movies and control the sound volume You can save the displayed scene as a still image ...

Page 162: ...rthermore you can export still images for use as a screen saver or a wallpaper Changing the File Type and Save 1 Click Export in the Main Window 2 Select the export type If you selected Export Movies Extract frames from a movie or Backup to CD please refer to the pages listed below Export Movies Exporting Movies 66 Extract frames from a movie Extracting Still Images from Movies Windows XP Only 69 ...

Page 163: ...Finish The window varies depending on the selected export type in step2 When you have selected Export Still Images You can convert still images to another file type resize and save them as new files You can select the file type from BMP JPEG and TIFF You can also specify a prefix to be added to the exported still images ...

Page 164: ...hen you have selected Export Shooting Properties You can select the information you wish to export and save as a text file When you have selected Export as a Screen Saver You can export and save the image as a screen saver ...

Page 165: ...65 E Exporting Images Windows When you have selected Export as a Wallpaper You can export and save the image as Windows wallpaper This task cannot be performed if you have selected multiple images ...

Page 166: ...ou are not using Windows XP QuickTime 6 5 or higher is required to export movies If it is not already installed on your computer install it from the DIGITAL VIDEO SOLUTION DISK Place the disk in the CD ROM drive and click QuickTime 6 5 Install in the installer panel 1 Click Export in the Main Window 2 Click Export Movies ...

Page 167: ...ect the save image type You can select multiple images or a folder to include all images in that folder Still images cannot be selected For instructions on how to export still images see Exporting Images 62 4 Select a file type and click Set the save image type ...

Page 168: ...t settings and click Specify name of file to be saved 6 Specify the file name and click Start export In each case specify the destination folder and file name of the movie to be exported 7 Click OK The Main Window appears Destination Folder ...

Page 169: ...m Movies Windows XP Only You can extract still images from movies and save them as image files 1 Click Export in the Main Window 2 Click Extract frames from a movie 3 Select the movie from which you wish to extract still images and click Set extraction method ...

Page 170: ...ames Extracts frames as still images from a specified frame range or time interval Specify the number of copies and extract frames Extracts a specified number of still images from the entire movie The extraction interval is calculated based on an equal distribution of the specified number of still images Extract a specified image Extracts still images from scenes that catch your attention ...

Page 171: ...w the movie will be displayed in the upper part of the window Display the images you want and click Add 6 Specify the file name and the folder where you wish to save it and click Perform processing Changes the thumbnail size Rotates all still images Clears or adds check marks to all still images at once Clears the check marks of all the still images before after the selected still images ...

Page 172: ...CD RW disks The shooting information is copied along with the images This function can only be used on a computer that came with a CD R RW drive as standard equipment 1 Place a CD R RW disk in the computer s CD R RW drive 2 If the following window appears click Cancel 3 Click Export in the Main Window ...

Page 173: ...73 E Exporting Images Windows 4 Click Backup to CD 5 Select the folders or images you wish to save and click Specify Backup Settings ...

Page 174: ...74 Exporting Images 6 Set the backup settings and click Start Backup The disk will be ejected from the drive when copying is complete You can add images to a CD R RW disk that already contains images ...

Page 175: ...emory card in the camcorder When using this function you cannot add the still images to a memory card using a card reader writer Please insert the card to the camcorder to add images Adding Still Images to the Memory Card 1 Connect the camcorder to the computer 25 2 Click Acquire Camera Settings in the Main Window 3 Click Connect to Camera ...

Page 176: ...t to Camera tab and click Uploads images to the camera 5 Select the still images you wish to save and click Open 6 Select the image size and click Add When you upload images edited with another application images properties may be lost ...

Page 177: ...O SOLUTION DISK The sample images provided on the supplied DIGITAL VIDEO SOLUTION DISK are intended only for personal use with this camcorder Do not use these sample images for other purposes 1 Connect the camcorder to the computer 25 2 Insert the DIGITAL VIDEO SOLUTION DISK to the computer s CD ROM drive If the installer panel opens click Exit to close it 3 Click Acquire Camera Settings 4 Click C...

Page 178: ...78 Exporting Images 5 Click Uploads images to the camera 6 In Look in select the CD ROM icon and double click DVC CARD IMAGE 7 Select the sample images you wish to save and click Open ...

Page 179: ...79 E Exporting Images Windows 8 In the Add image window click Add The sample images are saved in the memory card ...

Page 180: ...s to E mail Messages You can attach selected still images to an E mail message To use this function the e mail software must be enabled as MAPI client For details refer to the instruction manual of the e mail software 1 Click Internet in the Main Window 2 Click Email Images ...

Page 181: ...elect Send images unchanged Normally select Resize and compress images into JPEG type Long side Short side Selects the long or short side and sets the image size in numbers Quality The lower the quality the coarser becomes the still image and smaller the file size Pressing Calculate displays the file size after the compression as Modified File Size You can check the compressed still image by press...

Page 182: ...ected still images appear as an attachment in the message window Input address subject and your comments and send the message E mail software not supporting MAPI does not start automatically In this case select Save the images in a folder If you select Save the images in a folder click Browse and select the destination folder Start your e mail software and attach the saved still image to a message...

Page 183: ...view selected still images in a slide show 1 Click View Classify in the Main Window You can also view a slide show by clicking Slide Show on Application Tool Bar Please skip forward to step 4 2 Click View as a Slide Show 3 Select the images and click Setup Slide Show ...

Page 184: ...tically When you select Every 3 second s you can select the interval in the control below from 1 to 120 seconds Loop Select to stop the slide show after the last image or to continuously run it in a loop Transitions Select the transition effect to be used when moving from one slide to another When you click an effect you can check the effect in the preview window 5 Click Start Slide Show Click in ...

Page 185: ...lect an image and select Add Remove Sound from the Edit menu 2 Click Add 3 Select the sound file and click Open 4 Click OK The sound file will be copied to the same folder as the image To play back the sound select an image with a sound icon and select Play Sound from the Edit menu To remove sound from an image select Remove on the Sound window in step 2 disappears and the copied sound file will b...

Page 186: ...g the Owner Name of the Camcorder You can change and confirm the owner name of the camcorder 1 Connect the camcorder to the computer 25 2 Select Canon CameraWindow and click OK 3 Click the Set to Camera tab and click Confirms changes camera settings ...

Page 187: ...87 E Using Various Functions Windows 4 Enter the camcorder s owner name and click OK Input a camcorder owner name here up to 31 characters ...

Page 188: ...ograms Uninstalling ZoomBrowser EX 1 Click the Windows start menu and select All Programs Canon Utilities ZoomBrowser EX and ZoomBrowser EX Uninstall Other programs in the Canon Utilities folder can also be uninstalled in the same way Uninstall all programs in Canon Utilities when you have uninstalled ZoomBrowser EX RAW Image Task is used with Canon digital camera The camcorder does not support th...

Page 189: ...era from the Scanners and Cameras Properties list 2 Click OK to close the window 3 Turn the camcorder POWER switch to OFF and remove the USB cable from the computer 4 Click the Windows Start menu and select Programs Canon Utilities DV TWAIN Driver x x and TWAIN Driver Uninstall A version number appears in place of x x Windows Me 1 Delete the camcorder icon from the Scanners and Cameras folder 2 Cl...

Page 190: ...ct the camcorder Î TWAIN Driver or WIA Driver is not installed properly First uninstall the TWAIN WIA Driver then reinstall the driver from the DIGITAL VIDEO SOLUTION DISK remove the check marks from the other programs when prompted to select the programs to be installed ZoomBrowser EX Operation Cannot download still images Î The camcorder is not set to the correct mode Turn the POWER switch to PL...

Page 191: ...a or your camcorder model name does not appear in the Scanners and Cameras Properties or Scanners and Cameras If you connected the camcorder to the computer via the USB cable before installing the Digital Video Software Leave the camcorder connected to the computer 1 Click the Windows Start menu and select Settings and Control Panel 2 Double click the System icon The System Properties dialog appea...

Page 192: ...amcorder model name appears under the Other Devices and or Imaging Devices categories use the following procedures to delete it 1 Select Canon Camera or the name of the camcorder model right click the mouse button and select Delete 2 In the confirmation dialog click OK 3 Click OK to close the System Properties dialog Remove all copies of Canon Camera or your camcorder model name that appear in the...

Page 193: ...Browser EX version 4 do not appear in ZoomBrowser EX 4 or higher Î Titles and comments added using a prior version of ZoomBrowser EX will not be displayed Use the following procedure to display them 1 In Windows Explorer open the Program folder under the folder in which you installed ZoomBrowser EX 4 or higher C Program Files Canon ZoomBrowser EX Program 2 Double click dbconverter exe 3 Select the...

Page 194: ...Eastern Time CANADA Canon CANADA Inc Tel Canada 1 800 OK CANON 1 800 652 2666 ASIA Canon Hongkong Co Ltd 19 F The Metropolis Tower 10 Metropolis Drive Hunghom Kowloon Hong Kong Phone 852 2170 2828 Fax 852 2723 9684 The information on this manual is verified as of January 1st 2007 DIE 275W CANON INC 2007 ...

Page 195: ...len Originalzubehor von Canon zu verwenden Dieses Produkt ist so konzipiert dass es eine ausgezeichnete Leistung erbringt wenn es mit Canon Originalzubeh6r verwendet wird Canon ist fOr Schaden am Produkt bzw Unfalle wie beispielsweise Brande o A die durch eine Fehlfunktion von nicht originalen Zubeh6rteilen wie beispielsweise ein Leck oder die Explosion eines Akkus entstehen nicht haftbar Diese Ga...

Page 196: ...l warranty information carefully Canon ZR830 A KIT La garantie en vigueur dans Ie pays ou I achat a ete effectue s applique Veuillez lire les details de votre garantie avec soin Online product registration for U S A Customers only Register your product online at www registercanon com V Protect your product We will keep the model number and date of purchase of your new Canon product on file to help...

Page 197: ...for this product1 please ca toB free in Canada 1 800 828 4040 Or write to Canon Customer Relations 6390 Dixie Road Mississauga Ontario L5T 1P7 Si vous avez besoin de support technique pour ce produit veui ez signaler notre numero sans frais au Canada 1 800 828 4040 Ou ecrivez a Service ala clientele Canon Canada Inc 6390 Dixie Road Mississauga Ontario L5T 1P7 ...

Reviews: