85
Setting Up Functions fr
om
Menu
s
Setting the Image Quality
Selecting an Image Quality
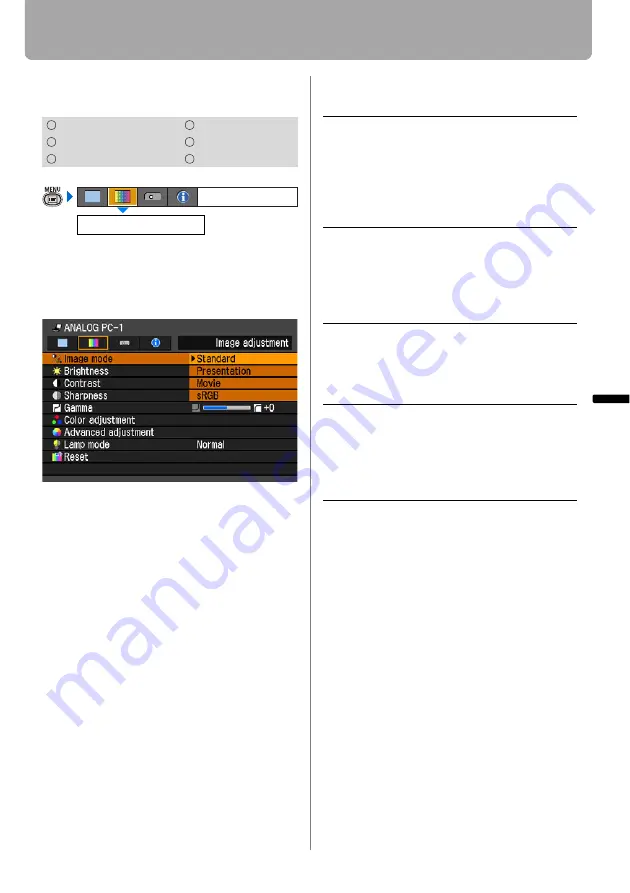
[Image mode]
You can select an image mode suitable for
the projecting image.
You can select it also with the
IMAGE
but-
ton on the remote control.
Press the
OK
button to accept your setting
and then press the
MENU
button.
• [Standard] is the factory default.
• You can decide the image quality by
adjusting the following items in each
image mode:
[Brightness], [Contrast], [Sharpness],
[Gamma], [Color adjustment],
[Advanced adjustment] and
[Lamp mode].
• The adjustment you have made is
stored as each combination of input sig-
nals and an image mode.
HDMI
COMPONENT
DIGITAL PC
VIDEO/S-VIDEO
ANALOG PC
USB
Image mode
Image adjustment
Standard
Select this to project an image
with near-original quality and a
high regard for reproduction of
white. It is suited to showing a
computer screen or watching
visual software (moving pic-
tures) in a bright room.
Presentation
Select this to project an image
with quality suited for the presen-
tation. It is also suited to project
visual software (moving pic-
tures) with a high regard for the
brightness.
Movie
Select this to project moving pic-
tures of all kinds. Its brightness is
suited to easily enjoy the atmo-
sphere of a movie theatre in a
dim room.
sRGB
Select this if you want to project
an image in the display mode
conforming to Windows standard
color space. It is suited to project
an image shot by sRGB-compati-
ble digital camera.


