background image

5

3

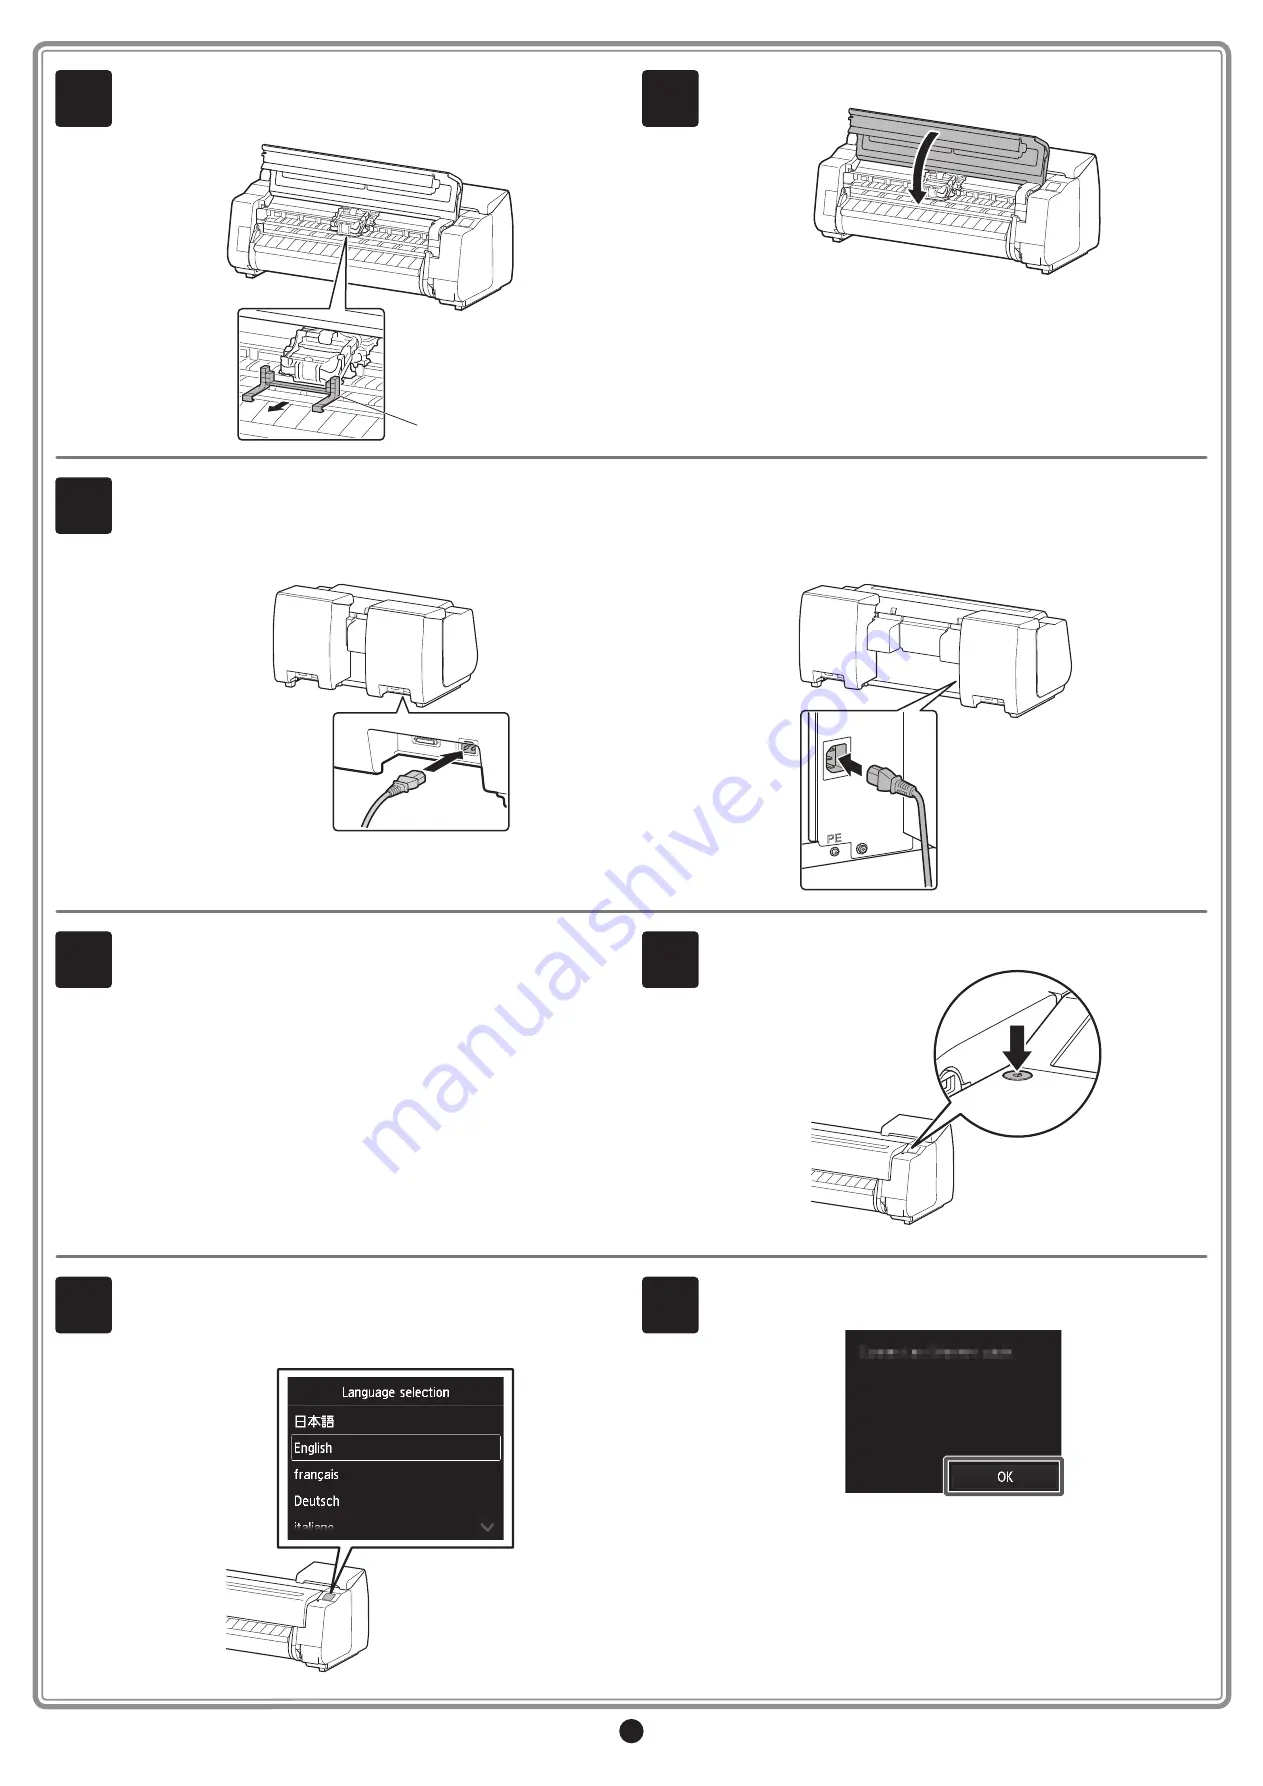
Peel off the tape affixed to the 

carriage, and then pull the protective 

material (A) towards you and remove it. Remove the protective sheet 

if there is one attached.

A

4

Close the top cover.

5

Plug the power cord into the power supply connector on the back of the printer.

PRO-2000

PRO-4000 / PRO-4000S / PRO-6000S

6

Plug the power cord into the outlet.

7

Turn on the printer.

8

When the language selection screen appears on the touch screen, 

select and tap a language (lightly with your finger, and then move 

your finger away). Then, if the screen for selecting a time zone 

appears, select and tap your region.

9

When a message prompting you to start the setup appears on the 

touch screen, tap 

OK

.

Summary of Contents for PRO-4000S

Page 1: ...tion Instructions in this Setup Guide show the PRO 4000 printer Note that your printer may look different from these illustrations in some cases However the basic operations are the same Note Some ite...

Page 2: ...e holder stopper is used when loading roll paper For details refer to the Online Manual Printer On the PRO 6000S this is included as standard On the PRO 2000 PRO 4000 and PRO 4000S this is an option R...

Page 3: ...on either side Be careful to avoid back strain and other injuries When moving the printer firmly grasp the carrying handles A under each side Holding the printer at other positions is dangerous and ca...

Page 4: ...k marker on the basket rod attached to the supporting plate A A Important If you are not using a stand place the printer in the installation location and proceed to Turn On the Printer 5 Affix the pri...

Page 5: ...or on the back of the printer PRO 2000 PRO 4000 PRO 4000S PRO 6000S 6 Plug the power cord into the outlet 7 Turn on the printer 8 When the language selection screen appears on the touch screen select...

Page 6: ...nk tanks and mount them in the holders with ink holes down and metal contacts on the bottom Important An ink tank cannot be mounted in the holder if it is not oriented correctly for the color Do not t...

Page 7: ...8 Firmly push down the handle part of the ink tank lock lever all the way in 9 Make sure the ink lamp lights red Important If the ink lamp does not light repeat steps 2 3 7 and 8 10 Repeat steps 2 to...

Page 8: ...to spill it once the protective caps are removed Do not reattach the protective caps after removing them Dispose of them according to local regulations 6 Insert the print head into the carriage with t...

Page 9: ...t crooked and align the leading edge of the paper with the front side of the line B B A 5 Lower the release lever to lock the paper and close the top cover 6 The screen for selecting the paper type ap...

Page 10: ...re are no problems Wireless LAN connection USB connection This is the method for connecting the printer to the network without using a cable This is the method for connecting the printer to a computer...

Page 11: ...open the covers of the printer or turn the power off while the ink is charging for the first time and the print head adjustment is executing Note Charging the system with ink fills the system from the...

Page 12: ...les If a warning screen about downloading appears select Do not block Allow etc to proceed with the operation 4 Run the file you downloaded and click Start Setup Configure the settings by following th...

Page 13: ...inch paper core attachment in the accessory pocket Note When the setup is completed refer to the various manuals to use the printer Refer to The Manuals Supplied with This Printer on p 2 Store Access...

Page 14: ...ew Lift the release lever and reload the paper The paper may not be aligned with the paper alignment line Reload the paper so that the edge of the paper is aligned with the paper alignment line Refer...

Reviews: