background image

1

Preparation

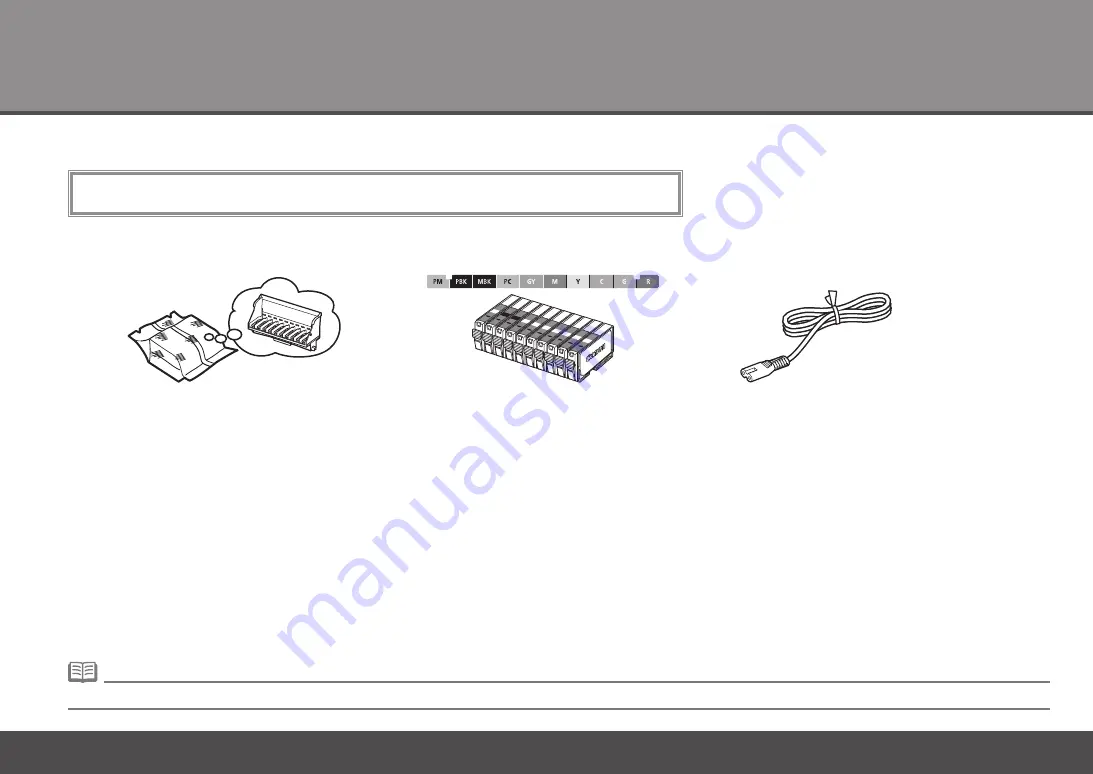
Check the Included Items

Manuals

Before turning on the printer, remove all the orange tapes and the protective sheets.

Setup CD-ROM (containing the drivers, applications and on-screen manuals)

Warranty

power cord

A USB cable is necessary to connect the printer with your computer.

Print Head

ink tanks

Summary of Contents for PIXMA Pro9500 Mark II

Page 1: ...Make sure to read this manual before using the printer Please keep it in hand for future reference Getting Started Read Me First series Photo Printer...

Page 2: ...Contents 6 5 4 3 2 1 After Installing the Printer Install the Software Install the Ink Tanks Install the Print Head Turn the Power On Loading Paper Preparation...

Page 3: ...te Caution Macintosh and Mac are trademarks of Apple Inc registered in the U S and other countries Microsoft is a registered trademark of Microsoft Corporation Windows is a trademark or registered tra...

Page 4: ...turning on the printer remove all the orange tapes and the protective sheets Setup CD ROM containing the drivers applications and on screen manuals Warranty power cord A USB cable is necessary to conn...

Page 5: ...e of 15 7 40 cm behind the printer Choosing a Location Do not install the printer where an object may fall on it The object may fall inside the printer resulting in malfunction Do not place any object...

Page 6: ...B Turn the Power On Confirm that the POWER lamp B lights blue Turn on the printer A Plug the power cord into the back left of the printer then connect the other end to the wall outlet Do NOT connect t...

Page 7: ...ive pressure to it Open the Top Cover C The Print Head Holder D comes out This is where you install the Print Head The Print Head Holder makes a noise as it moves This is normal operation If the Print...

Page 8: ...olor ink on the inside of the bag the Print Head comes in or the inside of the protective cap this has no effect on print quality Be careful not to get ink on yourself when handling these items Be car...

Page 9: ...Lock Lever E completely Set the Print Head in place Pinch the Print Head Lock Lever firmly and lower it gently Do not knock the Print Head against the sides of the holder Once you have installed the P...

Page 10: ...ure to them Remove the ink tank from its package Do not hold the sides of the ink tank ink may splash If the Print Head Holder moves to the right close and reopen the Top Cover Be sure to use the supp...

Page 11: ...6 1 2 3 4 5 3 4 Install the ink tank Insert the ink tank Press the PUSH mark on the ink tank until it clicks into place Make sure the Ink lamp lights red...

Page 12: ...inter vibrates while the lamp is flashing because ink is stirred inside the printer Make sure the Inner Cover D is closed Install all the other ink tanks in the same way Install all the ink tanks Make...

Page 13: ...ndows Vista and Mac OS X v 10 5 x Macintosh P 21 Windows P 12 You need to log on as the administrator or a member of the Administrators group Do not switch users during the installation process It may...

Page 14: ...p program should start automatically If the program does not start automatically double click the CD ROM icon on the computer When the CD ROM contents appear double click MSETUP4 EXE Windows Vista Win...

Page 15: ...4 Windows Macintosh AutoPlay screen appears click Run Msetup4 exe User Account Control dialog box appears click Continue If the same dialog box reappears in subsequent steps click Continue Windows Vis...

Page 16: ...ar items to install click Custom Install and follow the on screen instructions to proceed with the installation You can install the XPS Printer Driver from Custom Install Windows Vista SP1 or later Wh...

Page 17: ...h Read the License Agreement screen carefully and click Yes During installation follow any on screen instructions to install the software When the Please Allow All Install Wizard Processes screen appe...

Page 18: ...If installation does not continue after 10 minutes click Help on the screen in step then confirm the message When the printer is recognized by the computer a message appears on the screen It takes abo...

Page 19: ...ead Alignment screen appears load two sheets of A4 or Letter sized plain paper in the Rear Tray C as shown Align the Print Head For details refer to 6 Loading Paper on page 28 Click Execute Pinch and...

Page 20: ...tterns different from those shown above may be printed Make sure that the pattern shown is printed then click Next on the Print Head Alignment screen Some parts of patterns printed on the first page a...

Page 21: ...d to the Internet the user registration page appears Follow the on screen instructions to register your printer You will need your product serial number which is located on the inside of the printer I...

Page 22: ...Restart When the Extended Survey Program screen appears confirm the message If you can agree click Agree If you click Do not agree the Extended Survey Program will not be installed This has no effect...

Page 23: ...ble Make sure the printer is turned on Double click the Setup icon Turn on the computer then insert the Setup CD ROM into the CD ROM drive If the CD ROM folder does not open automatically double click...

Page 24: ...ou want to select particular items to install click Custom Install and follow the on screen instructions to proceed with the installation Enter your administrator name and password Click OK If you do...

Page 25: ...Setup screen appears click Execute Read the License Agreement screen carefully and click Yes Installation starts During installation follow any on screen instructions to install the software The Print...

Page 26: ...Click Execute When the Print Head Alignment screen appears load two sheets of A4 or Letter sized plain paper in the Rear Tray A as shown For details refer to 6 Loading Paper on page 28 Pinch and slide...

Page 27: ...fferent from those shown above may be printed Make sure that the pattern shown is printed Some parts of patterns printed on the first page are faint When Print Head Alignment cannot be executed proper...

Page 28: ...r You will need your product serial number which is located on the inside of the printer To register later click Cancel User registration can be started from the Solution Menu icon For details refer t...

Page 29: ...t read 6 Loading Paper on page 28 When the Extended Survey Program screen appears confirm the message If you can agree click Agree If you click Do not agree the Extended Survey Program will not be ins...

Page 30: ...ns how to load paper in the Rear Tray A Open the Feed Slot Cover D then pinch and slide the Paper Guide E Pull out the Front Tray Extension B beforehand Load paper straight along the right edge of the...

Page 31: ...per then close the Feed Slot Cover D You can print on large size paper such as 14 x 17 355 6 x 431 8 mm or thick paper by loading the paper in the Front Tray For details on how to load paper in the Fr...

Page 32: ...ntroduction to other functions available Describes various operating procedures to make full use of printer Also includes Troubleshooting information for your printer this manual Safety Precautions Fo...

Page 33: ...tings click the Change settings or find solutions to problems in Solution Menu to open My Printer Windows only Solution Menu Example Windows Vista You can start Solution Menu from the Canon Solution M...

Page 34: ...to colors Since ICC profiles are also available you can print photos in colors that are closer to your ideal colors using color management For details on how to use the application software and the pr...

Page 35: ...A computer that complies with Hi Speed USB standard is required Since the Hi Speed USB interface is fully upwardly compatible with USB 1 1 it can be used at USB 1 1 Print width Rear Tray 12 7 inches...

Page 36: ...Live Tech Support 1 800 828 4040 under warranty The following ink tanks are compatible with this printer Ordering Information Call 1 800 OK CANON to locate a dealer near you or visit the Canon eStore...

Reviews: