2
1
2
7
1
3
4
6
7
1
2
5
2
(FINE Cartridge) FINE
ةشوطرخ لخدأ
.فقوتت ىتح
!نيبناجلا لباقم اهيلع طغضت لا
44
5 ةوطخلا ىلإ 2 ةوطخلا نم تاوطخلا ءارجإ دعأ
(FINE Cartridge) FINE
ةشوطرخ تيبثتل
.ىرخلأا
66
)Alarm
( هيبنت
حابصملا ناك اذإ
ققحتف ،يلاقتربلا نوللاب ءيضي
FINE
ةشوطرخ نأ نم
اهبيكرت مت دق )
FINE Cartridge)
.حيحص لكشب
Paper
( قرولا جارخإ ءاطغ قلاغإب مق
.(Output Cover
ضرع مت هنأ نم ققحت ،اًبيرقت ةيناث
20
رورم دعب
.لمعلا عبات مث ،
2
ةشاشلا
77
.زاهجلا اذه عم ةقفاوتم ةيلاتلا )
FINE Cartridges) FINE
شيطارخ
.فيلغتلا طيرش ىلع دوجوملا ربحلا نم رذحلا خوت
،)
FINE Cartridge) FINE
ةشوطرخ كفب مق
.فيلغتلا طيرش ةلازإب مق مث
33
(Head Cover
( سأرلا ءاطغ نأ نم ققحت
.اًيئاقلت هحتف مت
.ئيضم
)Paper
( قرو
حابصملا نأ نم ققحت
77
مقف ،اًقلغم )
Head Cover
( سأرلا ءاطغ ناك اذإ
Paper Output
( قرولا جارخإ ءاطغ قلاغإب
.1
ةوطخلا ءارجإ دعأ مث ،)
Cover
Paper
( قرولا جارخإ جرد حتفب مق
قرولا جارخإ ءاطغو )
Output Tray
.(Paper Output Cover)
11
.(Ink Cartridge Lock Lever
( ربحلا ةشوطرخ قلاغإ عارذ ضفخب مق
22
.نيميلا يف دوسلأاو راسيلا يف ناوللأا ربحلل )
FINE Cartridge) FINE
ةشوطرخ بيكرتب مق
.فقوتت ىتح ميقتسم لكشب اهلخدأ
ربحلا ةشوطرخ قلاغإ عارذ عفرب مق
.(Ink Cartridge Lock Lever)
55
!سمللا عونمم
متي مل اذإ
LED
ةشاش ءافطإ متيس
.اًبيرقت قئاقد
5
ةدمل زاهجلا ليغشت
،ضرعلا ةشاش ليغشت ةداعلإو
رزلا فلاخب( رز يأ ىلع طغضا
ةحول ىلع دوجوملا )
)ON
( ليغشت
. (Operation Panel
( ليغشتلا
FINE
شيطارخ لادبتسا
)FINE Cartridges)
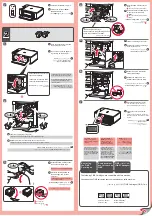
Insérez la cartouche FINE jusqu'à
ce qu'elle soit correctement
installée.
Ne cognez pas la cartouche contre
les bords !
44
Répétez les étapes 2 à 5 pour
installer l'autre cartouche FINE.
66
Si le témoin
Alarme
)Alarm)
est allumé en
orange, vérifiez que
la cartouche FINE est
correctement installée.
Fermez le couvercle de sortie
papier.
Après environ 20 secondes, vérifiez que
l'écran 2 est affiché, puis passez à l'étape
suivante.
77
Les cartouches FINE suivantes sont compatibles avec cette machine.
Faites attention à l'encre se trouvant
sur le ruban protecteur.
Enlevez la cartouche FINE de
son emballage, puis le ruban
protecteur.
33
Vérifiez que le capot des têtes
s'est ouvert automatiquement.
Vérifiez que le voyant
Papier
)Paper)
est allumé.
77
Si le capot des têtes est fermé, fermez
le couvercle de sortie papier, puis
reprenez l'étape 1.
Ouvrez le bac de sortie papier et
le couvercle de sortie papier.
11
Rabaissez le levier de verrouillage de cartouche d'encre.
22
Installez la cartouche FINE couleur à gauche et la cartouche Noir à droite.
Insérez-la sans la faire pencher jusqu'à ce
qu'elle soit correctement installée.
Soulevez le levier de verrouillage
de cartouche d'encre.
55
Ne pas toucher !
L
'écran LED s'éteint si
la machine n'est pas
utilisée pendant environ
5 minutes. Pour restaurer
l'affichage de l'écran,
appuyez sur n'importe
quel bouton )à l'exception
du bouton
MARCHE )ON)
)
du panneau de contrôle.
Remplacement
des cartouches
FINE
Insert the FINE Cartridge until it
stops.
Do not knock it against the sides!
44
Repeat step 2 to 5 to install the
other FINE Cartridge.
66
If the
Alarm
lamp is lit
orange, check that the
FINE Cartridge is installed
correctly.
Close the Paper Output Cover.
After about 20 seconds, check that
screen 2 is displayed, then proceed.
77
The following FINE Cartridges are compatible with this machine.
Be careful of ink on the protective tape.
Unpack the FINE Cartridge, then
remove the protective tape.
33
Check that the Head Cover has
opened automatically.
Check that the
Paper
lamp is lit.
77
Replacing
the FINE
Cartridges
If the Head Cover is closed, close the
Paper Output Cover, then redo step 1.
Open the Paper Output Tray and
the Paper Output Cover.
11
Lower the Ink Cartridge Lock Lever.
22
Install the Color FINE Cartridge to the left and Black to the right.
Insert it straight until it stops.
Lift the Ink Cartridge Lock Lever.
55
Do not touch!
The LED turns off if the
machine is not operated
for about 5 minutes. To
restore the display, press
any button (except the
ON
button) on the Operation
Panel.
Color: CL-441XL
Color: CL-441
Black: PG-440XL
Black: PG-440


