Setting the Print Quality Level (Custom)
The print quality level can be set in the
Custom
.
The procedure for setting the print quality level is as follows:
1. Open the
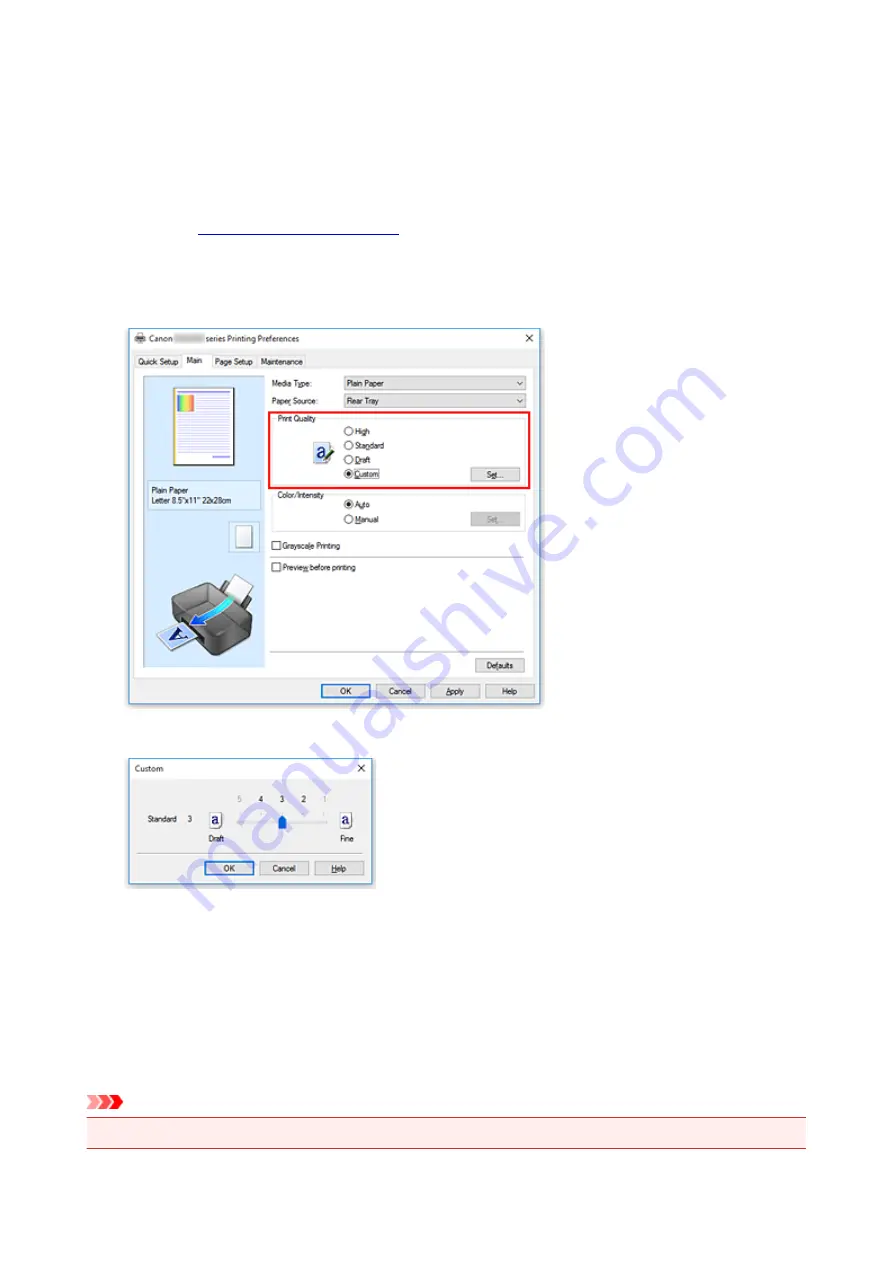
2. Select the print quality
On the
Main
tab, select
Custom
for
Print Quality
, and click
Set...
.
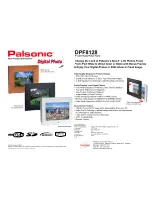
The
Custom
dialog box opens.
3. Setting the print quality level
Drag the slider bar to select the print quality level and click
OK
.
4. Complete the setup
Click
OK
on the
Main
tab.
When you execute print, the image data is printed with the selected print quality level.
Important
• Certain print quality levels cannot be selected depending on the settings of
Media Type
.
148
Summary of Contents for PIXMA MG3000 SERIES
Page 1: ...MG3000 series Online Manual Overview Printing Scanning Frequently Asked Questions English ...
Page 18: ...Basic Operation Printing Photos from a Computer Copying 18 ...
Page 25: ...Loading Paper Loading Plain Paper Photo Paper Loading Envelopes 25 ...
Page 32: ...Loading Originals Loading Originals on the Platen Glass Supported Originals 32 ...
Page 61: ...Specifications 61 ...
Page 62: ...Safety Safety Precautions Regulatory Information WEEE EU EEA 62 ...
Page 76: ...Main Components and Their Use Main Components Power Supply 76 ...
Page 77: ...Main Components Front View Rear View Inside View Operation Panel 77 ...
Page 104: ...Network Connection Network Connection Tips 104 ...
Page 138: ...Note Selecting Scaled changes the printable area of the document 138 ...
Page 192: ...Printing Directly from Smartphone Tablet Android Print Using Printer with Wireless Direct 192 ...
Page 228: ...ScanGear Scanner Driver Screens Basic Mode Tab Advanced Mode Tab 228 ...
Page 292: ...Back of Paper Is Smudged Uneven or Streaked Colors 292 ...
Page 302: ...Scanning Problems Scanner Does Not Work ScanGear Scanner Driver Does Not Start 302 ...
Page 314: ...Errors and Messages An Error Occurs Message Appears 314 ...


