background image

3

ESP

AÑOL

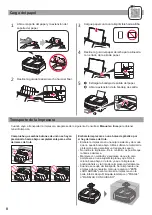
Cierre la cubierta/unidad de escaneado

.

5.  Encender la impresora

Conecte el cable de alimentación.

Atrás

No conecte ningún cable excepto el de 

alimentación.

Pulse el botón 

ACTIVADO (ON)

.

Si aparece la siguiente pantalla, use los 


botones 

[

 y 

]

 para seleccionar el idioma 


y pulse el botón 

OK

.

Si aparece la siguiente pantalla, seleccione su 

país o región y, a continuación, pulse el botón 

OK

.

Confirme que todos los depósitos de tinta


contengan tinta.

Seleccione 

Sí (Yes) 

con los botones 

[

 y 

]

 y, 


a continuación, pulse el botón 

OK

.

Summary of Contents for PIXMA G4210

Page 1: ...Guía de inicio Lea primero Información de seguridad e información importante apéndice Getting Started Read Safety and Important Information addendum first ...

Page 2: ...exión con el ordenador y con el teléfono inteligente o la tableta página 4 Cómo sujetar la impresora Películas explicativas Installing the Printer page 1 Connecting with Computer and Smartphone Tablet page 4 How to Hold Printer Explanatory Movies ...

Page 3: ...he scanning unit cover b Remove the orange tape and the protective material and discard them a b 3 Installing the Cartridge 1 Open the cartridge locking cover 2 Take out each cartridge from the package and remove the label 3 Remove the protective tape Do not touch 4 Insert the C color cartridge on the left and the B black cartridge on the right Do not bump it against the surrounding parts 5 Close ...

Page 4: ... ink bottle upright and remove the bottle cap 4 Insert the nozzle of the ink bottle into the inlet and stand the ink bottle upside down 5 Pour all ink into the ink tank Confirm that the ink has been filled to the upper limit line A A 6 Replace the tank cap securely 7 Close the ink tank cover 8 Repeat steps 1 to 7 to pour all ink into the corresponding ink tanks on the right according to the label ...

Page 5: ...rd yet 2 Press the ON button 3 When the following screen appears use the and buttons to select a language and then press the OK button 4 If the following screen appears select your country or region and then press the OK button 5 Confirm that all the ink tanks have ink in them 6 Select Yes with the and buttons and then press the OK button ...

Page 6: ...e g Execute the downloaded file Proceed to step on the next page to continue 6 Preparing for Connection 1 Press the OK button Preparing the ink starts This takes about 5 to 6 minutes Proceed to the next step 2 Check that the following screen appears From here on proceed to a step according to how you use the printer To use the printer by connecting only to a computer or both to a computer and smar...

Page 7: ...t side of the window If the contents of the CD ROM appear double click Msetup4 exe 4 Proceed to step d When using Windows 7 b When the AutoPlay screen appears click Run Msetup4 exe c If the User Account Control dialog box appears click Continue When AutoPlay Screen Does Not Appear 1 Click Computer from the start menu 2 Double click the CD ROM icon on the right side of the opened window If the cont...

Page 8: ...ged depending on the contract with your service provider Up to 5 devices can be connected to the printer via wireless LAN connection directly 2 Check the display on the printer The screen turns off when no operation is made for about 10 minutes Press one of the buttons on the operation panel except for the ON button to display the screen a Does the following screen appear b Does the printer is con...

Page 9: ...Method recommended on the connection method selecting screen the appropriate connection method is selected automatically depending on your environment d Make sure that the following screen appears a Tap the installed application software b Follow the on screen instructions to register the printer If a message saying Printer is not registered Perform printer setup does not appear see Troubleshootin...

Page 10: ... the printer in a sturdy box so that it is placed with its bottom facing down using sufficient protective material to ensure safe transport Do not tilt the printer Ink may leak Please handle with care and ensure the box remains flat and NOT turned upside down or on its side as the printer may be damaged and ink in the printer may leak When a shipping agent is handling transport of the printer have...

Page 11: ...r de la impresora 2 a Abra la cubierta unidad de escaneado b Retire la cinta naranja y el material de protección y deséchelos a b 3 Instalar el cartucho 1 Abra la tapa de bloqueo del cartucho 2 Saque cada cartucho del paquete y retire la etiqueta 3 Retire la cinta protectora No tocar 4 Inserte el cartucho C color en la parte izquierda y el cartucho B negro en la parte derecha No golpear contra los...

Page 12: ...acia arriba y retire la tapa del frasco 4 Inserte el inyector del frasco de tinta en la entrada y coloque el frasco de tinta boca abajo 5 Vierta toda la tinta en el depósito de tinta Confirme que se ha llenado la tinta hasta la línea de límite superior A A 6 Vuelva a colocar firmemente la tapa del depósito 7 Cierre la cubierta del depósito de tinta 8 Repita los pasos del 1 al 7 para verter toda la...

Page 13: ...ción 2 Pulse el botón ACTIVADO ON 3 Si aparece la siguiente pantalla use los botones y para seleccionar el idioma y pulse el botón OK 4 Si aparece la siguiente pantalla seleccione su país o región y a continuación pulse el botón OK 5 Confirme que todos los depósitos de tinta contengan tinta 6 Seleccione Sí Yes con los botones y y a continuación pulse el botón OK ...

Page 14: ...rchivo descargado Vaya al paso en la página siguiente para continuar 6 Preparación para la conexión 1 Pulse el botón OK Preparando la inicialización de tinta Este proceso tardará de 5 a 6 minutos en completarse Continúe en el siguiente paso 2 Compruebe que aparezca la siguiente pantalla A partir de aquí continúe en el paso que corresponda según su uso de la impresora Para usar la impresora conectá...

Page 15: ...ontenido del CD ROM haga doble clic en Msetup4 exe 4 Continúe en el paso d Si utiliza Windows 7 b Cuando se muestre la pantalla Reproducción automática AutoPlay haga clic en Ejecutar Msetup4 exe Run Msetup4 exe c Si se muestra el cuadro de diálogo Control de cuentas de usuario User Account Control haga clic en Continuar Continue Si no se muestra la pantalla Reproducción automática AutoPlay 1 Haga ...

Page 16: ...nta según el contrato que tenga con el proveedor del servicio Se pueden conectar un máximo de 5 dispositivos directamente a la impresora mediante la conexión LAN inalámbrica 2 Compruebe la pantalla en la impresora La pantalla se desactiva cuando no se realiza ninguna operación durante aproximadamente 10 minutos Para mostrar la pantalla pulse cualquier botón en el panel de control excepto el botón ...

Page 17: ...c autom método con recomendado Auto Select Conn Method recommended en la pantalla de selección del método de conexión se seleccionará el método de conexión adecuado según su ambiente d Asegúrese de que aparezca la siguiente pantalla a Puntee el software de la aplicación instalado b Siga las instrucciones en pantalla para registrar la impresora Si no aparece el siguiente mensaje Impresora no regist...

Page 18: ...en una caja resistente y de modo que no quede boca abajo Utilice suficiente material de protección para garantizar un transporte seguro No incline la impresora De lo contrario es posible que la tinta se derrame Manipule con cuidado y asegúrese de que la caja permanece en una superficie plana y que NO se coloca boca abajo o de lado ya que la impresora podría dañarse y la tinta de la impresora derra...

Page 19: ...Videoteca sobre procedimientos How To Video Library RMC Regulatory Model Code K10472 ...

Page 20: ...XXXXX Windows 10 Acceso al Manual en línea Desde el navegador Desde el acceso directo del escritorio Desde el navegador Access Online Manual From browser From desktop shortcut From browser PRINTED IN XXXXXXXX QT6 2261 V02 ...

Reviews: