background image

©

 Canon Inc. 

©

 M. Nishiguchi/SENAUN

Ships of the world : 

Nippon Maru

 : Assembly Instructions

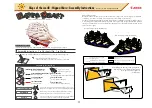
As shown in the illustration, 

use A parts (standard parts) 

for parts 44 - 46 when the bow 

will face to the right and B parts 

(optional parts) when the bow will face to the left.

Parts

-

Parts

-

Fold once and glue the folds together, 

 then give the sails a bulging appearance. 

  If you plan to have the bow face to the right, 

  curl the sails so that surface A will bulge out. 

  If the bow will face to the left, curl the sails 

  so that surface B will bulge out.

For parts 62 - 64, choose A parts 

(standard parts) or B parts (optional parts) 

depending on the direction in which 

the bow will point.

  Attach parts 65 - 70 (the yards) to the vessel masts. If the bow will 

point to the right, attach the yards so that surface A is on top. 

If the bow will face to the left, attach so that surface B is on top. 

Glue the yards in place at an angle, as shown in the illustration, 

so that the model will resemble a ship sailing in the wind.

Surface A on top 

(bow pointed to the right)

Surface B on top 

   (bow pointed to 

      the left)

Summary of Contents for Nippon Maru

Page 1: ...h a ruler and an exhausted pen no ink to get a sharper easier fold Build the model by carefully reading the Assembly Instructions in the parts sheet page order This model was designed for Papercraft and may differ from the original in some respects Before starting assembly Writing the number of each section on its back side before cutting out the sections is highly recommended This way you can be ...

Page 2: ...nted to the right or bow pointed to the left optional part After folding this part unfold and cut out from the cream colored area Attach part 12 after first gluing part 11 to part 8 Insert until the corners meet Affix parts 15 19 and 23 to the mast by gluing them to the positions shown in the illustration Cut notches all the way to the red lines ...

Page 3: ... Nishiguchi SENAUN Ships of the world Nippon Maru Assembly Instructions Cut away the yellow area Cut away this area for part 35 in the same way Glue these parts together Glue the rear sides of these parts together ...

Page 4: ... of the world Nippon Maru Assembly Instructions Fold in the tabs on part 35 and glue in the spots indicated by the arrows After inserting part 36 into part 35 glue the untreated tabs on the main vessel body Curl this part Bottom of vessel ...

Page 5: ...will bulge out If the bow will face to the left curl the sails so that surface B will bulge out For parts 62 64 choose A parts standard parts or B parts optional parts depending on the direction in which the bow will point Attach parts 65 70 the yards to the vessel masts If the bow will point to the right attach the yards so that surface A is on top If the bow will face to the left attach so that ...

Page 6: ... them bulge from the center toward the outside Parts Finished Glue the rear sides of these parts together National Institute For Sea Training WiththecooperationoftheNationalInstituteForSeaTraining Nippon Maru training vessel National Institute For Sea Training WiththecooperationoftheNationalInstituteForSeaTraining Nippon Maru training vessel National Institute For Sea Training Withthecooperationof...

Reviews: