background image

20

14

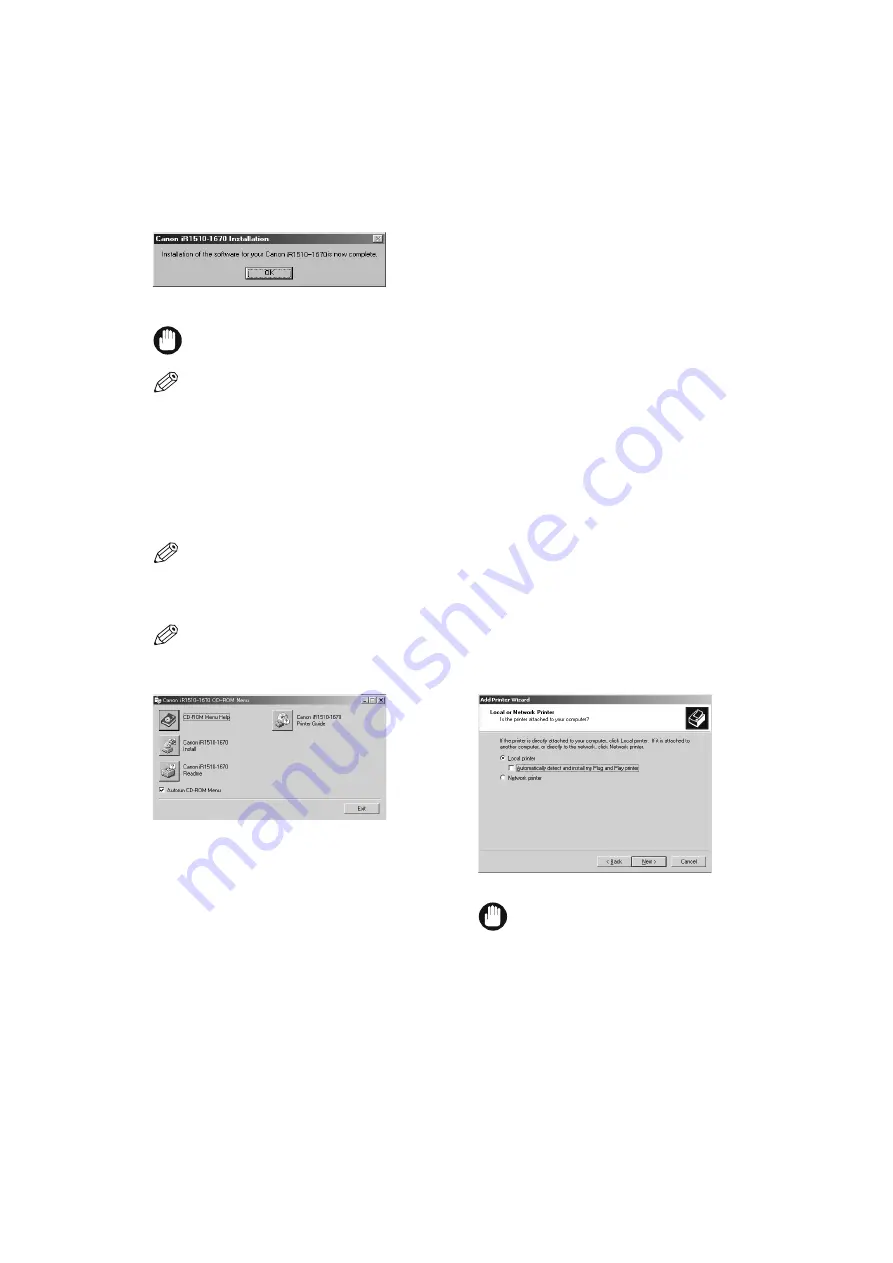
When the installation is complete, the following 
dialog box appears. Click 

OK

 to close the dialog 

box.

15

If you opted to print a test page, the test page is 
printed after the installation has been completed. If 
the test page printed correctly, click 

Yes

.

z

z

z

z

Installing from CD-ROM Menu (Windows 2000)

• If some other printer driver is already installed on your computer for the parallel port (ex. 

LPT1:

), before installing Canon 

iR1510-1670, be sure to uninstall that driver or set it for file output (

FILE:

).

• For installation instructions using 

Plug and Play

 or 

Add Printer Wizard

 for Parallel Port, 

 Printer Guide.

1

Make sure the computer is turned off.

2

Make sure the power cord of the machine is plugged into the power outlet and the machine is connected to your 
computer using parallel cable (

 pp. 7, 8).

3

Turn on the computer. Start up Windows 2000.

Plug and Play

 is being carried out and the 

Found New Hardware Wizard

 dialog box appears. Click 

Cancel

. For installation 

instructions, using 

Plug and Play

 function of your computer, 


Printer Guide

.

• If any Windows application (including virus checkers) starts up automatically, exit it before installation.

4

Set the attached CD-ROM into the CD-ROM drive of your computer.

CD-ROM Menu will appear automatically. If the CD-ROM was already set in at the start up, first eject the CD-ROM, then 
insert it again.

• If the CD-ROM Menu does not appear automatically, choose 

Run At

 from the 

Start Menu


 type 

D:\AUTORUN.EXE

 (if your CD-

ROM drive is drive D:) in the command line 

 click 

OK

.

5

Click 

Canon iR1510-1670 Install

 button.

Add Printer Wizard

 dialog box appears. Click 

Next >

.

6

Select 

Local printer


 click 

Next >

.

The printer port selection dialog box appears.

• To check on 

Automatically detect and install my Plug 

and Play printer

 is not recommended.

Summary of Contents for iR1510

Page 1: ...iR1510 iR1530 iR1570F Quick Start Guide...

Page 2: ......

Page 3: ...cting the Telephone Line and an External Device only for the iR1570F model 9 Installing the Output Tray 11 Loading Paper in the Paper Drawer 11 Setting the Receive Mode only for the iR1570F model 12 Q...

Page 4: ...ation in the United States and or in other countries Adobe Acrobat is trademark of Adobe Systems Incorporated Other brand and product names are trademarks or registered trademarks of their respective...

Page 5: ...you press appear in this typeface Stop Reset Information in the LCD appears in this typeface COPY SETTINGS Only for the iR1570F model p nn A number preceded by an arrow and enclosed in parenthesis ref...

Page 6: ...CONNECTOR PLATEN UNIT LEVER PLATEN UNIT ADF ROLLER ADF AUTOMATIC DOCUMENT FEEDER PLATEN GLASS CONTROL PANEL PAPER DRAWER OUTPUT TRAY POWER CORD CONNECTOR MODULAR JACKS iR1570F only TONER SUPPLY COVER...

Page 7: ...R1570F models DRUM CARTRIDGE COVER DRUM CARTRIDGE STACK BYPASS RIGHT COVER PLATE DOCUMENT OUTPUT SLOT DOCUMENT OUTPUT TRAY SLIDE GUIDES FEEDER COVER DOCUMENT FEEDER TRAY DOCUMENT FEEDER TRAY DOCUMENT...

Page 8: ...ator Energy Saver Key OK Key FAX Resolution Key Receive Mode Key Directory Key Enlarge Reduce Key Exposure Key Image Quality Key Paper Select Key Numeric Keys Stop Reset Key Start Key One Touch Speed...

Page 9: ...tioned above cables If you are using USB cable make sure your computer runs Microsoft Windows 98 Me Windows 2000 or Windows XP Server 2003 is equipped with a USB port and its operation is approved by...

Page 10: ...untry where you are using the machine 5 Press OK Please wait for a while until the LCD returns to the Copy Mode standby display Insert the power cord straight into the power cord connector on the left...

Page 11: ...wing Telephone line External device such as telephone or answering machine Users in the UK Only If the connector of the external device cannot be connected to the jack on the machine you will need to...

Page 12: ...___________________ Receive Modes Machine and Telephone_______________________________________________ FaxTel Manual Machine Only _______________________________________________________ FaxOnly Machin...

Page 13: ...media Reference Guide 1 Grip the paper drawer handle and draw it out towards you until the paper drawer comes to a stop 2 Open a package of copy paper and remove the paper stack 3 Load the paper stack...

Page 14: ...machine receives faxes automatically and routes voice calls to an answering machine You can set details for the FaxTel mode Fax Guide 3 Press OK The selected receive mode is set and the machine return...

Page 15: ...posure press Exposure 4 Press Start to begin copying Quick Guide for Sending Faxes Only for the iR1570F model This section is a quick guide for sending faxes Before sending faxes you need to register...

Page 16: ...er recommended 64 Mbytes more than 128 Mbytes recommended Approx 15 Mbytes or more u Windows 98 Pentium II 300 MHz or better Pentium III 600 MHz or better recommended 64 Mbytes more than 128 Mbytes re...

Page 17: ...ity for connecting the machine to network Refer to NetSpot_Device_Installer Windows Readme_Englisch html on the attached CD ROM for details about NetSpot Device Installer n n n n CD ROM Menu If your c...

Page 18: ...onnected to your computer using parallel cable pp 7 8 3 Turn on the computer Start up Windows Plug and Play is being carried out and the Found New Hardware Wizard In Windows 95 New Hardware Found or D...

Page 19: ...iles from box click OK For Windows Me select D English WinMe 9 The driver file selection dialog box appears Click Next The printer port selection dialog box appears 10 Select the printer port the mach...

Page 20: ...e computer Start up Windows NT 4 0 4 Set the attached CD ROM into the CD ROM drive of your computer CD ROM Menu will appear automatically If the CD ROM was already set in at the start up first eject t...

Page 21: ...box click OK 10 The driver file selection dialog box appears Click Next Add Printer Wizard dialog box Printer name appears 11 Click Next If you wish to change printer name first type a new name into...

Page 22: ...llel cable pp 7 8 3 Turn on the computer Start up Windows 2000 Plug and Play is being carried out and the Found New Hardware Wizard dialog box appears Click Cancel For installation instructions using...

Page 23: ...ine will not print 8 Click Have Disk in the Manufacturers Printers dialog box The Install From Disk dialog box appears 9 Click Browse select the directory that contains the CAPT For example if your CD...

Page 24: ...from the Printer Properties 13 Click Next Click Yes if you want to print a test page or No if you do not want to print a test page 14 Click Finish Click Yes if the Digital Signature Not Found dialog...

Page 25: ...g virus checkers starts up automatically exit it before installation 4 Set the attached CD ROM into the CD ROM drive of your computer CD ROM Menu will appear automatically If the CD ROM was already se...

Page 26: ...s selected in the Copy manufacturer s files from box click OK 10 The driver file selection dialog box appears Click Next Add Printer Wizard dialog box Printer name appears 11 Click Next If you wish to...

Page 27: ...ish Click Yes if the Digital Signature Not Found dialog box appears 15 When the installation is complete the following dialog box appears Click OK to close the dialog box 16 If you opted to print a te...

Page 28: ...installation When you are asked to select the directory that contains the CAPT browse to D English Win9x or D English WinMe if your CD ROM drive is drive D For installation instructions using Plug and...

Page 29: ...ter CD ROM Menu will appear automatically If the CD ROM was already set in at the start up first eject the CD ROM then insert it again If the CD ROM Menu does not appear automatically choose Run At fr...

Page 30: ...ing CAPT software 14 Parallel Cable Users 16 Windows 2000 20 Windows 95 98 Me 16 Windows NT 4 0 18 Windows Server 2003 23 Windows XP 23 System requirements 14 USB Cable Users 26 Windows 98 Me Windows...

Reviews: