


(D)
3
4
2
3
은색
패키지에서
프린터
헤드를
꺼냅니다
.
프린트
헤드가
들어있는
포장지의
내부
또는
보호
캡의
내부에
투명한
또는
밝은
파란색
잉크가
묻어
있을
수
있으나
이는
인쇄
품질에
영향을
주지
않습니다
.
이
항목들을
다룰
때
잉크가
묻지
않도록
조심하십시오
.
손을
더럽히지
않도록
조심
하십시오
.
•
오렌지색
보호
캡을
제거하고
폐기합니다
.
프린트
헤드
홀더가
이동하지
않는
경우
프린터가
켜져
있는지
확인합니다
.
•
프린트
헤드
잠금
레버
(D)
를
올립니다
.
프린트
헤드
잠금
레버가
멈출
때까지
확고하게
올립니다
.(
프린트
헤드
잠금
레버가
무겁
게
느껴질
수
있습니다
.)
•
프린트
헤드
설치하기
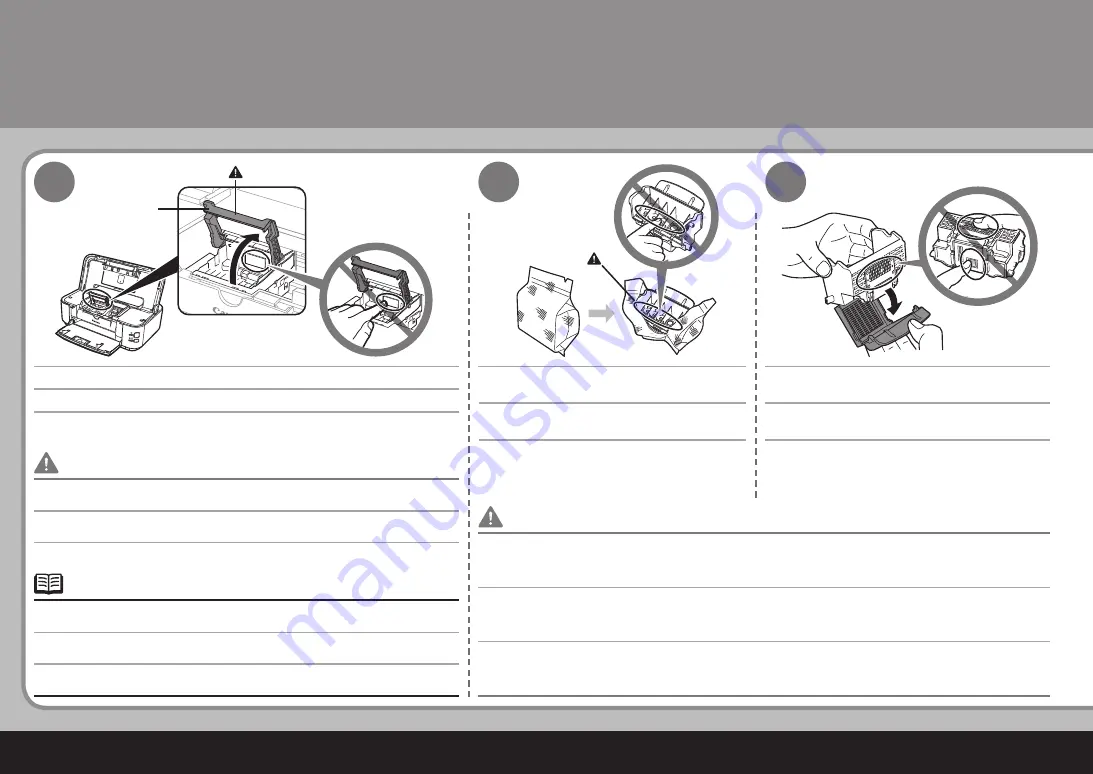
從銀色包裝中取出列印頭。
列印頭包裝袋的內部或保護蓋的內側可能會有一些透明或淺藍色墨水——這對列印品質沒有影響。處理這些物件時,請注
意不要將墨水濺到身上。注意不要弄髒雙手。
•
取下並丟棄橙色保護蓋。
如果列印頭固定座末移出,確保印表機已開啟。
•
抬起列印頭鎖定桿
(D)
。
穩固地抬起列印頭鎖定桿直到其停止。
(
抬起列印頭鎖定桿時可能會感覺吃力。
)
•
安裝列印頭
Remove the Print Head from the silver
package.
There may be some transparent or light blue ink on the inside of the bag the Print Head comes in, or the inside of the
protective cap - this has no effect on print quality. Be careful not to get ink on yourself when handling these items. Be
careful not to stain your hands.
•
Remove and discard the orange protective cap.
If the Print Head Holder does not move, make sure that the printer is turned on.
•
Raise the Print Head Lock Lever (D).
Firmly raise the Print Head Lock Lever until it stops. (The Print Head Lock Lever may
feel heavy.)
•
Install the Print Head


