6
6
6-13
6-13
Troubleshooting■>■Operation■Check■of■the■Main■Controller■LEDs■>■Overview■>■Check■the■lighting■of■the■LED■on■the■Main■Controller
Troubleshooting■>■Operation■Check■of■the■Main■Controller■LEDs■>■Overview■>■Check■the■lighting■of■the■LED■on■the■Main■Controller
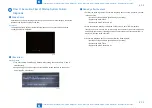
Operation■Check■of■the■Main■Controller■LEDs
Overview
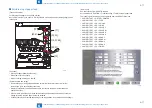
You■may■be■able■to■determine■the■remedies■against■Main■Controller-related■troubles■by■
checking■the■lighting■status■of■LEDs■on■the■PCB.
■
■
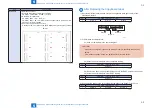
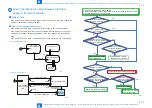
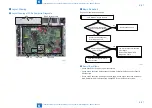
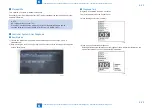
Location■of■LEDs
SATA_FLASH
Main Controller PCB
LED7
LED1
LED14
■
■
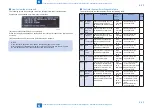
Preconditions
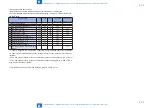
Check■whether■the■connectors■are■securely■connected.■LEDs■are■not■lit■when■the■contact■is■
poor.■(Power-on■is■not■possible)
When■the■LED■of■the■Control■Panel■main■power■is■not■lit,■check■the■connection■of■cables■(such■
as■UI■Cable).■
F-6-10
■
■
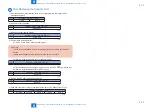
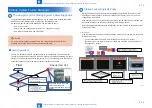
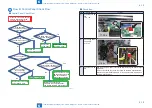
Check■the■lighting■of■the■LED■on■the■Main■Controller
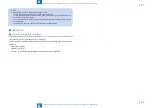
Lighting check of the LED
on the Main Controller PCB
Flash PCB
LED1 lights up.
Yes
No
1. Check for poor connection of the connector
on the FLASH PCB.
2. Replace the FLASH PCB.
Is the machine
started normally?
Normal operation
Yes
No
1. Replace the Main Controller PCB.
2. Replace the FLASH PCB.
LED7 lights up.
LED14 lights up.
Replace the Main Controller PCB.
No
Yes
1. Error in the connector on the Main Controller PCB
2. Replace the Main Controller PCB.
No
3. Replace the power supply of the machine
Yes
Checking the startup of firmware
Checking the Non-all-night Power Supply (12V)
Checking the power supply on the
Main Controller PCB
3. Replace the Main Controller PCB.
F-6-11

