


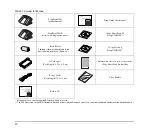


6
●
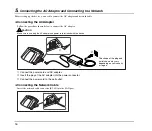
Do not pull directly on the power cord. When
disconnecting the power cord, grasp the plug and
remove it from the outlet.
●
Keep the area around the power plug clear of
objects so that the power cord can be
disconnected easily in an emergency.
●
Use only the AC adapter provided with this device.
Also, do not use the AC adapter provided with any
other electrical devices.
Model: MG1-3968
●
If you have any questions regarding the power
supply, contact your local authorized Canon dealer
or service representative for further information.
❏
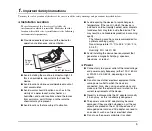
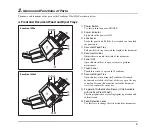
Moving the Device
●
When moving the device, always hold it with both
hands to avoid dropping it. The weight of the
device unit is approximately 7.49 lbs (3.4 kg).
●
Before moving the device, make sure the
document tray is closed and the network cable and
AC adapter are disconnected. If the device is
transported with these items connected, the plugs
and connectors may be damaged due to
excessive force applied to them during movement.
❏
Handling
WARNING
Note the following precautions whenever using the
device. Failure to do so may result in a fire or electric
shock.
■
Never use alcohol, benzene, paint thinner, aerosol
sprays, or any other highly flammable substance
near the device.
■
Do not cut, damage, or modify the power cord or
AC adapter. Do not place heavy objects on the
power cord or AC adapter, and do not pull or
excessively bend the power cord.
■
Never connect the power cord when your hands
are wet.
■
Do not connect the device to a multiplug power
strip.
■
Do not knot or coil the power cord, as this may
result in a fire or electric shock. When connecting
the power cord, make sure that the power plug is
securely and completely inserted into the power
outlet.
■
Do not use power cords and AC adapters other
than the power cord and AC adapter provided with
this device.
■
Never try to take the device apart or modify it in
any way.
■
Never try to take the AC adapter apart or modify it
in any way, as this is dangerous and may lead to a
fire or electric shock.
■
Do not use flammable aerosol sprays near the
device.
■
When cleaning the device, turn the power OFF and
disconnect the power cord from the power supply.
■
Clean the device using a slightly dampened cloth
which has been well wrung out. Never use alcohol,
benzene, paint thinner, or any other flammable
substances.
■
If the device makes strange noises, or gives off,
smoke, heat, or strange odors, or the device does
not function or other abnormalities occur when you
use the machine, immediately turn the power OFF,
and disconnect the power plug from the power
outlet. Then, contact your local authorized Canon
dealer or service representative for further
information.


