


11
En
Selecting the Method to Connect:
Via Wireless LAN or Other Method
No
Yes
Do you want to use the
wireless LAN to connect
the computer?
The settings can be
configured later.
Yes
Connect to the computer via a wireless LAN
immediately
Start from step 4 of “Setting Up a Wireless LAN” in the
Wireless LAN Setting Guide.
No
Connect to the computer via a wired LAN
Proceed to “Connecting via a Wired LAN” (P. 11).
Connect to the computer via a USB cable
Proceed to “Connecting via a USB Cable” (P. 11).
Connecting via a Wired LAN
Checking before the Setup
Internet
Router
or
hub
LAN cable
Are the computer and the router (or hub) properly
connected using a LAN cable?
For more information, see the instruction manual for the
network device you are using, or contact the networking
device manufacturer.
Have the network settings on the computer been
completed?
If the computer is not properly configured, you may not use
the wired LAN connection even after completing the following
settings.
NOTE
•
You cannot connect both the wired LAN and wireless
LAN at the same time. In addition, the machine is set to
the “Wired LAN” by default.
•
When you connect to a network environment that is not
security protected, your personal information could be
disclosed to third parties. Please use caution.
•
If you connect through a LAN in the office, contact your
network administrator.
Connecting via a Wired LAN
1
Connect the LAN cable.
The IP address will be automatically configured in 2
minutes. If you want to set the IP address manually, see
the following items.
e-Manual “Network”
►
“Connecting to a Network”
►
“Setting IP Addresses”
2
Install the driver and software using the provided
DVD-ROM.
See “For details on the installation procedures:” (P. 12).
Proceed to “Setting the Paper Size and Type” (P. 12).
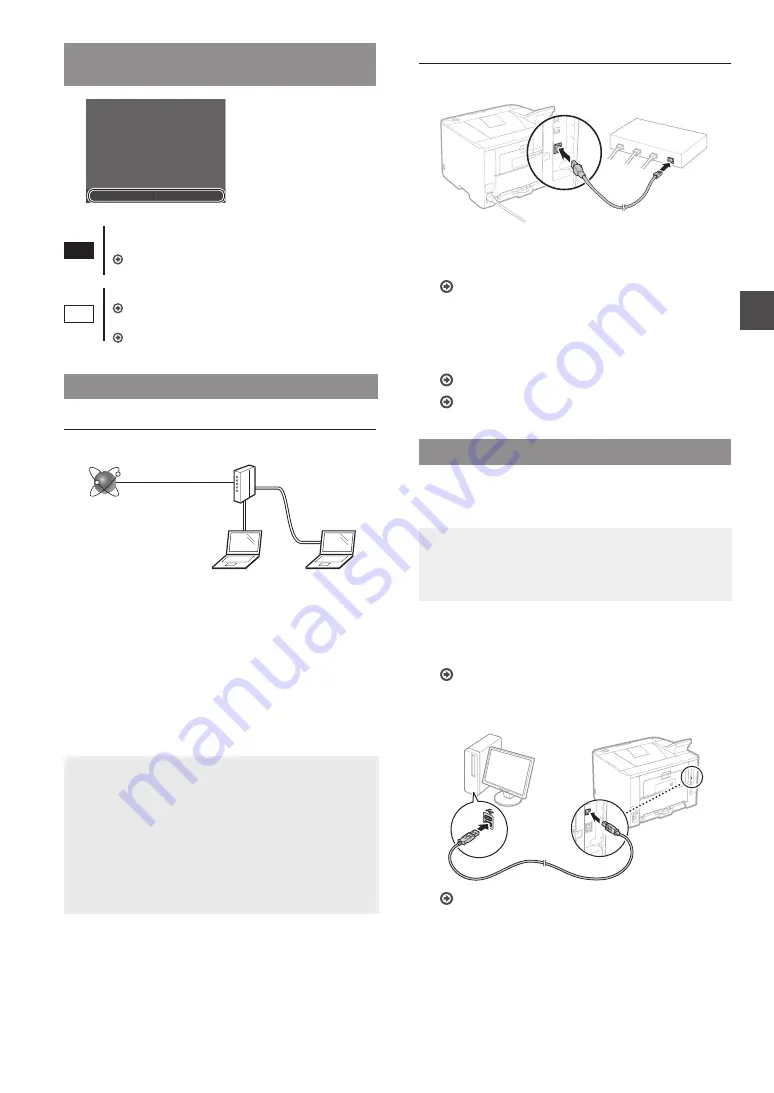
Connecting via a USB Cable
Install the driver and software on the DVD-ROM included with
the machine.
NOTE
If you connected the USB cable before installing, first
remove the USB cable, and then re-install.
1
Install the driver and software using the User
Software and Manuals DVD-ROM.
See “For details on the installation procedures:” (P. 12).
2
Connect the USB cable.
Summary of Contents for imageclass LBP251dw
Page 3: ...3 Remove all the tape 1 2 1 2...
Page 4: ...4 Installing the Printer...
Page 5: ...5 For A5 or larger paper size For paper size smaller than A5 a b b a b a Fill paper up to here...
Page 6: ...6 Installing the Printer Paper Feeder Unit PF 44 Option...
Page 78: ...78 Ru 2 1 LBP253x LBP252dw LBP251dw 2 1 2 1 DVD Canon Windows Mac OS Mac DVD Mac OS Canon...
Page 79: ...79 Ru...
Page 80: ...80 Ru...
Page 108: ...108 Ar LBP253x LBP252dw LBP251dw DVD Canon Windows Mac Mac DVD Mac Canon...
Page 109: ...109 Ar...
Page 110: ...110 Ar...
Page 111: ...111...


