background image

1

QT6-2133-V01

PRINTED IN XXXXXXXX

XXXXXXXX

© CANON INC. 2017

479

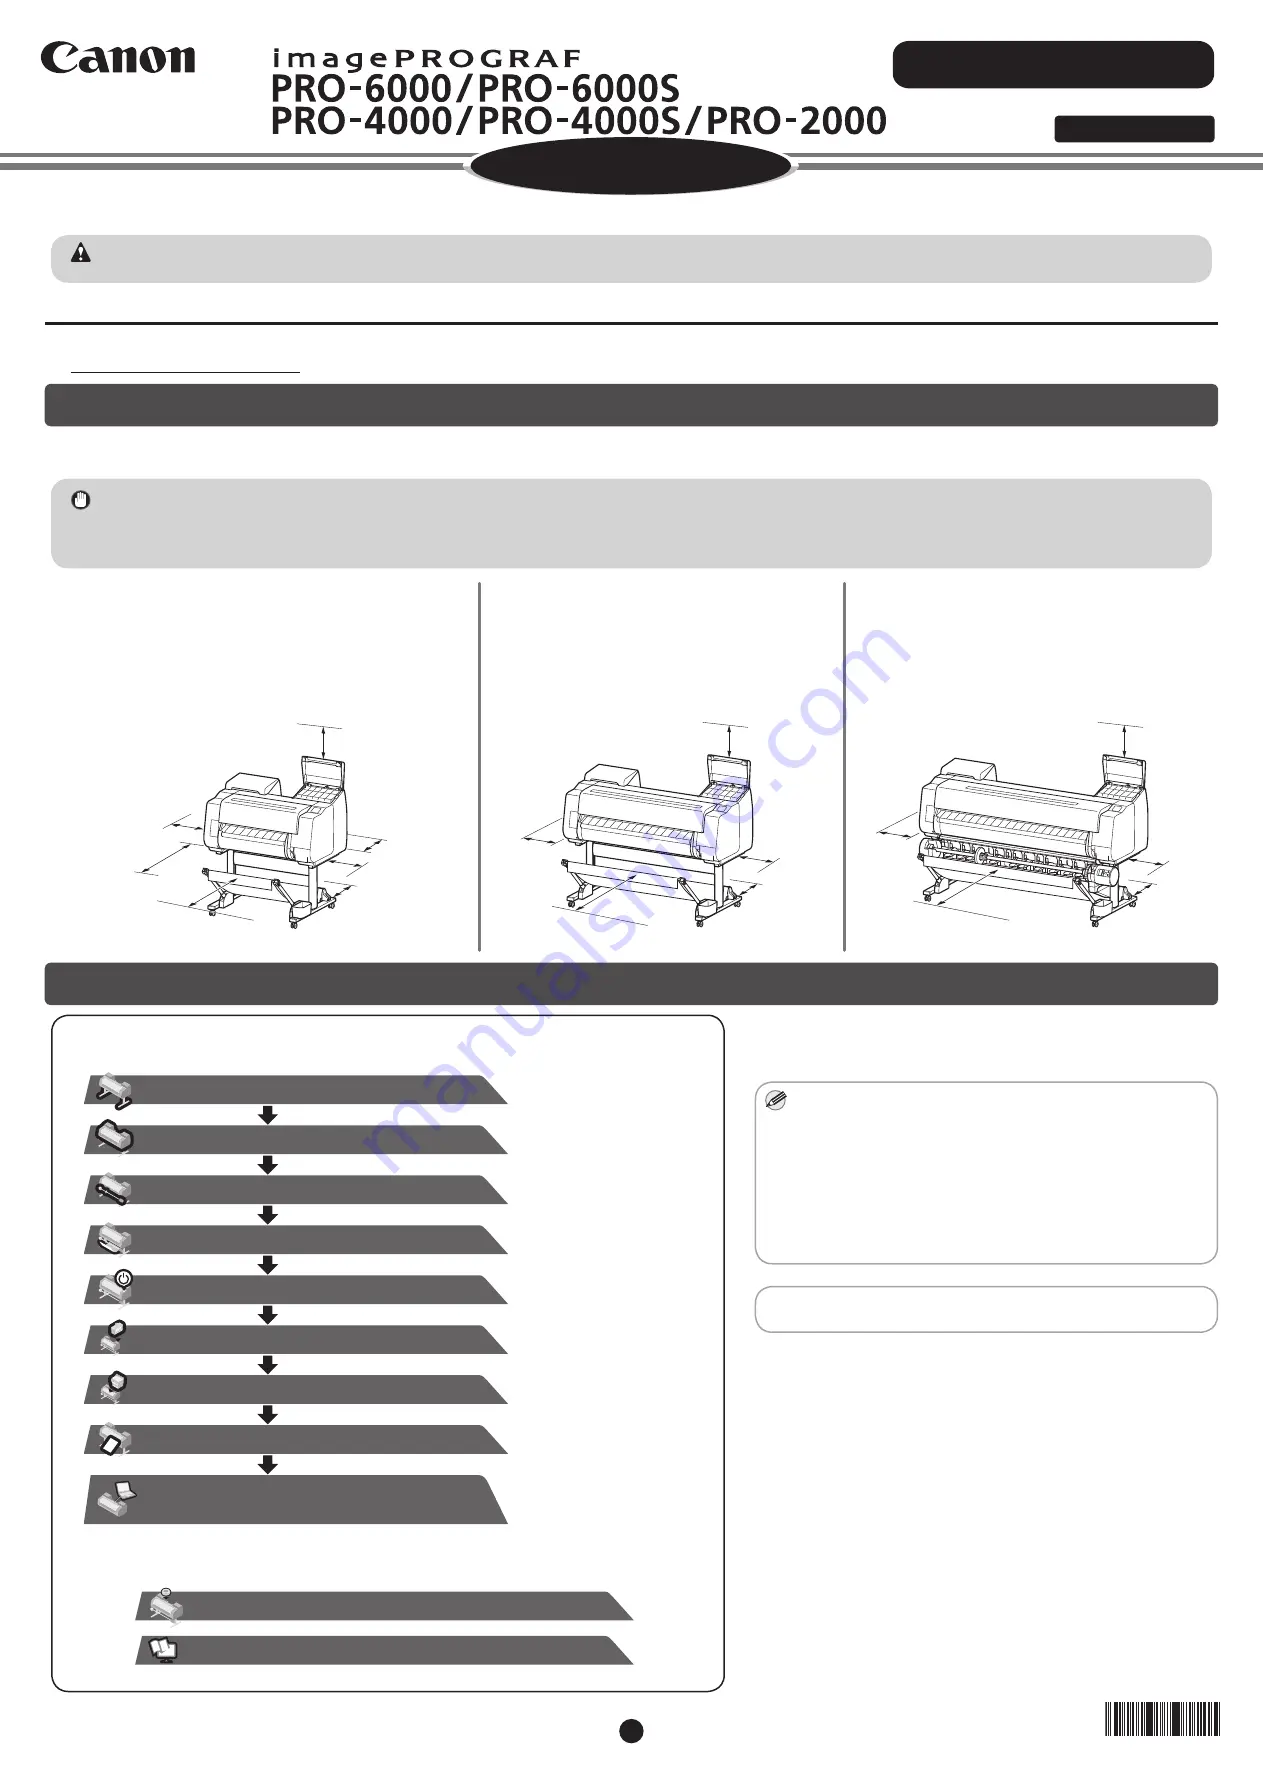
It is recommended that you reserve space of the following dimensions to allow you to work around the printer.

Check the completed image of the printer you purchased and make sure you have enough space to install the printer.

In order to ensure that this product is used safely, be sure to read the precautions.
-> Quick Guide (separate manual)

Before Setting Up the Printer

Read this manual before attempting to operate the printer.

Keep this manual in a handy location for future reference.

Set up the printer using the following procedure.

• Windows is a trademark or registered trademark of Microsoft Corporation in the 

U.S. and/or other countries.

PRO-2000

Installation space (W x D x H)

•  When not using the stand 

59.5 x 56.5 x 40.2 inches (1510 x 1434 x 1020 mm)

•  When using the stand 

59.5 x 66.3 x 61.5 inches (1510 x 1684 x 1560 mm)

PRO-4000 / PRO-4000S

Installation space (W x D x H)

78.5 x 66.3 x 61.5 inches (1993 x 1684 x 1560 mm)

PRO-6000 / PRO-6000S

Installation space (W x D x H)

94.5 x 66.3 x 61.5 inches (2399 x 1684 x 1560 mm)

Confirming the Installation Space

Overview of Setup

Important

• The printer stand and roll unit may be options depending on the model. Care is required because the required space may differ depending on whether or not the 

options are used.

• The space required in front of the printer differs on how the basket supplied with the printer stand is used. This shows the installation space when used in the 

position in the illustration.

Caution

• Instructions in this Setup Guide show the PRO-4000 printer. Note that your printer may look different from these illustrations in some cases. However, the basic 

operations are the same.

Note

• Some items are included with the printer but not described in 

this manual. 

Keep these items in a safe place after setup because they 

are used in various printing applications.

• For instructions on the included items not described in this 

manual, refer to the Online Manual. ("How to Display the 

Online Manuals" on p.14)

• A cable to connect the printer to a computer is not provided 

with the printer.

RMC (Regulatory Model Code): K10468

RMC (Regulatory Model Code): K10441

RMC (Regulatory Model Code): K10440

RMC (Regulatory Model Code): K10439

RMC (Regulatory Model Code): K10438

If an error message appears during setup or other problems occur, 

refer to "Responding to Messages" on p.14.

Setup Guide

Introductory Information

ENGLISH

• Check this also after setup is complete.

3.9 inches

(100 mm)

(When not using

 the stand)

3.9 inches (100 mm)

(When using the

 stand)

23.6 inches 

 (600 mm)

(When using the stand)

(When not

 using the stand)

5.9 inches (150 mm)

7.9 inches 

(200 mm)

7.9 inches

(200 mm)

23.6 inches

(600 mm)

7.9 inches 

(200 mm)

7.9 inches 

(200 mm)

23.6 inches 

 (600 mm)

3.9 inches

(100 mm)

5.9 inches 

(150 mm)

7.9 inches 

(200 mm)

7.9 inches 

(200 mm)

23.6 inches 

 (600 mm)

3.9 inches

(100 mm)

5.9 inches 

(150 mm)

*

Assemble the Stand

(P.3)

*  Refer to the separate 

manual

Install the Printer

(P.3)

*

Attach the Roll Unit

(P.4)

*  Refer to the separate 

manual

*

Attach the Basket

(P.4)

*  Refer to the separate 

manual

Turn On the Printer

(P.4)

Install the Ink Tanks

(P.6)

Install the Print Head

(P.8)

Load the Paper

(P.9)

Store Accessories in the Pockets

(P.13)

How to Display the Online Manuals

(P.14)

• Perform Print Head Adjustment

(P.10 ~ 12)

• Connect to the Printer

Summary of Contents for Image Prograf PRO-2000

Page 1: ... Setup Guide show the PRO 4000 printer Note that your printer may look different from these illustrations in some cases However the basic operations are the same Note Some items are included with the printer but not described in this manual Keep these items in a safe place after setup because they are used in various printing applications For instructions on the included items not described in thi...

Page 2: ...ot be included depending on your region 4 The holder stopper is used when loading roll paper For details refer to the Online Manual Printer On the PRO 6000 and PRO 6000S this is included as standard On the PRO 2000 PRO 4000 and PRO 4000S this is an option Refer to the Roll Unit Setup Guide for details on the products included in the boxes The Manuals Supplied with This Printer Printed Manuals Quic...

Page 3: ...prox 231 lb 105 kg PRO 4000S Approx 227 lb 103 kg PRO 2000 Approx 185 lb 84 kg When moving the printer firmly grasp the carrying handles A under each side Holding the printer at other positions is dangerous and may cause injury and damage if the printer is dropped When setting the printer down temporarily make sure to put the printer on a flat stable place When standing the printer up make sure th...

Page 4: ...e black marker on the basket rod attached to the supporting plate A A Important If you are not using a stand place the printer in the installation location and proceed to Turn On the Printer 5 Affix the printer to the stand Remove the basket rod Use an M4 Allen wrench to securely affix three M4 hex screws each on the left and right from the bottom of the supporting plate 1 Open the top cover 2 Pul...

Page 5: ...on the back of the printer PRO 2000 PRO 4000 PRO 4000S PRO 6000 PRO 6000S 6 Plug the power cord into the outlet 7 Turn on the printer 8 When the language selection screen appears on the touch screen select and tap a language lightly with your finger and then move your finger away Then if the screen for selecting a time zone appears select and tap your region 9 When a message prompting you to start...

Page 6: ...tanks and mount them in the holders with ink holes down and metal contacts on the bottom Important An ink tank cannot be mounted in the holder if it is not oriented correctly for the color Do not try to force an ink tank into the holder if it does not go in normally Check the color indicated on the label and the ink tank orientation and then try mounting the tank into the holder again 1 Instructio...

Page 7: ...n 8 Firmly push down the handle part of the ink tank lock lever all the way in 9 Make sure the ink lamp lights red Important If the ink lamp does not light repeat steps 2 3 7 and 8 10 Repeat steps 2 to 9 to install each of the ink tanks Close the ink tank covers ...

Page 8: ... to spill it once the protective caps are removed Do not reattach the protective caps after removing them Dispose of them according to local regulations 6 Insert the print head into the carriage with the ink holes A on the upper side and facing towards you as shown in the figure Carefully push the print head firmly into the carriage ensuring that the part covered by the protective caps does not to...

Page 9: ...you insert the paper in portrait orientation while not using the printer stand the paper may become jammed 4 Load the paper aligned with the paper alignment lines A to ensure that the paper is not crooked and align the leading edge of the paper with the front side of the line B A B 5 Lower the release lever to lock the paper and close the top cover 6 The screen for selecting the paper type appears...

Page 10: ...nd tap Yes if there are no problems USB connection This is the method for connecting the printer to a computer using a USB cable Only 1 printer can be connected Do not connect the USB cable yet Wired LAN connection This is the method for connecting the printer to the network using a LAN cable Wireless LAN connection This is the method for connecting the printer to the network without using a cable...

Page 11: ... the covers of the printer or turn the power off while the ink is charging for the first time and the print head adjustment is executing Note Charging the system with ink fills the system from the ink tanks to the print head In addition cleaning is performed to keep the printer in optimal condition This may cause the remaining ink indicator and maintenance cartridge capacity indicator to drop some...

Page 12: ...ut downloading appears select Do not block Allow etc to proceed with the operation 4 Run the file you downloaded and click Start Setup Configure the settings by following the instructions on the screen Note A screen for selecting the printer connection method may be displayed in the middle of configuring the settings If this happens select the method you selected in step 4 on p 10 or step 1 on p 1...

Page 13: ...3 inch paper core attachment in the accessory pocket Note When the setup is completed refer to the various manuals to use the printer Refer to The Manuals Supplied with This Printer on p 2 Store Accessories in the Pockets Note Once you have finished setting up the printer and software it is recommended that you execute color calibration You can compensate for variations in color tone due to differ...

Page 14: ...lease lever and reload the paper The paper may not be aligned with the paper alignment line Reload the paper so that the edge of the paper is aligned with the paper alignment line Refer to steps 2 6 on p 9 Unsupported paper size Lift the release lever and replace the paper The roll paper is fed even though cut sheet remains selected as the paper source Release the release lever and reload the pape...

Reviews: