background image

1

2

3

4

5

6

7

8

9

Back

Previous

Next

TOP

9-11

Before Using the 
Machine

Document and Paper

Sending and 
Receiving

Copying

Printing (FAX-L160 
Only)

System Manager 
Settings

Maintenance

Troubleshooting

Appendix

Table of Contents

Index

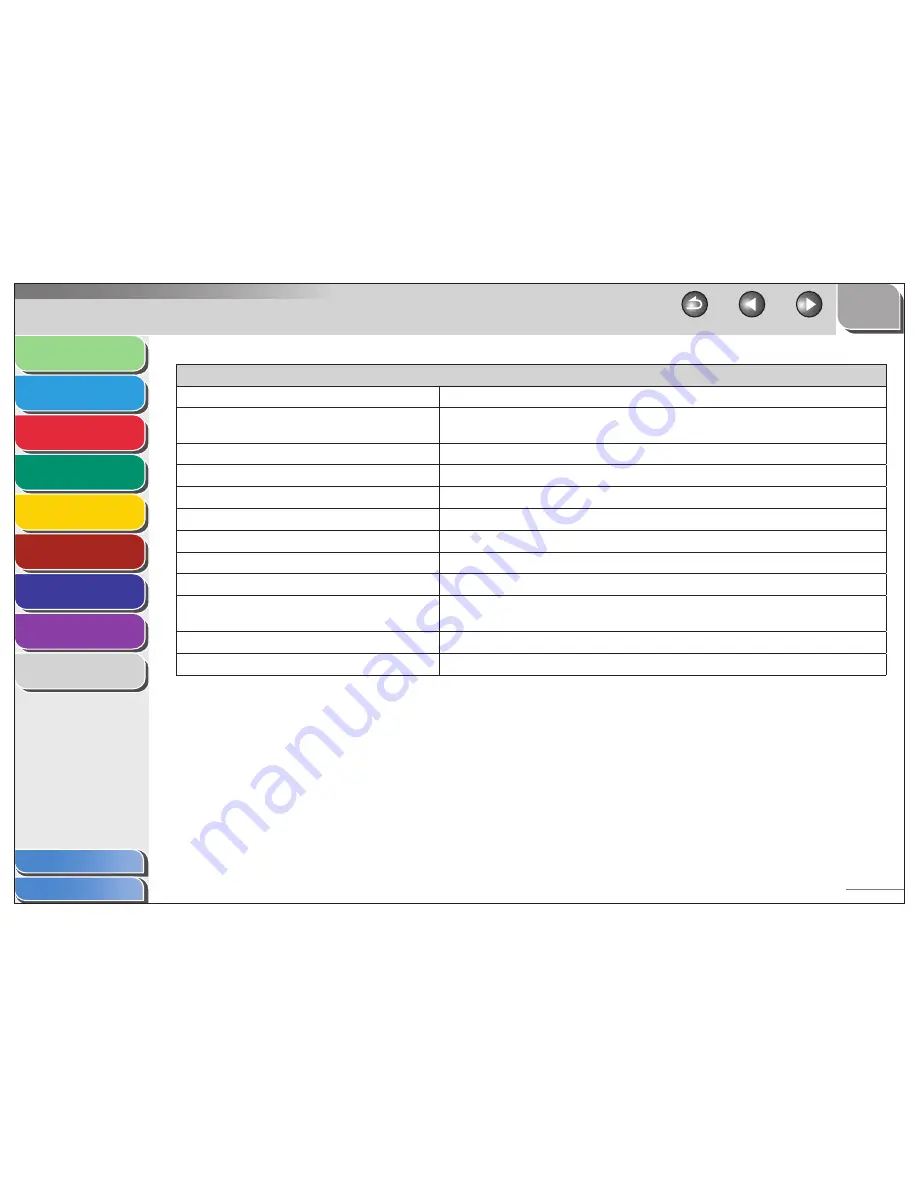
  ADDRESS  BOOK  SET.

Setting Item

Description

1.  1-TOUCH SPD DIAL

Registers recipients on one-touch speed dialing keys. Up to 15 recipients can be registered. (See 
“Storing/Editing One-Touch Speed Dialing Keys/Coded Speed Dialing Codes,” on p. 3-7.)

1.  NAME

Registers the recipient’s name (max. 20 characters, including spaces).

2.  TEL NUMBER ENTRY

Registers the recipient’s fax/telephone number (max. 50 digits, including spaces).

3.  OPTIONAL SETTING

Sets the optional settings for sending faxes.

OFF

The optional setting is not set.

ON

The optional setting is set.

SUBADDRESS

Sets the subaddress (20 digits).

PASSWORD

Sets the password (20 digits).

2.  CODED DIAL

Registers recipients for coded speed dialing. Up to 100 recipients can be registered. (See 
“Storing/Editing One-Touch Speed Dialing Keys/Coded Speed Dialing Codes,” on p. 3-7.)

1.  NAME

Registers the recipient’s name (max. 20 characters, including spaces).

2.  TEL NUMBER ENTRY

Registers the recipient’s fax/telephone number (max. 50 digits, including spaces).

Summary of Contents for FAX L140

Page 1: ...Receiving Copying Printing FAX L160 Only System Manager Settings Maintenance Troubleshooting Appendix How to Use This Guide Table of Contents Index Reference Guide Please read this guide before operating this product After you finish reading this guide store it in a safe place for future reference ...

Page 2: ...t Adobe Reader Adobe Acrobat Reader is required If Adobe Reader Adobe Acrobat Reader is not installed on your system please download it from the Adobe Systems Incorporated website Considerable effort has been made to make sure that the manuals for the machine are free of inaccuracies and omissions However as we are constantly improving our products if you need an exact specification please contact...

Page 3: ...ialing Keys p 3 14 Specify a recipient with a two digit code Coded Speed Dialing Codes p 3 14 Specify multiple recipients as a group Group Dialing p 3 15 Look up a particular recipient Address Book Search p 3 15 Redial when the line is busy Redialing p 3 19 Send documents to multiple recipients Broadcasting p 3 30 Receive faxes in memory without printing out Memory Lock Reception p 3 25 Reject fax...

Page 4: ...olling p 3 31 Send a fax to be relayed to other fax machines Relay p 3 33 Select a scan mode depending on the type of image Image Quality p 4 3 1 Indicates the features available only for FAX L160 Adjust the density level of scanned images Density p 4 3 Enlarge or reduce copied images Zoom Ratio p 4 4 Print a document from a PC 1 Printing p 5 2 Sort printouts by page order 1 Collate Printing p 5 3...

Page 5: ...ings Maintenance Troubleshooting Appendix Table of Contents Index Table of Contents Manuals for the Machine i Things You Can Do ii How to Use This Guide xv Using the Top Page xv Using the Chapter Topic List xvi Illustrations Used in This Manual xviii Legal Notices xix 1 Before Using the Machine 1 1 Machine Components 1 3 Operation Panel 1 6 Operation Panel 1 6 ...

Page 6: ... Maintenance Troubleshooting Appendix Table of Contents Index LCD Standby Mode 1 9 Fax Mode 1 9 Copy Mode 1 9 Optional Handset 1 10 Maintaining the Handset 1 10 Toner Cartridge 1 11 Maintaining the Toner Cartridge 1 12 Telephone Line Setting 1 13 Setting the Telephone Line Type 1 13 Timer Settings 1 14 Setting the Sleep Mode 1 14 Setting Daylight Saving Time 1 15 ...

Page 7: ...System Manager Settings Maintenance Troubleshooting Appendix Table of Contents Index 2 Document and Paper 2 1 Document Requirements 2 2 Scanning Area 2 3 Loading Documents 2 4 Paper Requirements 2 5 Printable Area 2 7 Loading Paper 2 8 Loading Envelopes 2 8 Setting Paper Size and Type 2 11 3 Sending and Receiving 3 1 Basic Sending Method 3 5 ...

Page 8: ... Appendix Table of Contents Index Scan Settings 3 6 Image Quality 3 6 Density 3 6 Storing Editing Address Book 3 7 Storing Editing One Touch Speed Dialing Keys Coded Speed Dialing Codes 3 7 Storing Editing Group Dialing 3 10 Specifying Recipients 3 14 Using One Touch Speed Dialing Keys 3 14 Using Coded Speed Dialing Codes 3 14 Group Dialing 3 15 Using Address Book Key 3 15 Manual Sending 3 17 ...

Page 9: ... 3 18 Dialing Through a Switchboard 3 18 Switching Temporarily to Tone Dialing 3 19 Redialing 3 19 Checking Dialing Line 3 21 Dialing an Overseas Number With Pauses 3 21 Basic Receiving Method 3 23 Receiving Features 3 24 FAX TEL Optional Settings 3 24 Manual Reception 3 25 Memory Reception 3 25 Memory Lock Reception 3 26 Remote Reception 3 27 Selecting the Receive Mode for Printing 3 28 Reception...

Page 10: ...ing Appendix Table of Contents Index Advanced Features 3 30 Broadcasting 3 30 Delayed Sending 3 30 Polling 3 31 Relay 3 33 Canceling TX RX Jobs 3 34 Checking and Deleting TX RX Jobs 3 35 Checking Transmission Reception Results 3 35 Checking and Deleting Fax Documents Stored in Memory 3 35 4 Copying 4 1 Basic Copying Method 4 2 Scan Settings 4 3 Image Quality 4 3 Density 4 3 Zoom Ratio 4 4 ...

Page 11: ...pendix Table of Contents Index Canceling Copy Jobs 4 5 5 Printing FAX L160 Only 5 1 Printing Documents 5 2 Advanced Printing Features 5 3 Collate Printing 5 3 Checking and Deleting Jobs 5 4 Checking and Deleting Print Jobs 5 4 6 System Manager Settings 6 1 Specifying the System Manager Settings 6 2 Restricting Access to Destinations 6 3 Confirming Entered Fax Numbers 6 3 Restricting Redial 6 3 ...

Page 12: ...enance Troubleshooting Appendix Table of Contents Index 7 Maintenance 7 1 Cleaning the Machine 7 2 Exterior 7 2 Interior 7 2 Fuser Roller 7 6 Scanning area 7 6 Replacing the Toner Cartridge 7 8 Redistributing Toner 7 8 Replacing the Toner Cartridge with a New One 7 12 Transporting the Machine 7 17 8 Troubleshooting 8 1 Clearing Jams 8 3 Document Jams 8 3 Paper Jams 8 5 ...

Page 13: ...ooting Appendix Table of Contents Index LCD Messages 8 10 Error Codes 8 16 If LOAD CORRECT PAPER is displayed 8 18 Re Loading the Paper 8 18 Changing the Paper Size Setting 8 18 General Problems 8 19 Paper Feeding Problems 8 20 Sending Receiving Problems 8 21 Sending Problems 8 21 Receiving Problems 8 24 Copying Problems 8 30 Printing Problems FAX L160 Only 8 32 Telephone Problems 8 35 ...

Page 14: ...hooting Appendix Table of Contents Index If a Power Failure Occurs 8 36 If You Cannot Solve a Problem 8 37 9 Appendix 9 1 Machine Settings 9 3 Printing USER DATA LIST 9 3 Accessing the Setting Menu 9 3 Setting Menu 9 5 PAPER SETTINGS 9 5 VOLUME CONTROL 9 5 COMMON SETTINGS 9 6 COPY SETTINGS 9 6 FAX SETTINGS 9 7 ADDRESS BOOK SET 9 11 PRINTER SETTINGS FAX L160 Only 9 12 TIMER SETTINGS 9 13 ...

Page 15: ...enance Troubleshooting Appendix Table of Contents Index ADJUST CLEANING 9 14 REPORT SETTINGS 9 14 SYSTEM SETTINGS 9 16 Summary of Reports and Lists 9 18 Printing Reports Automatically 9 19 TX REPORT 9 19 RX REPORT 9 20 ACTIVITY REPORT 9 21 Printing Reports and Lists Manually 9 23 Checking Remaining Memory 9 24 Checking Print and Scan Counts 9 25 Glossary 9 26 Index 9 32 ...

Page 16: ...Paper Sending and Receiving Copying Printing FAX L160 Only System Manager Settings Maintenance Troubleshooting Appendix How to Use This Guide Table of Contents Index Reference Guide Please read this guide before operating this product After you finish reading this guide store it in a safe place for future reference Returns to the last page opened Displays the previous or next page Returns to the t...

Page 17: ...5 6 7 8 9 Back Previous Next TOP 1 1 Before Using the Machine Document and Paper Sending and Receiving Copying Printing FAX L160 Only System Manager Settings Maintenance Troubleshooting Appendix Table of Contents Index 1 Before Using the Machine Machine Components 1 3 Operation Panel 1 6 Operation Panel 1 6 LCD Standby Mode 1 9 Fax Mode 1 9 Copy Mode 1 9 Optional Handset 1 10 Maintaining the Hands...

Page 18: ...uld keep in mind when using the machine Indicates a warning that may lead to death or serious injury if not observed Explains how to avoid actions that could injure you or damage your machine Explains operating restrictions and how to avoid minor difficulties In addition this guide uses distinctive notations to identify keys and information in the LCD The keys you press appear in square brackets S...

Page 19: ...shooting Appendix Table of Contents Index Illustrations Used in This Manual Unless otherwise mentioned illustrations used in this manual are those taken when no optional equipment is attached to the FAX L160 The model FAX L160 is used for illustration purposes in this manual When there is any difference between FAX L160 and FAX L140 it is clearly indicated in the text e g FAX L160 Only ...

Page 20: ...ights reserved No part of this publication may be reproduced transmitted transcribed stored in a retrieval system or translated into any language or computer language in any form or by any means electronic mechanical magnetic optical chemical manual or otherwise without the prior written permission of Canon Inc Disclaimer The information in this document is subject to change without notice CANON I...

Page 21: ... Only System Manager Settings Maintenance Troubleshooting Appendix Table of Contents Index 1 Before Using the Machine Machine Components 1 3 Operation Panel 1 6 Operation Panel 1 6 LCD Standby Mode 1 9 Fax Mode 1 9 Copy Mode 1 9 Optional Handset 1 10 Maintaining the Handset 1 10 Toner Cartridge 1 11 Maintaining the Toner Cartridge 1 12 ...

Page 22: ...er Sending and Receiving Copying Printing FAX L160 Only System Manager Settings Maintenance Troubleshooting Appendix Table of Contents Index Telephone Line Setting 1 13 Setting the Telephone Line Type 1 13 Timer Settings 1 14 Setting the Sleep Mode 1 14 Setting Daylight Saving Time 1 15 ...

Page 23: ...able of Contents Machine Components A Document feeder tray Holds documents B Document feeder tray extension Extension for the document feeder tray C Paper delivery tray Outputs printouts D Paper delivery tray extension Extension for the paper output tray E Toner cover Open it when replacing the toner cartridge or removing jammed paper F Notch Used to open the toner cover G Operation panel Controls...

Page 24: ...nts H Document delivery tray extension Extension for the document delivery tray I Document delivery tray Outputs scanned documents Part of paper stack cover J ADF Automatic Document Feeder Feeds documents automatically into the machine for scanning K Document release lever Releases jammed document L Paper stack cover Protects paper supply in the machine from dirt and dust M Document guides Adjust ...

Page 25: ...tings Maintenance Troubleshooting Appendix Index Table of Contents N Power socket Connect the power cord O Handset cable retainer Hook the optional handset cable to retain the slack P Line jack Connect the telephone cable Q External device jack Connect an external device if necessary R Handset jack Connect the optional handset S USB port Connect the USB cable ...

Page 26: ...aling or group dialing B LCD display Displays messages and prompts during operation Also displays selections text and numbers when adjusting settings C key Press to decrease the value for various settings Also press to see the previous item in the menu D key Press to increase the value for various settings Also press to see the next item in the menu E Energy Saver key Press to set or cancel the Sl...

Page 27: ...de K Clear key Press to clear entered alphanumeric characters L Stop Reset key Press to stop a current job or to return the machine to the standby mode Also press to switch to the Fax mode when the machine is in the Copy mode M Start key Press to start scanning documents for sending or copying N Processing Data indicator Flashes while sending or receiving faxes Lights when the machine has waiting ...

Page 28: ...earch pre registered destinations under one touch speed dialing keys or coded speed dialing by name R Coded Dial key Press to specify recipients registered under coded speed dialing S Image Quality key Press to select image quality for copy or fax T Hook key Press when you want to dial without lifting up the handset of the optional telephone or external telephone U Redial Pause key Press to redial...

Page 29: ...ate Time B Receive mode C Image quality Copy Mode A 4 1 0 0 T E X T P H O T O 1 A Zoom ratio B Paper size C Quantity D Density E Image quality When you connect the power code the LCD displays PLEASE WAIT first and then displays INITIALIZING until the standby display appears It is also possible to see the standby display without having INITIALIZING shown If the machine remains idle for one minute t...

Page 30: ...s a telephone and a fax machine or if you want to receive faxes manually install the handset available from your local authorized Canon dealer or the Canon help line For how to install the handset see Before FAX Setting in the Starter Guide Maintaining the Handset Do not leave the handset exposed to direct sunlight Do not install the handset in hot or humid conditions Do not spray aerosol polish o...

Page 31: ...mption varies depending on the type of documents printed If your average document contains a lot of graphics tables or charts the life of the toner cartridge will be shorter as they consume more toner When you are replacing a toner cartridge be sure to use a toner cartridge designed for this product To purchase a new Canon genuine toner cartridge contact your local authorized Canon dealer or Canon...

Page 32: ...tive shutter on the toner cartridge Print quality may deteriorate if the drum surface is exposed to light or is damaged Always hold the toner cartridge by its handle to avoid touching the drum protective shutter Do not stand the toner cartridge on end and do not turn it upside down If toner becomes caked in the toner cartridge it may become impossible to free it even by shaking the toner cartridge...

Page 33: ... Telephone Line Type The default setting is TOUCH TONE 1 Press Menu 2 Press or to select FAX SETTINGS then press OK 3 Press or to select USER SETTINGS then press OK 4 Press or to select TEL LINE TYPE then press OK 5 Press or to select the telephone line type then press OK TOUCH TONE Tone dialing ROTARY PULSE Pulse dialing If you do not know the type of telephone line you use contact your local tel...

Page 34: ...nts You can also enter values using numeric keys The default setting is 5 minutes 6 Press Stop Reset to return to the standby mode Energy Saver lights green when the machine enters the Sleep mode To resume the normal mode from the Sleep mode press Energy Saver on the operation panel To enter the Sleep mode manually press Energy Saver on the operation panel The machine will not enter the Sleep mode...

Page 35: ...ving Time The default setting is ON 1 Press Menu 2 Press or to select TIMER SETTINGS then press OK 3 Press or to select DAYLIGHT SV TIME then press OK 4 Press or to select ON then press OK 5 Press or to select BEGIN DATE TIME then press OK 6 Press or to select MONTH then press OK 7 Press or to select the month then press OK 8 Press or to select WEEK then press OK 9 Press or to select the week then...

Page 36: ...Maintenance Troubleshooting Appendix Index Table of Contents 14 Press or to select MONTH then press OK 15 Press or to select the month then press OK 16 Press or to select WEEK then press OK 17 Press or to select the week then press OK 18 Press or to select DAY then press OK 19 Press or to select the day then press OK 20 Press Stop Reset to return to the standby mode ...

Page 37: ...pying Printing FAX L160 Only System Manager Settings Maintenance Troubleshooting Appendix Table of Contents Index 2 Document and Paper Document Requirements 2 2 Scanning Area 2 3 Loading Documents 2 4 Paper Requirements 2 5 Printable Area 2 7 Loading Paper 2 8 Loading Envelopes 2 8 Setting Paper Size and Type 2 11 ...

Page 38: ... x 400 mm Min 148 x 105 mm Max 30 A4 or Letter size sheets Max 10 Legal size sheets or the stack height of 5 mm 64 to 105 g m2 If using fine art paper it should be 0 1 mm or thicker per sheet To prevent document jams do not use any of the following Wrinkled or creased paper Carbon paper or carbon backed paper Curled or rolled paper Coated paper Torn paper Onion skin or thin paper Documents with st...

Page 39: ... Printing FAX L160 Only System Manager Settings Maintenance Troubleshooting Appendix Index Table of Contents Scanning Area Make sure your document s text and graphics fall within the shaded area in the following diagram Note that the margin widths listed are approximate and there may be slight variations in actual use ...

Page 40: ...AX L160 Only System Manager Settings Maintenance Troubleshooting Appendix Index Table of Contents Loading Documents 1 Adjust the slide guides to the width of the documents 2 Fan the document stack and even the edges 3 Insert the document top edge first in the ADF with the printed side facing up The document is ready for scanning ...

Page 41: ... of 80 g m2 paper Only for PC printing Paper Type Setting Paper Type Weight Plain Paper Plain paper 64 to 90 g m2 Plain Paper L Heavy Paper Heavy paper 105 to 128 g m2 Heavy Paper H Transparency Transparencies The default paper size is A4 If you use a different paper size you must change the paper size settings See Setting Paper Size and Type on p 2 11 For transparencies you can load only up to 10...

Page 42: ... Make sure the paper is free from dust lint and oil stains Be sure to test paper before purchasing large quantities Store all paper wrapped and on a flat surface until ready for use Keep opened packs in their original packaging in a cool dry location Store paper at 18 C 24 C 40 60 relative humidity Use only the transparencies designed for laser printers Canon recommends you to use Canon type trans...

Page 43: ...Copying Printing FAX L160 Only System Manager Settings Maintenance Troubleshooting Appendix Index Table of Contents Printable Area The shaded area indicates the approximate printable area of A4 paper and envelope Note that the margin widths listed are approximate and there may be slight variations in actual use ...

Page 44: ...ure to set the correct envelope size in the printer driver See Online Help To prevent jams do not use the following Envelopes with windows holes perforations cutouts and double flaps Envelopes made with special coated paper or deeply embossed paper Envelopes with peel off sealing strips Envelopes with letters enclosed 1 Place the stack of envelopes on a firm flat surface and press down firmly on t...

Page 45: ...nting FAX L160 Only System Manager Settings Maintenance Troubleshooting Appendix Index Table of Contents 2 Lift the paper stack cover and pull it out completely Make sure the back end of the cover does not catch the front paper guide 3 Pull out the paper guide rail 4 Insert the envelope stack with the print side facing up ...

Page 46: ...Adjust the side paper guides to the size of the stack If the paper guides are not adjusted correctly for the size of the envelopes the quality of your printouts may be adversely affected 6 Push back the paper guide rail to the front edge of the stack 7 Pinch and slide the front paper guide to match the envelope size 8 Insert the paper stack cover Make sure the back end of the cover does not catch ...

Page 47: ...ress OK You can select from the following paper sizes A4 OFICIO BRAZIL OFICIO MEXICO OFICIO FOLIO GOVERNMENT LETTER GOVERNMENT LEGAL FOOLSCAP LTR LGL The available paper size will vary depending on the country where the unit was purchased 6 Press OK 7 Press or to select PAPER TYPE then press OK 8 Press or to select the paper type then press OK You can select from the following paper types PLAIN PA...

Page 48: ...L160 Only System Manager Settings Maintenance Troubleshooting Appendix Table of Contents Index 3 Sending and Receiving Basic Sending Method 3 5 Scan Settings 3 6 Image Quality 3 6 Density 3 6 Storing Editing Address Book 3 7 Storing Editing One Touch Speed Dialing Keys Coded Speed Dialing Codes 3 7 Storing Editing Group Dialing 3 10 ...

Page 49: ...e of Contents Index Specifying Recipients 3 14 Using One Touch Speed Dialing Keys 3 14 Using Coded Speed Dialing Codes 3 14 Group Dialing 3 15 Using Address Book Key 3 15 Manual Sending 3 17 Fax Dialing Features 3 18 Dialing Through a Switchboard 3 18 Switching Temporarily to Tone Dialing 3 19 Redialing 3 19 Checking Dialing Line 3 21 Dialing an Overseas Number With Pauses 3 21 Basic Receiving Met...

Page 50: ...bleshooting Appendix Table of Contents Index Receiving Features 3 24 FAX TEL Optional Settings 3 24 Manual Reception 3 25 Memory Reception 3 25 Memory Lock Reception 3 26 Remote Reception 3 27 Selecting the Receive Mode for Printing 3 28 Reception Restriction 3 29 Printing Received Documents 3 29 Advanced Features 3 30 Broadcasting 3 30 Delayed Sending 3 30 Polling 3 31 Relay 3 33 ...

Page 51: ... and Receiving Copying Printing FAX L160 Only System Manager Settings Maintenance Troubleshooting Appendix Table of Contents Index Canceling TX RX Jobs 3 34 Checking and Deleting TX RX Jobs 3 35 Checking Transmission Reception Results 3 35 Checking and Deleting Fax Documents Stored in Memory 3 35 ...

Page 52: ...ow this procedure to send faxes 1 Make sure the LCD shows the fax mode If the LCD shows the copy mode press Stop Reset 2 Set documents Insert the document top edge first in the ADF with the printed side facing up See Loading Documents on p 2 4 3 Enter the fax number with the numeric keys You can also specify the fax number with one touch speed dialing keys coded speed dialing codes or Address Book...

Page 53: ...ollowing Menu FAX SETTINGS USER SETTINGS STANDARD SETTINGS DENSITY or IMAGE QUALITY See Setting Menu on p 9 5 Image Quality The default setting is STANDARD 1 Press Image Quality 2 Press or to select the resolution then press OK STANDARD for most text only documents 200 x 100 dpi FINE for fine print documents the resolution is twice that of STANDARD 200 x 200 dpi PHOTO for documents that contain ph...

Page 54: ...y pressing Coded Dial followed by two digit code You can register up to 100 coded speed dialing codes Using Group Dialing p 3 15 You can specify up to 15 groups of fax telephone numbers registered in one touch speed dialing keys You can register up to 50 fax telephone numbers in a group Using Address Book Key p 3 15 You can specify fax telephone numbers by pressing Address Book and searching a fax...

Page 55: ... M B E R E N T R Y Ex Press R first if the machine is behind a switchboard Dialing Through a Switchboard on p 3 18 Press Redial Pause to enter a pause See Dialing an Overseas Number With Pauses on p 3 21 7 Press or to select ON then press OK If no subaddress or password is required press or to select OFF then press OK And press Stop Reset to return to the standby mode 8 Enter the subaddress number...

Page 56: ...y or Coded Dial followed by the two digit code 5 Press repeatedly to go to the character you want to change then press Clear To delete the entire entry press and hold Clear 6 Enter a new character with the numeric keys then press OK 7 Press repeatedly to go to the wrong digit then press Clear to delete it To delete the entire entry press and hold Clear 8 Enter a new number with the numeric keys th...

Page 57: ... speed dialing code by pressing the corresponding one touch speed dialing key or Coded Dial followed by the two digit code 5 Press OK 6 Press and hold Clear to delete the entire entry then press OK If you delete the fax number the registered name is cleared automatically 7 Press Stop Reset to return to the standby mode Storing Editing Group Dialing The recipients must be registered in one touch sp...

Page 58: ...uch speed dialing key To enter a recipient stored under a coded speed dialing code press Coded Dial then enter the two digit code with the numeric keys For multiple entries press Coded Dial between each entry You can review the destinations which have been already entered with or 7 Press Stop Reset to return to the standby mode Adding New Recipients to Group 1 Press Menu 2 Press or to select ADDRE...

Page 59: ...K 6 Press or to display the recipient you want to delete from the group then press Clear Repeat this step if you want to delete another recipient 7 Press OK 8 Press Stop Reset to return to the standby mode Changing Group Name 1 Press Menu 2 Press or to select ADDRESS BOOK SET then press OK 3 Press or to select GROUP DIAL then press OK 4 Press or to select a group to edit then press OK You can spec...

Page 60: ...or to select GROUP DIAL then press OK 4 Press or to select a group to delete then press OK You can specify a group to edit by pressing the corresponding one touch speed dialing key 5 Press OK 6 Press Clear repeatedly until all recipients are deleted then press OK When you delete all recipients the registered name is cleared automatically If you press Clear excessively the display returns to ADDRES...

Page 61: ...f you want to adjust the image quality and density see Scan Settings on p 3 6 2 Press the desired one touch speed dialing keys 01 to 15 If you pressed a wrong key press Stop Reset and try again 0 1 2 3 X X X X X X 0 5 C A N O N Ex 3 Press Start Using Coded Speed Dialing Codes You can specify up to 100 recipients using coded speed dialing codes To use this feature you must register recipients in co...

Page 62: ...Reset and perform step 2 again 3 Press Start Using Address Book Key Address Book search enables you to search for a particular recipient registered in the machine This is useful when you forget which one touch speed dialing key or coded speed dialing code the recipient you want is registered under You can either go through all the recipients registered in the machine LIST or look up a particular o...

Page 63: ...Looking Up a Recipient 1 Set documents If you want to adjust the image quality and density see Scan Settings on p 3 6 2 Press Address Book If no recipient is registered for speed dialing NOT REGISTERED is displayed 3 Press or to select SEARCH then press OK 4 Use the numeric keys to enter up to 10 first characters of the recipient s name then press OK S E A R C H A C A N O N Ex Press to switch betw...

Page 64: ...lephone to the machine see Connect Telephone Cables and Install Optional Handset in the Starter Guide 2 Set documents If you want to adjust the image quality and density see Scan Settings on p 3 6 3 Press Hook or pick up the optional handset or handset of your external telephone 4 Dial the recipient s fax telephone number Make sure to confirm the dial tone before entering a fax number If you enter...

Page 65: ...u can easily access the outside line Registering the R Key 1 Press Menu 2 Press or to select SYSTEM SETTINGS then press OK 3 Press or to select COMMUNICATIONS then press OK 4 Press or to select R KEY SETTING then press OK 5 Press or to select PBX then press OK 6 Use the numeric keys to enter the prefix number up to 20 digits then press OK P R E F I X Ex 7 Press Stop Reset to return to the standby ...

Page 66: ... the call may not be connected or the wrong number may be dialed 2 Use the numeric keys to dial the required information service 3 When the recorded message of the information service answers press Tone to switch to tone dialing If you pressed Hook in step 1 you can pick up the handset to talk to the other party 4 Use the numeric keys to enter the numbers requested by the information service 5 If ...

Page 67: ...enu 2 Press or to select FAX SETTINGS then press OK 3 Press or to select TX SETTINGS then press OK 4 Press or to select AUTO REDIAL then press OK 5 Press or to select ON then press OK 6 Press or to select the number of redials the machine will make then press OK R E D I A L T I M E S 2 T I M E S Ex You can also enter values with the numeric keys 7 Press or to select the time in minutes between red...

Page 68: ...INE CHCK then press OK 5 Press or to select ON then press OK 6 Press Stop Reset to return to the standby mode Dialing an Overseas Number With Pauses When you dial or register an overseas number you may need to insert a pause within the number Make sure the LCD shows the fax mode If the LCD shows the copy mode press Stop Reset 1 Set documents 2 Use the numeric keys to dial the international access ...

Page 69: ... Only System Manager Settings Maintenance Troubleshooting Appendix Index Table of Contents 4 Use the numeric keys to dial the country code the area code and the fax telephone number of the recipient 5 If necessary press Redial Pause to enter a pause at the end of the number The letter P appears at the end of the fax number 6 Press Start ...

Page 70: ...press OK 3 Press or to select RX MODE then press OK 4 Press or to select the receive mode then press OK FaxOnly Answers all calls as faxes AnsMode Receives faxes automatically and records voice messages FaxTel Switches between fax and voice calls automatically if the optional handset or an external telephone is connected to the machine For optional settings see FAX TEL Optional Settings on p 3 24 ...

Page 71: ...ect FAX SETTINGS then press OK 3 Press or to select RX SETTINGS then press OK 4 Press or to select FAX TEL OPT SET then press OK 5 For RING START TIME press or the numeric keys to specify the duration 4 to 30 seconds for which the machine attempts to detect the fax tone before it starts ringing then press OK If the machine receives a fax the machine does not ring and switches to the receive mode a...

Page 72: ...ically receives faxes in memory when printing is disabled under certain conditions e g toner or paper has run out Load paper and press OK to start printing faxes stored in memory For toner empty the machine automatically starts printing when the error is cleared The machine memory can store up to 346 fax jobs or approximately 346 pages Based on the condition that the other party sends the fax by F...

Page 73: ...hen press OK 5 Press or to select ON then press OK When you select OFF the machine starts to print the received documents in memory 6 If you want to set a password press or to select PASSWORD then press OK If you do not need to set a password skip to step 8 7 Use the numeric keys to enter the memory lock reception password up to seven digits then press OK P A S S W O R D 5 6 7 8 _ Ex If the memory...

Page 74: ...r the memory lock reception password then press OK 4 Press or to select OFF then press OK The received documents are printed 5 Press Stop Reset to return to the standby mode Remote Reception Remote reception enables you to use an external telephone connected to the machine to receive faxes manually This can be useful when the machine is not nearby or is being used by someone else The default setti...

Page 75: ...ID to start reception If the machine is set for pulse dialing press Tone to switch to tone dialing before pressing the remote reception ID 3 When the reception is complete hang up the telephone Selecting the Receive Mode for Printing You can select whether the machine stores all received pages in the memory before printing them out or prints each page as it is received 1 Press Menu 2 Press or to s...

Page 76: ... to return to the standby mode Printing Received Documents The machine provides the received image reduction Received Image Reduction You can print received documents in a reduced size 1 Press Menu 2 Press or to select FAX SETTINGS then press OK 3 Press or to select PRINTER SETTINGS then press OK 4 Press or to select RX REDUCTION then press OK 5 Press or to select desired setting then press OK ON ...

Page 77: ... destination in the group is counted as a separate dialing If you frequently send documents to multiple destinations it is recommended that you store those destinations as a group 1 Set documents 2 Press Add Mode 3 Press or to select BROADCAST then press OK 4 Specify the destination Use the numeric keys one touch speed dialing keys coded speed dialing codes or Address Book key to specify recipient...

Page 78: ... pressing Add Mode BROADCAST Sends the same document to multiple recipients at a time See Broadcasting on p 3 30 POLLING RX Retrieve documents stored in remote machines for polling See Polling Receiving on p 3 32 RELAY Sends a document to be relayed to other recipients See Relay on p 3 33 6 Press Start to scan the document for the delayed sending Polling Polling Sending Polling sending enables you...

Page 79: ...ss Start Polling Receiving Polling receiving enables you to retrieve documents stored in remote machines for polling 1 Press Add Mode 2 Press or to select POLLING RX then press OK 3 Use the numeric keys one touch speed dialing keys coded speed dialing codes or Address Book key to enter a destination then press OK If the recipient sets a subaddress and or password you also need to set the same suba...

Page 80: ...ure How the document is handled after it reaches the relay station depends on what function is registered in the station s subaddress 1 Set documents 2 Press Add Mode 3 Press or to select RELAY then press OK 4 Use the numeric keys one touch speed dialing key coded speed dialing or Address Book key to specify the relay station then press OK 5 Use the numeric keys to enter the relay station s subadd...

Page 81: ...ting FAX L160 Only System Manager Settings Maintenance Troubleshooting Appendix Index Table of Contents Canceling TX RX Jobs Follow the procedure below to cancel an ongoing job sending or receiving 1 Press Stop Reset 2 When the CANCEL DURING TX RX message appears press to select YES Y E S N O C A N C E L D U R I N G T X R X ...

Page 82: ...TX RX LOG then press OK 3 Press or to view the required transmission reception result 4 Press Stop Reset to return to the standby mode Checking and Deleting Fax Documents Stored in Memory 1 Press System Monitor 2 Press or to select TX STATUS then press OK 3 Press or to scroll through the job list and check the status of the fax jobs If you want to delete the job go to step 4 Otherwise press Stop R...

Page 83: ...ument and Paper Sending and Receiving Copying Printing FAX L160 Only System Manager Settings Maintenance Troubleshooting Appendix Table of Contents Index 4 Copying Basic Copying Method 4 2 Scan Settings 4 3 Image Quality 4 3 Density 4 3 Zoom Ratio 4 4 Canceling Copy Jobs 4 5 ...

Page 84: ...bleshooting Appendix Index Table of Contents Basic Copying Method Follow this procedure to make a copy 1 Set documents For documents you can copy see Document Requirements on p 2 2 2 Press Copy The copy mode automatically resets to the fax mode after one minute of inactivity or when you press Stop Reset 3 Use the numeric keys to enter the desired copy quantity 1 to 99 4 Press Start ...

Page 85: ...y to select the document type TEXT for text documents PHOTO for documents that contain fine text or photos TEXT PHOTO for documents that contain text and photos When you press Stop Reset the setting will be canceled If you want to keep the settings set the image quality as following Menu COPY SETTINGS STANDARD SETTINGS IMAGE QUALITY Press or to select the desired document type Copy density automat...

Page 86: ...you press Stop Reset the setting will be canceled If you want to keep the settings set the density as following Menu COPY SETTINGS STANDARD SETTINGS DENSITY MANUAL See Setting Menu on p 9 5 Zoom Ratio You can reduce or enlarge images by any copy ratio in 1 increments The available copy ratios are from 50 to 200 The default setting is 100 1 Press Copy 2 Press or to adjust the zoom ratio then press ...

Page 87: ...X L160 Only System Manager Settings Maintenance Troubleshooting Appendix Index Table of Contents Canceling Copy Jobs Follow this procedure to cancel an outgoing job 1 Press Stop Reset 2 When the CANCEL COPYING message appears press to select YES Y E S N O C A N C E L C O P Y I N G The job is canceled and the copy quantity is reset ...

Page 88: ... and Receiving Copying Printing FAX L160 Only System Manager Settings Maintenance Troubleshooting Appendix Table of Contents Index 5 Printing FAX L160 Only Printing Documents 5 2 Advanced Printing Features 5 3 Collate Printing 5 3 Checking and Deleting Jobs 5 4 Checking and Deleting Print Jobs 5 4 ...

Page 89: ...printer driver is installed To check if the driver is installed see Software Settings with Computer in the Starter Guide For details on the printer driver settings see Online Help How to display the print screen or items on the screen may vary depending on your application and or OS 1 From an open document on an application click File Print 2 Select the printer icon for the machine Canon L90 L160 ...

Page 90: ...ou can print documents collated into sets arranged in page order For example when printing multiple copies of a 3 page document the print order is 1 2 3 1 2 3 and so on 1 From an open document on an application click File Print 2 Select the printer icon for the machine Canon L90 L160 L230 UFRII LT then click Preferences or Properties to open the dialog box 3 Click the Finishing tab 4 For Finishing...

Page 91: ...ata indicator is turned on When the Processing Data indicator is turned off all print jobs are erased from the memory Checking and Deleting Print Jobs 1 Press System Monitor 2 Press or to select PRINT STATUS then press OK 3 Press or to scroll through the job list and check the status of the print jobs If you want to delete the job go to step 4 Otherwise press Stop Reset to return to the standby mo...

Page 92: ...g and Receiving Copying Printing FAX L160 Only System Manager Settings Maintenance Troubleshooting Appendix Table of Contents Index 6 System Manager Settings Specifying the System Manager Settings 6 2 Restricting Access to Destinations 6 3 Confirming Entered Fax Numbers 6 3 Restricting Redial 6 3 ...

Page 93: ...n be placed on storing or changing the System Settings 1 Press Menu 2 Press or to select SYSTEM SETTINGS then press OK If the System Password has been set enter the System Password using the numeric keys then press OK 3 Press or to select SYS MANAGER INFO then press OK 4 Press or to select SYSTEM PASSWORD then press OK 5 Use the numeric keys to enter a number up to seven digits then press OK If yo...

Page 94: ... 2 Press or to select SYSTEM SETTINGS then press OK If the System Password has been set enter the System Password using the numeric keys then press OK 3 Press or to select ACCESS TO DEST then press OK 4 Press or to select CONFIRM FAX NO then press OK 5 Press or to select ON or OFF then press OK OFF The confirmation screen does not appear ON The confirmation screen appears when you enter a fax numb...

Page 95: ... Copying Printing FAX L160 Only System Manager Settings Maintenance Troubleshooting Appendix Index Table of Contents 3 Press or to select ACCESS TO DEST then press OK 4 Press or to select RESTRICT REDIAL then press OK 5 Press or to select ON or OFF then press OK 6 Press Stop Reset to return to the standby mode ...

Page 96: ...L160 Only System Manager Settings Maintenance Troubleshooting Appendix Table of Contents Index 7 Maintenance Cleaning the Machine 7 2 Exterior 7 2 Interior 7 2 Fuser Roller 7 6 Scanning area 7 6 Replacing the Toner Cartridge 7 8 Redistributing Toner 7 8 Replacing the Toner Cartridge with a New One 7 12 Transporting the Machine 7 17 ...

Page 97: ...liquids such as thinners benzene acetone or any other chemical cleaner to clean the machine These can damage the machine components When you disconnect the power cord the documents stored in memory will be erased To check the jobs stored in memory see the following Checking and Deleting Fax Documents Stored in Memory on p 3 35 Checking and Deleting Print Jobs on p 5 4 Exterior 1 Disconnect the pow...

Page 98: ...delivery tray without folding the extension first 3 Open the toner cover by the notch A 4 Remove the toner cartridge Do not touch the rollers and parts which have labels CAUTION Hot surface avoid contact on They become very hot during use To avoid exposing the toner cartridge to light place it in its protective bag or wrap it in a thick cloth Do not open the drum protective shutter on the toner ca...

Page 99: ... cloth to remove any toner or paper debris from the machine s interior Do not touch the fixing assembly A as it becomes very hot during use Do not touch the pins B or the transfer roller C as this can damage the machine If loose toner comes into contact with your skin or clothing wash with cold water Warm water will set the toner 6 Hold the toner cartridge by its handle A 7 The arrow A on the tone...

Page 100: ...ubleshooting Appendix Index Table of Contents 8 Insert the toner cartridge so that the guide A on the left side of the toner cartridge fits into the groove inside the machine and slide it down parallel to the guide 9 Push the toner cartridge to make sure it is properly set in the machine 10 Close the toner cover Be careful not to get your fingers caught 11 Reconnect the power cord ...

Page 101: ...r takes approximately 180 seconds 1 Press Menu 2 Press or to select ADJUST CLEANING then press OK 3 Make sure that a sheet of blank A4 paper is in the paper feeder 4 Press or to select FIX UNIT CLEANING then press OK Use standard paper as the cleaning paper Throw away the cleaning paper after use Scanning area Keep the scanning area clean to avoid dirty copies or faxes to be sent If your documents...

Page 102: ...tform A in the document delivery slot 4 Gently wipe the scanning glass A and white sheet B with a clean soft lint free cloth moistened with water Do not dampen the cloth too much as this may tear the document or damage the machine 5 After the scanning area becomes dry lift the scanning platform back into place 6 Insert the paper stack cover Make sure the back end of the cover does not catch and lo...

Page 103: ...ile receiving fax printing fax is interrupted and the received data will be stored in the memory If you set CONT PRINTING in PRINTER SETTINGS in FAX SETTINGS to ON you can keep printing fax documents or reports without replacing the toner cartridge The default setting for CONT PRINTING is OFF See Setting Menu on p 9 5 When CONT PRINTING is set to ON the printed documents may be light or blurred be...

Page 104: ...anager Settings Maintenance Troubleshooting Appendix Index Table of Contents 2 Open the toner cover by the notch A 3 Remove the toner cartridge Do not touch the rollers and parts which have labels CAUTION Hot surface avoid contact on They become very hot during use 4 Gently rock the toner cartridge several times to evenly distribute the toner inside ...

Page 105: ...dex Table of Contents 5 Hold the toner cartridge by its handle A Do not open the drum protective shutter A Always hold the toner cartridge by its handle 6 The arrow A on the toner cartridge should be facing away from you and pointing down 7 Insert the toner cartridge so that the guide A on the left side of the toner cartridge fits into the groove inside the machine and slide it down parallel to th...

Page 106: ...g Copying Printing FAX L160 Only System Manager Settings Maintenance Troubleshooting Appendix Index Table of Contents 8 Push the toner cartridge to make sure it is properly set in the machine 9 Close the toner cover Be careful not to get your fingers caught 10 Open the paper delivery tray A and the extension B ...

Page 107: ...m Manager Settings Maintenance Troubleshooting Appendix Index Table of Contents Replacing the Toner Cartridge with a New One 1 Close the paper delivery tray extension A and then the paper delivery tray B itself Do not close the paper delivery tray without folding the extension first 2 Open the toner cover by the notch A 3 Remove the toner cartridge ...

Page 108: ...er Settings Maintenance Troubleshooting Appendix Index Table of Contents 4 Remove the new toner cartridge from the protective bag Do not open the drum protective shutter A Save the protective bag You may need it later when you remove the toner cartridge from the machine 5 Gently rock the toner cartridge several times to evenly distribute the toner inside ...

Page 109: ...the removed seal be careful that your hands or clothes do not get dirty from touching the toner If your hands or clothes get dirty from touching the toner wash them immediately in cold water Do not use hot water If you do the toner may be set permanently Do not pull the seal out at an angle 7 Hold the toner cartridge by its handle A Do not open the drum protective shutter on the toner cartridge Pr...

Page 110: ...able of Contents 8 The arrow A on the toner cartridge should be facing away from you and pointing down 9 Insert the toner cartridge so that the guide A on the left side of the toner cartridge fits into the groove inside the machine and slide it down parallel to the guide 10 Push the toner cartridge to make sure it is properly set in the machine 11 Close the toner cover Be careful not to get your f...

Page 111: ... 7 16 Before Using the Machine Document and Paper Sending and Receiving Copying Printing FAX L160 Only System Manager Settings Maintenance Troubleshooting Appendix Index Table of Contents 12 Open the paper delivery tray A and the extension B ...

Page 112: ...e of Contents Transporting the Machine Follow this procedure to avoid vibration damage to the machine when transporting it over a long distance 1 Disconnect the power cord and all the cables from the back of the machine 2 Close the paper delivery tray extension A and then the paper delivery tray B itself Do not close the paper delivery tray without folding the extension first 3 Open the toner cove...

Page 113: ...ance Troubleshooting Appendix Index Table of Contents 4 Remove the toner cartridge To avoid exposing the toner cartridge to light place it in its protective bag or wrap it in a thick cloth Do not open the drum protective shutter A Always hold the toner cartridge by its handle 5 Close the toner cover Be careful not to get your fingers caught 6 Detach the document feeder tray ...

Page 114: ...Printing FAX L160 Only System Manager Settings Maintenance Troubleshooting Appendix Index Table of Contents 7 Fold the document delivery tray extension A and then push the document delivery tray B into the machine Do not open or close the document delivery tray extension without extending the document delivery tray first ...

Page 115: ... System Manager Settings Maintenance Troubleshooting Appendix Table of Contents Index 8 Troubleshooting Clearing Jams 8 3 Document Jams 8 3 Paper Jams 8 5 LCD Messages 8 10 Error Codes 8 16 If LOAD CORRECT PAPER is displayed 8 18 Re Loading the Paper 8 18 Changing the Paper Size Setting 8 18 General Problems 8 19 Paper Feeding Problems 8 20 ...

Page 116: ...g FAX L160 Only System Manager Settings Maintenance Troubleshooting Appendix Table of Contents Index Sending Receiving Problems 8 21 Sending Problems 8 21 Receiving Problems 8 24 Copying Problems 8 30 Printing Problems FAX L160 Only 8 32 Telephone Problems 8 35 If a Power Failure Occurs 8 36 If You Cannot Solve a Problem 8 37 ...

Page 117: ...om the inside of the machine When removing jammed documents or paper take care not to cut your hands on the edges of the document or paper When removing jammed paper or when inspecting the inside of the machine do not allow necklaces bracelets or other metal objects to touch the inside of the machine as this may result in burns or electrical shock If you tear the paper remove any torn pieces to av...

Page 118: ...nager Settings Maintenance Troubleshooting Appendix Index Table of Contents 2 Lift the paper stack cover and pull it out completely Make sure the back end of the cover does not catch the front paper guide 3 Lower the scanning platform A in the document delivery slot 4 Carefully pull out the jammed document 5 Lift the scanning platform back into place ...

Page 119: ...Make sure the back end of the cover does not catch and lower the scanning platform 7 Lower the document release lever back into place Paper Jams When PAPER JAM OPEN TONER COVER appears on the LCD display remove jammed paper from the inside of the machine first then from the paper feeder if necessary 1 Close the paper delivery tray extension A and then the paper delivery tray B itself Do not close ...

Page 120: ...eshooting Appendix Index Table of Contents 2 Open the toner cover by the notch A Always open the toner cover first before removing jammed paper inside the machine 3 Remove the toner cartridge To avoid exposing the toner cartridge to light place it in its protective bag or wrap it in a thick cloth Do not open the drum protective shutter A Always hold the toner cartridge by its handle ...

Page 121: ... machine Do not touch the fixing assembly A as it becomes very hot during use Do not touch the pins B or the transfer roller C as this can damage the machine If you tear the paper remove any torn pieces to avoid further jams If loose toner comes into contact with your skin or clothing wash with cold water Warm water will set the toner 5 Hold the toner cartridge by its handle A 6 The arrow A on the...

Page 122: ...Appendix Index Table of Contents 7 Insert the toner cartridge so that the guide A on the left side of the toner cartridge fits into the groove inside the machine and slide it down parallel to the guide 8 Push the toner cartridge to make sure it is properly set in the machine 9 Close the toner cover Be careful not to get your fingers caught 10 Open the paper delivery tray A and the extension B ...

Page 123: ...Appendix Index Table of Contents 11 Lift the paper stack cover and pull it out completely Make sure the back end of the cover does not catch the front paper guide 12 Carefully pull jammed paper from inside the slot If you tear the paper remove any torn pieces to avoid further jams 13 Insert the paper stack cover Make sure the back end of the cover does not catch and lower the scanning platform ...

Page 124: ...rently available Action If you need more space wait for the machine to send any documents in memory Also print send or delete any documents stored in memory CANNOT PRINT RX DATA Description The machine temporarily received the fax in memory because an error of some kind has occurred in the machine This error message appears with one of the messages below CLOSE COVER TONER COVER LOAD CORRECT PAPER ...

Page 125: ...ached the upper limit 131 Action Send the document separately CANNOT USE FUNCTION Description Redialing is not available with Redial Pause This message appears when RESTRICT REDIAL is set to ON in the ACCESS TO DEST of the SYSTEM SETTINGS menu Action Dial the number manually CHECK DOCUMENT Description A document jam may have occurred in the ADF Action Remove the jammed document Description The doc...

Page 126: ...ars LOAD CORRECT PAPER Description The size of the paper in the paper feeder is different from that of the paper specified in CASSETTE of the PAPER SETTINGS menu Action Load the correct size paper or change the paper size in CASSETTE of the PAPER SETTINGS menu For more information see If LOAD CORRECT PAPER is displayed on p 8 18 LOAD PAPER Description No paper is loaded in the paper feeder Action ...

Page 127: ...Wait for the machine to send any documents in memory Also print send or delete any documents stored in memory NOT AVAILABLE Description You pressed the one touch speed dialing key or coded speed dialing that has already been registered when you are registering group dialing Description You pressed the group dialing that has already been registered when you are registering a one touch speed dialing...

Page 128: ...M OPEN TONER COVER Description Paper jams have occurred in the machine Action Clear the paper jam See Paper Jams on p 8 5 and reload paper in the paper feeder PRINTER DATA ERROR CHECK PRINTER Description The data from the PC was not printed Action Check if the software is installed properly or if the printer cable is properly connected Action Check if the memory is full Only for the FAX L160 REGIS...

Page 129: ... SET TONER AGAIN Description Paper is not loaded properly or the toner cartridge is not set Action Load paper properly For instructions on how to load paper in the paper feeder see Set Up the Machine in the Starter Guide Set the toner cartridge in the machine For details see Set Up the Machine in the Starter Guide TONER LOW PREPARE NEW TONER Description The toner is running low Action Prepare a ne...

Page 130: ... FAX L160 Only System Manager Settings Maintenance Troubleshooting Appendix Index Table of Contents Error Codes An error code is a four digit code shown on an ERROR TX REPORT or an ERROR RX REPORT when an error occurs For details on reports see Printing Reports Automatically on p 9 19 See the following for individual error codes ...

Page 131: ... Print send or delete any documents stored in memory 0080 Description The recipient s machine did not respond within 35 seconds Action Resend the document Ask the other party to check their machine If you are making an overseas call add a pause to the number 008D Description The recipient s machine has run out of paper Action Ask the recipient to make sure that paper is loaded in their machine 00A...

Page 132: ...r print jobs you need to specify the paper size from your computer For copy jobs LOAD CORRECT PAPER disappears automatically Load the correct size paper or change the paper size setting See Setting Paper Size and Type on p 2 11 Re Loading the Paper 1 Load the correct size paper as shown on LCD display then press OK to resume the job The machine re starts printing Changing the Paper Size Setting 1 ...

Page 133: ...ll outlet If the machine is plugged into a power strip make sure the power strip is plugged in and turned on Is the power cord supplying power Use a different power cord or test the cord for continuity using a voltmeter Q A Q A Nothing appears in the LCD Is the power cord plugged in securely Check that the power cord is securely plugged into the machine and into the wall outlet If the machine is p...

Page 134: ...eed together into the machine Is the paper loaded correctly Make sure the paper is correctly loaded See Set Up the Machine in the Starter Guide Does the machine contain too many sheets Make sure you load the correct quantity See Paper Requirements on p 2 5 Q A Q A Q A Q A Are different types of paper loaded in the machine Load only one type of paper Make sure you load paper that meets the requirem...

Page 135: ...ment is correctly loaded See Loading Documents on p 2 4 Make sure the scanning platform is fully closed See Paper Jams on p 8 5 Q A Q A A Is the one touch speed dialing key or coded speed dialing code you entered registered correctly Check that the Address Book settings are registered correctly See Storing Editing Address Book on p 3 7 Did you dial the correct number Check that you have the correc...

Page 136: ...orking properly Make sure there is a dial tone when you press Hook or when you lift the optional handset or the handset of any external telephone connected to the machine If there is no dial tone contact your local telephone company Q A Q A A Q A Q A Is the recipient s machine a G3 fax machine Make sure the recipient s machine is compatible with your machine Did the recipient s machine answer with...

Page 137: ... a document stored in memory leaving little memory available Print send or delete any documents stored in memory Q A A A Q A Faxes sent from the machine are spotted or dirty Is the recipient s machine working properly Check the machine by making a copy If the copy is clear the problem may be in the recipient s machine If the copy is spotted or dirty clean the scanner components See Scanning Area o...

Page 138: ...e Is RESTRICT REDIAL set to ON When RESTRICT REDIAL is set to ON Redialing is not available See Restricting Redial on p 6 3 Q A Q A Q A Entering the fax number is required again after pressing Start Is CONFIRM FAX NO set to ON When CONFIRM FAX NO is set to ON you need to enter the fax number again after pressing Start See Confirming Entered Fax Numbers on p 6 3 Receiving Problems Cannot receive a ...

Page 139: ...cted properly Make sure the cable is connected properly See Before FAX Setting in the Starter Guide Q A Q A A Q A Q A No automatic switching between telephone and fax calls Is the machine set to switch automatically between telephone and fax calls For the machine to switch between fax and telephone calls automatically the receive mode must be set to FaxTel or AnsMode If you have set AnsMode confir...

Page 140: ...ang up the optional handset or the external telephone before pressing Start or dialing the remote reception ID Always press Start or dial the remote reception ID before hanging up Otherwise you will disconnect the call Q A Q A Q A Q A Are documents set on the ADF After removing the document from the ADF please attempt manual receiving again If you press Start when documents are set on the ADF it a...

Page 141: ...the Machine in the Starter Guide Is the toner cartridge installed properly Make sure the toner cartridge is installed properly See Set Up the Machine in the Starter Guide Is the cartridge out of toner Replace the toner cartridge See Replacing the Toner Cartridge on p 7 8 Q A Q A Q A Q A Is the correct size of paper loaded in the machine Make sure you load paper that meets the requirements for use ...

Page 142: ...ributed Redistribute the toner inside the toner cartridge If the problem persists replace the toner cartridge See Replacing the Toner Cartridge on p 7 8 Is the printing method for received documents set to CUT If you want to print a received document without cutting off the end set the printing method to ON or OFF See Received Image Reduction on p 3 29 Q A Q A Q A Q A Cannot receive using Error Co...

Page 143: ...the telephone line Press Tone to set the tone dialing Do you receive messages from the information services such as to press Start after the beep to receive When you hear the beep sound press Start Errors occur frequently while receiving Are the telephone lines in poor condition or do you have a bad connection Check if there is a device nearby that interferes with signal reception e g microwave ov...

Page 144: ...ridge See Replacing the Toner Cartridge on p 7 8 Does the document meet the requirements for the machine Make sure you load documents that meet the requirements for use See Chapter 2 Document Requirements on p 2 2 Q A Q A Q A Q A Copy is too light or has uneven density Is the toner low or unevenly distributed Redistribute the toner inside the toner cartridge If the problem persists replace the ton...

Page 145: ...type of paper loaded in the machine Make sure you load paper that meets the requirements for use See Paper Requirements on p 2 5 Copy is skewed Is the paper loaded correctly Make sure the paper is correctly loaded in the machine See Set Up the Machine in the Starter Guide A Q A Q A Q A Copy is not clear Is the correct type of paper loaded in the machine Make sure you load paper that meets the requ...

Page 146: ...you remove the seal from the toner cartridge See Set Up the Machine in the Starter Guide Is the toner cartridge installed properly Make sure the toner cartridge is installed properly See Set Up the Machine in the Starter Guide Q A Q A Q A Is the toner cartridge out of toner Replace the toner cartridge See Replacing the Toner Cartridge on p 7 8 Printout is too light or has uneven density Is the ton...

Page 147: ... loaded See Set Up the Machine in the Starter Guide Is the correct type of paper loaded in the machine Make sure you load paper that meets the requirements for use See Paper Requirements on p 2 5 A A Q A Q A Printout is skewed Is the paper loaded correctly Make sure the paper is correctly loaded in the machine See Set Up the Machine in the Starter Guide Printout is not clear Is the correct type of...

Page 148: ... and the machine If the computer has other ports connect the USB cable to others Q A Q A Q A Q A Are there any jobs remaining in the print queue A print job may be stuck in the print queue when it could not be finished due to an expected interruption When this happens follow this procedure to delete any remaining print jobs and then print the documents again 1 Double click the icon of the printer ...

Page 149: ... sure the power strip is plugged in and turned on Is the machine set for the correct telephone line type Make sure the machine is set for the correct telephone line type See Before FAX Setting in the Starter Guide Q A Q A Q A Telephone disconnects while you are talking Is the telephone cable connected properly Make sure the cable is connected properly See Before FAX Setting in the Starter Guide Is...

Page 150: ...o make telephone calls You can receive telephone calls from the optional handset or telephone connected to the machine You cannot send receive or copy documents If power is suddenly lost due to a power failure or accidental unplugging the machine may lose received data stored in memory If this happens the LCD displays LOST IMAGE when power is restored and automatically prints a Lost Report unless ...

Page 151: ...dealer or the Canon help line Please have the following information ready when you contact Canon Product name FAX L160 FAX L140 Serial number On the label located at the back of the machine Place of purchase Nature of problem Steps you have taken to solve the problem and the results If the machine makes strange noises emits smoke or odd odor disconnect the power cord immediately and contact your l...

Page 152: ...ager Settings Maintenance Troubleshooting Appendix Table of Contents Index 9 Appendix Machine Settings 9 3 Printing USER DATA LIST 9 3 Accessing the Setting Menu 9 3 Setting Menu 9 5 PAPER SETTINGS 9 5 VOLUME CONTROL 9 5 COMMON SETTINGS 9 6 COPY SETTINGS 9 6 FAX SETTINGS 9 7 ADDRESS BOOK SET 9 11 PRINTER SETTINGS FAX L160 Only 9 12 TIMER SETTINGS 9 13 ...

Page 153: ...enance Troubleshooting Appendix Table of Contents Index ADJUST CLEANING 9 14 REPORT SETTINGS 9 14 SYSTEM SETTINGS 9 16 Summary of Reports and Lists 9 18 Printing Reports Automatically 9 19 TX REPORT 9 19 RX REPORT 9 20 ACTIVITY REPORT 9 21 Printing Reports and Lists Manually 9 23 Checking Remaining Memory 9 24 Checking Print and Scan Counts 9 25 Glossary 9 26 Index 9 32 ...

Page 154: ...rent settings print out USER DATA LIST Printing USER DATA LIST 1 Press Menu 2 Press or to select REPORT SETTINGS then press OK 3 Press or to select LIST PRINT then press OK 4 Press or to select USER DATA LIST then press OK Printing starts and the screen automatically returns to the standby mode Accessing the Setting Menu 1 Press Menu 2 Press or to select the menu you want to access then press OK P...

Page 155: ...eshooting Appendix Index Table of Contents 3 Press or to select a submenu then press OK For details on the submenu see Setting Menu on p 9 5 4 To register the settings or go to a submenu item press OK 5 When finished press Stop Reset to return to the standby mode If you press Stop Reset before pressing OK the setting will not be registered Press Menu to return to the previous display ...

Page 156: ...Setting Paper Size and Type on p 2 11 1 PAPER SIZE Sets the paper size from the following options A4 OFICIO BRAZIL OFICIO MEXICO OFICIO FOLIO GOVERNMENT LETTER GOVERNMENT LEGAL FOOLSCAP LTR LGL 2 PAPER TYPE Sets the paper type from the following options PLAIN PAPER PLAIN PAPER L HEAVY PAPER HEAVY PAPER H and TRANSPARENCY VOLUME CONTROL Setting Item Description 1 MONITOR VOLUME Sets the volume for ...

Page 157: ...tive for print jobs 2 DISPLAY LANGUAGE Selects the language on the display See Appendix in the Starter Guide ENGLISH GERMAN FRENCH SPANISH ITALIAN SWEDISH NORWEGIAN DUTCH FINNISH DANISH PORTUGUESE CZECH SLOVENE HUNGARIAN RUSSIAN TURKISH POLISH COPY SETTINGS Setting Item Description 1 STANDARD SETTINGS Sets the default setting for copying 1 IMAGE QUALITY Sets the document type for copying TEXT PHOT...

Page 158: ... max 20 characters including spaces See Set the Machine for Sending Faxes in the Starter Guide 2 UNIT NAME Registers your name company name max 32 characters including spaces See Set the Machine for Sending Faxes in the Starter Guide 3 TX TERMINAL ID Sets the options for sender information ON Sender information is printed in small type at the top of each page OFF Sender information is not printed ...

Page 159: ...MES 2TIMES 2 REDIAL INTERVAL Sets period of time before redialing 2MIN 99MIN 2MIN OFF After the first attempt at dialing fails redialing is not attempted 2 DIALING LINE CHCK Sets whether to check the telephone line condition OFF ON 4 RX SETTINGS Sets the reception features 1 FAX TEL OPT SET Sets the optional items in the FaxTel mode See FAX TEL Optional Settings on p 3 24 1 RING START TIME Sets th...

Page 160: ...r of incoming rings before the machine answers 1TIMES 16TIMES 2TIMES OFF The optional handset or the external telephone does not ring In the Sleep mode the optional handset or external telephone may ring one or two times 3 REMOTE RX Sets whether to use remote receiving See Remote Reception on p 3 27 ON The machine enables remote receiving REMOTE RX ID You can dial a code on remote extension to sta...

Page 161: ...ion on p 3 29 OFF All receptions are conducted ON Receives the fax only from the sending fax machine that sends the TSI signal 5 PRINTER SETTINGS Sets the printer functions 1 RX REDUCTION Sets whether to reduce or truncate the image when a faxed page is larger than the size of paper loaded See Received Image Reduction on p 3 29 ON Reduces the image to fit on the size of paper loaded OFF Retains th...

Page 162: ... name max 20 characters including spaces 2 TEL NUMBER ENTRY Registers the recipient s fax telephone number max 50 digits including spaces 3 OPTIONAL SETTING Sets the optional settings for sending faxes OFF The optional setting is not set ON The optional setting is set SUBADDRESS Sets the subaddress 20 digits PASSWORD Sets the password 20 digits 2 CODED DIAL Registers recipients for coded speed dia...

Page 163: ...DRESS Sets the subaddress 20 digits PASSWORD Sets the password 20 digits 3 GROUP DIAL Registers destinations in group dialing Up to 50 destinations can be registered in a group See Storing Editing One Touch Speed Dialing Keys Coded Speed Dialing Codes on p 3 7 NAME Registers the group name max 20 characters including spaces PRINTER SETTINGS FAX L160 Only Setting Item Description 1 ERROR TIME OUT S...

Page 164: ...te format DD MM YYYY YYYY MM DD MM DD YYYY 3 AUTO SLEEP Sets the auto Sleep mode when the machine remains idle for a certain period of time 3MIN 30MIN 5MIN See Setting the Sleep Mode on p 1 14 ON OFF 4 DAYLIGHT SV TIME Sets the daylight saving time mode See Setting Daylight Saving Time on p 1 15 ON Activates the daylight saving time mode 1 BEGIN DATE TIME Sets the begin date 1 MONTH default MARCH ...

Page 165: ...y conditions or in low temperature and low humidity conditions OFF ON REPORT SETTINGS Setting Item Description 1 SETTINGS Sets the report functions See Printing Reports Automatically on p 9 19 1 TX REPORT Sets whether the transmission report prints out PRINT ERROR ONLY Prints a report only when a transmission error occurs OUTPUT NO No report is printed OUTPUT YES Prints a report every time you sen...

Page 166: ...VITY REPORT Prints the fax transaction report manually 4 MEMORY DATA LIST Prints the list of the reserved jobs in memory 5 MEMORY IMAGE PRNT Prints the information and image of the first page of the reserved job 6 1 TOUCH LIST Prints the list of fax telephone numbers and names registered for one touch speed dialing 7 CODED DIAL LIST Prints the list of fax telephone numbers and names registered for...

Page 167: ...ystem manager password up to seven digits 2 COMMUNICATIONS Sets the fax communication 1 COUNTRY SELECT Select the country or area where the machine is used 2 MEMORY LOCK Sets whether to receive and store all documents in memory and not to print automatically See Memory Lock Reception on p 3 26 OFF Disables memory lock reception ON Enables memory lock reception 1 PASSWORD Registers the password tha...

Page 168: ...ETTING Registers the R key to access an outside line easily See Dialing Through a Switchboard on p 3 18 PSTN PBX 3 ACCESS TO DEST Sets restriction of the access to recipients 1 RESTRICT REDIAL Sets whether to disable the redial function of the Redial Pause key OFF ON 2 CONFIRM FAX NO Sets whether to confirm the entered fax numbers each time you send a fax OFF ON 4 UPDATE FIRMWARE This function is ...

Page 169: ...set to print automatically ACTIVITY REPORT Shows the last 60 transactions performed by the machine MEMORY DATA LIST Lists reserved jobs stored in memory MEMORY IMAGE PRNT Shows information and the first page of a reserved job 1 TOUCH LIST Lists the recipient numbers registered to all the one touch speed dialing keys CODED DIAL LIST Lists the recipient numbers registered to all the coded speed dial...

Page 170: ...atically TX REPORT The default setting is PRINT ERROR ONLY 1 Press Menu 2 Press or to select REPORT SETTINGS then press OK 3 Press or to select SETTINGS then press OK 4 Press or to select TX REPORT then press OK 5 Press or to select the setting you want then press OK PRINT ERROR ONLY Prints a report only when a transmission error occurs OUTPUT NO Does not print a report Press Stop Reset to return ...

Page 171: ...smission successful NG Transmission failed STOP Transmission manually canceled before completion MEM FULL Memory became full during transmission NO ANSWER Call not answered PAPER JAM ADF jam occurs during Manual TX Error code For descriptions of error codes See Error Codes on p 8 16 RX REPORT The default setting is OUTPUT NO 1 Press Menu 2 Press or to select REPORT SETTINGS then press OK 3 Press o...

Page 172: ...IME Date and time of transaction PAGE Number of pages received RESULT Result of transaction transaction duration OK Reception successful NG Reception failed Error code For descriptions of error codes see Error Codes on p 8 16 ACTIVITY REPORT The default setting is OUTPUT YES 1 Press Menu 2 Press or to select REPORT SETTINGS then press OK 3 Press or to select SETTINGS then press OK 4 Press or to se...

Page 173: ...x Index Table of Contents Report Items The following items are displayed in the Activity Report NO Transaction number 01 to 60 JOB NO Job number START TIME Date and time of transaction MODE Mode of transaction G3 or ECM DESTINATION TEL ID Name and number of recipient PAGE Number of pages sent or received RESULT Result of transaction transaction duration OK Transaction successful NG Transaction fai...

Page 174: ...y TX REPORT RX REPORT ACTIVITY REPORT MEMORY DATA LIST MEMORY IMAGE PRNT 1 TOUCH LIST CODED DIAL LIST GROUP DIAL LIST USER DATA LIST If no relevant data is stored in memory NO DATA is displayed For information on each report or list see Summary of Reports and Lists on p 9 18 1 Press Menu 2 Press or to select REPORT SETTINGS then press OK 3 Press or to select LIST PRINT then press OK 4 Press or to ...

Page 175: ...ings Maintenance Troubleshooting Appendix Index Table of Contents Checking Remaining Memory You can check the amount of available memory by pressing the System Monitor key 1 Press System Monitor 2 Press or to select AVAILABLE MEMORY then press OK to confirm the remaining memory 7 5 A V A I L A B L E M E M O R Y Ex 3 Press Stop Reset to return to the standby mode ...

Page 176: ...y System Manager Settings Maintenance Troubleshooting Appendix Index Table of Contents Checking Print and Scan Counts System monitor allows you to check print and scan counts 1 Press System Monitor 2 Press or to select VIEW PAGE TOTALS then press OK 3 Press or to view the print or scan counts 4 Press Stop Reset to return to the standby mode ...

Page 177: ...achine Automatic redialing When the recipient s machine is busy or does not answer or when an error occurs while sending the machine waits a specified time and then automatically redials the number If the receiving fax is still busy or does not answer the machine waits the specified time and dials again B bps Bits per second Refers to the speed with which a fax machine sends and receives data Broa...

Page 178: ...to or receive from a machine dpi Dots per inch A machine of measurement for indicating a machine s resolution E ECM Error Correction Mode The ability of your machine to reduce system and line errors when sending or receiving from another fax with ECM capability ECM is most effective in areas where the telephone lines are in poor condition or there is frequent interference on the line Extension A t...

Page 179: ...graphics language that allows computer applications to draw graphic images using printers Images in HP GL 2 are represented as vector graphics Vector objects describe an image in terms of geometric shapes such as lines and polygons and fills HP GL 2 is supported by your Canon machine I Interface The connection between two devices that makes it possible for them to communicate with each other The m...

Page 180: ...s one key to dial the entire number or group P Paper feed Refers to guiding a sheet of paper into the machine s paper path Paper feeder The device in the machine that feeds recording media into the machine for printing copied or sent documents Pause A timing entry required for registering certain long distance numbers and for dialing out through some telephone systems or switchboards Pressing Redi...

Page 181: ...telephone number Remote reception ID The two digit code that enables you to manually activate fax reception using an external telephone Remote reception Activating fax reception by answering an external telephone that is not located near the machine You need to dial a remote receiving ID number to start remote reception Report A document printed by the machine and containing information about the ...

Page 182: ...hine supports the same standard confidential or relayed communications are possible by attaching a subaddress and a password in advance T Tone A key that allows you to temporarily switch to touch tone from pulse dialing In some countries on line data services may require that you use tone dialing Tone pulse setting The ability to set the machine to match the telephone dialing system your telephone...

Page 183: ...n results 3 35 Transmission result 3 35 Checking dialing line 3 21 Cleaning machine Exterior 7 2 Interior 7 2 Scanning area 7 6 Clearing jams 8 3 Document jams 8 3 Paper jams 8 5 Clear key 1 7 Coded Dial key 1 8 3 14 Coded speed dialing codes Deleting 3 10 Editing 3 9 Registering 3 7 Storing Editing 3 7 Using 3 14 Collate Printing 5 3 COMMON SETTINGS 9 3 9 6 Components 1 3 Copying 4 1 Copy job Can...

Page 184: ...e quality Copying 4 3 Faxes 3 6 Image Quality key 1 8 J Jams Document 8 3 Paper 8 5 L LCD Messages 8 10 Standby mode 1 9 LCD display 1 6 Line jack 1 5 Loading Document 2 4 Paper 2 8 Loading Envelopes 2 8 M Machine components 1 3 Machine settings 9 3 Maintaining the toner cartridge 1 12 Maintenance 7 1 Manual reception 3 25 Manual sending 3 17 Memory lock reception 3 26 Memory reception 3 25 Menu A...

Page 185: ...and receiving 3 1 Sending documents Address Book 3 7 Advanced features 3 30 Basic sending method 3 5 Fax dialing features 3 18 Manual sending 3 17 Scan settings 3 6 Specifying recipients 3 14 Setting menu ADDRESS BOOK SET 9 11 COMMON SETTINGS 9 6 COPY SETTINGS 9 6 FAX SETTINGS 9 7 PAPER SETTINGS 9 5 PRINTER SETTINGS 9 12 REPORT SETTINGS 9 14 SYSTEM SETTINGS 9 16 TIMER SETTINGS 9 13 VOLUME CONTROL ...

Page 186: ...pying Printing FAX L160 Only System Manager Settings Maintenance Troubleshooting Appendix Table of Contents Index TX REPORT Printing automatically 9 19 U USB port 1 5 USER DATA LIST 9 3 Using Address Book key 3 15 Coded speed dialing 3 14 Group dialing 3 15 One touch speed dialing keys 3 14 V VOLUME CONTROL 9 3 9 5 ...

Page 187: ...MAGE FRANCE S A S 12 rue de I Industrie 92414 Courbevoie Cedex France CANON U K LTD Woodhatch Reigate Surrey RH2 8BF United Kingdom CANON DEUTSCHLAND GmbH Europark Fichtenhain A10 47807 Krefeld Germany CANON ITALIA S p A Via Milano 8 20097 San Donato Milanese MI Italy CANON ESPAÑA S A c Joaquín Costa 41 28002 Madrid Spain CANON LATIN AMERICA INC 703 Waterford Way Suite 400 Miami Florida 33126 U S ...

Reviews: