background image

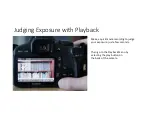
Judging Exposure with Playback

It is difficult to accurately judge exposure with the LCD screen. In 

particular, you want to try to avoid overexposing your image.

Overexposed areas in video can be so bright that they are “blown 

out” masses of white with no image information. 

This camera does not have Zebra stripes for judging overexposure nor 

does it have a histogram in the LCD monitor while you are shooting.

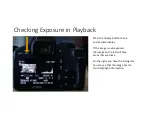
However, these things (or something similar to them) do appear in 

the playback display.

Summary of Contents for EOS REBEL T2I

Page 1: ...Canon Rebel T2i EOS 550 D Quick Start Guide For Video Recording v 01 2020...

Page 2: ...les demonstrated for determining exposure will be the same for more expensive models Some of the same image problems exist in the high end DSLRs as well There are quick start guides for other DSLR mod...

Page 3: ...while making reference to specific equipment in the CDA EV depot In this guide all of my examples are from the Canon T2i Subsequent generations of Canon Rebel cameras will have similar if not identica...

Page 4: ...t not preferable to an actual video camera Advantages of the Canon Rebel DSLR relatively simple to use a good lens that can also shoot close up details proper image exposure and focus controls Disadva...

Page 5: ...Keep the camera horizontal The video image is always wider than taller Don t expect the video resolution to be as fine as still images HD video has a resolution of 1920 x 1080 pixels This is like shoo...

Page 6: ...Basic Operation and Essential Menu Settings In the following examples you can see the placement of the menu setting by looking directly at the LCD on the T2i...

Page 7: ...SD card slot This model comes with a Class 10 8 GB SD card This will record 22 minutes of HD video Video can be recorded with a Class 6 SD card or higher...

Page 8: ...ory Indicator You ll notice that when you are recording there is a buffer memory indicator on the LCD If the card is too slow to record video the recording will stop and the indicator will have reache...

Page 9: ...ee the battery charge level The battery will last about two hours and takes about the same amount of time to charge Turn off the camera when you are not using it to save battery power There is no AC a...

Page 10: ...Movie mode Turn the dial on top to movie recording mode...

Page 11: ...s On the 18 55 mm zoom lens there are two rings for focusing and zooming There is a switch to enable auto or manual focus and a switch for image stabilization Turn off stabilization when the camera is...

Page 12: ...when you are hand holding the camera Try to hold the camera as steady as possible by bracing it against your body or holding one hand underneath the camera as shown It may help to keep a tripod shoe...

Page 13: ...Tripod Mounting It helps to have a quarter handy to mount the tripod shoe on the bottom of the camera Tighten until snug...

Page 14: ...ds are usually lighter and simply designed to hold the camera steady Video tripods have larger heads that allow for fluid movement when panning or tilting Select the tripod that is appropriate for you...

Page 15: ...Movie Record Button vs Shutter Button Shutter photo and Auto Focus button when pressed halfway Movie Record Button...

Page 16: ...Overheating When shooting in bright light the camera can become overheated and the recording may stop This is a normal malfunction for this model If this happens just wait for it to cool down...

Page 17: ...Format the SD card Go into the wrench camera menu Reformat the SD Card to erase any images or videos that may be left by the previous user...

Page 18: ...Set the Movie Recording image size and frame rate 1920 x 1080 30p is the most common HD video image size and frame rate in North America...

Page 19: ...he size of HD video 24 and 30 are the frame rates 24 frames or 30 frames per second fps In addition to fps frame rates can be expressed as p to indicate progressive scanning common to all new cameras...

Page 20: ...fps In fact the camera is recording at 23 97 fps and 29 97 fps NTSC cameras do not advertise this actual frame rate but confusingly round it up to 24 or 30 When you edit NTSC video you will see one of...

Page 21: ...quire a longer recording without interruption you may shoot for 24 minutes with the 640 x 480 option The image quality will be lower and fine image details may be lost The image will also be more squa...

Page 22: ...Recording Times by Image Size This chart gives you an idea of the file sizes for video...

Page 23: ...1920 x 1080 25 or 50 in the movie recording menu then you must change the video system menu setting from PAL to NTSC Only record in PAL frame rates if the video is destined for distribution in countri...

Page 24: ...Auto or Manual Movie Exposure I recommend using manual exposure for video recording This is the only way to control shutter speed However here follows an overview of both approaches...

Page 25: ...re problems First the image is overexposed Second the camera has selected a high ISO of1600 that will produce image noise Try to avoid any ISO above 800 Third the shutter speed is below twice the fram...

Page 26: ...pensation When the dial lines up on the middle the optimal exposure has been reached You can see that this compensation has changed the ISO to 800 Great But the shutter speed remains the same I am sho...

Page 27: ...s You may not notice the effect in a talking head video but the shutter speed can greatly affect how movement appears in your video Once the shutter speed is below twice your video frame rate all moti...

Page 28: ...Manual exposure settings Determine your exposure manually in this order ISO try not to use an ISO above 800 ISO Shutter Speed usually twice the frame rate and never lower Aperture f stop White Balance...

Page 29: ...ust To adjust ISO hold down the ISO button and turn the dial on top of the camera 800 ISO is the highest ISO you want to use with this camera The lower the ISO the less chance that you will have image...

Page 30: ...itivity to light As you lower the ISO the sensor becomes less sensitive Usually ISO 100 or 200 will work for outdoor scenes in daylight ISO 400 and 800 can be used indoors Any ISO number above ISO 800...

Page 31: ...the ISO 800 setting then make sure that your lens aperture is set to be as open as possible On this camera that would be f 3 2 at the most wide angle focal length 18 mm and f 5 6 at the most telephoto...

Page 32: ...ust the shutter speed move the dial on top of the camera The shutter speed is the number in the bottom left of the LCD Here it reads 60 meaning 1 60 th of a second The standard shutter speed is twice...

Page 33: ...ingle digit 60 on the camera means 1 60th of a second The standard shutter speed is twice the video frame rate When recording at 30 frames per second then each video image all 30 images per second wil...

Page 34: ...a bright day you are already shooting at the lowest ISO possible 100 ISO at the smallest aperture opening possible f32 with image compensation and the image is still overexposed In this case increasi...

Page 35: ...lade of the fan is distorted This distortion is caused by the electronic shutter of the camera The electronic image scanning is slower than the movement of the fan blades We don t notice this at slowe...

Page 36: ...The fan is on high speed The camera is using the standard shutter speed for 1080 24p video The fan blades appear as we would see it with our eye blurred...

Page 37: ...The fan is on high speed The camera shutter speed is very high for 1080 24p video The fan blades appear distorted Normally all three are the same shape and size...

Page 38: ...hold down the A V button on the back of the camera and turn the dial on top The aperture opening or f stop is indicated to the right of the shutter speed With this zoom lens the largest available f s...

Page 39: ...Correct Adjustment When the dial lines up on the middle the optimal exposure has been reached...

Page 40: ...al leafed opening in the lens that lets in more or less light to the sensor or to the film in an old film camera This is the aperture The smaller the number the larger the opening F 2 is a large openi...

Page 41: ...ture the narrower the depth of field or the less that is in focus Focal length also affects depth of field Wide angle lenses show a greater area in focus Telephoto lenses will create a narrower depth...

Page 42: ...ld markings on them for each aperture Here is a lens on an older Canon film camera Here the markings are indicating that at f 4 the depth of field will be between just before and after 2 meters or bet...

Page 43: ...Depth of Field Here the markings are indicating that at f 16 the depth of field will be between 1 4 m and 3 2 m approximately or between 4 6 ft and 11 ft...

Page 44: ...then as the aperture opening increases the depth of field becomes shallower Keep in mind that these are still photos that is why the shutter speed is varying but the principle is the same in a video i...

Page 45: ...F 29 coffee cup text to buildings in focus My point of focus is the sheet music...

Page 46: ...f 18 coffee cup text is blurred...

Page 47: ...F 11 foreground and background blurred...

Page 48: ...F 8 Pencil is blurred...

Page 49: ...F 5 6 book spine is somewhat blurred...

Page 50: ...F 4 5 the sheet music is now the only object in focus and not all of it is in focus...

Page 51: ...djust It is important to have an accurate white balance before you begin recording Adjusting video color can be difficult to correct with software Judge white balance by looking at white objects obvio...

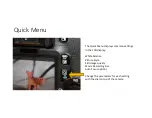
Page 52: ...Auto White Balance Quick Menu Button The Quick Menu gives you access to many image settings...

Page 53: ...Tungsten White Balance in a Daylight Situation There are also white balance presets to choose for different lighting scenarios Here the preset is obviously incorrect for this situation...

Page 54: ...enario for example where there is a mixture of daylight and fluorescent or tungsten light If none of the presets work then perform a manual custom white balance Take a photo of a white piece of paper...

Page 55: ...Custom White Balance This menu setting automatically selects the last still image you have taken as the custom white balance reference...

Page 56: ...Quick Menu Custom White Balance This becomes the custom setting for white balance...

Page 57: ...codec that has a very low dynamic range about 3 stops The image has a high contrast and is easily overexposed Enabling highlight tone priority can help to prevent overexposure This will increase your...

Page 58: ...ing your image Overexposed areas in video can be so bright that they are blown out masses of white with no image information This camera does not have Zebra stripes for judging overexposure nor does i...

Page 59: ...Judging Exposure with Playback Make a quick movie recording to judge your exposure just a few seconds Then go to the Playback Menu by selecting the play button on the back of the camera...

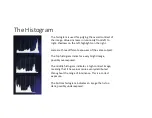
Page 60: ...ress the display button to see an alternate display If the image is overexposed the image on the left will have areas that are black On the right you have the histogram You can see that the image has...

Page 61: ...ght Here are three different exposures of the same subject The top histogram indicates a very bright image possibly overexposed The middle histogram indicates a high contrast image meaning that it has...

Page 62: ...uick Menu displays common settings in the LCD display White balance Picture Style Still Image quality Movie Recording Size Auto Focus options Change the parameters for each setting with the dial on to...

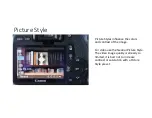
Page 63: ...e Styles influence the colors and contrast of the image For video use the Neutral Picture Style The video image quality is already so limited it is best not to increase contrast or saturation with a P...

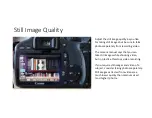
Page 64: ...ly from recording video The camera manual says that you can take still images while shooting video but in practice this stops video recording If you require still images and video of a subject conside...

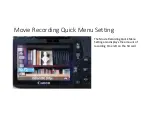
Page 65: ...Movie Recording Quick Menu Setting The Movie Recording Quick Menu Setting also displays the amount of recording time left on the SD card...

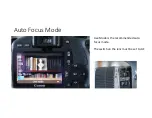
Page 66: ...Auto Focus Mode Live Mode is the recommended auto focus mode The switch on the lens must be set to AF...

Page 67: ...starting your video recording If you wish to change focus while recording use either method Make sure that the AF during Movie menu setting is enabled if you want to use auto focus while recording Ke...

Page 68: ...he lens Set Shutter AE lock Menu setting to the AF AE lock position Set AF Mode Quick Menu Setting to Live Mode Point the camera at the subject Press the shutter button down halfway The auto focus are...

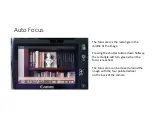
Page 69: ...rectangle in the middle of the image Pressing the shutter button down halfway the rectangle will turn green when the focus is reached The focus area can be moved around the image with the four pointed...

Page 70: ...To use Manual focus Set Focus to MANUAL in the Menu Setting or set the switch to MF on the lens Point the camera at the subject Use the magnifier button to digitally zoom Move the outer ring on the l...

Page 71: ...Use the magnifier for Manual Focus...

Page 72: ...focusing manually you are calculating the distance from the subject to the camera s sensor not the front of the lens Most cameras have a focal plane indicator a circle with a line through it You are...

Page 73: ...Essential Menu Settings Set Shutter AE lock Menu setting to the AF AE lock position The function of these two buttons on the camera change depending on whether you are in manual or auto focus...

Page 74: ...ephoto lens If you change the focal length of the lens then the focus may change Even if the camera is stationary and remains fixed on the same subject as soon as you zoom then you may have to refocus...

Page 75: ...focusing Because of the limitations of auto focus and the limitations of the zoom lens supplied with the camera we can conclude the following Try to avoid shots with camera movement Try to avoid zoomi...

Page 76: ...r These files will open up in QuickTime Player VLC media player or any video editing program including iMovie Simply copy the clips from the SD card on to your computer and import them into the editin...

Page 77: ...T2i EOS 550 D Audio Recording Options The following is a realistic assessment of the difficulties of recording audio with this camera A real video camera with proper XLR microphone inputs will simplif...

Page 78: ...microphone on the top shoe of the camera and input directly into the camera Unfortunately the Canon T2i has an automatic volume level adjustment that adds noise to the audio signal This is a somewhat...

Page 79: ...n the camera It picks up sound from any source that is directly in front of it and minimizes sounds from the rear and sides of the microphone a super cardioid polar pattern Point the microphone at the...

Page 80: ...d to keep the windshield on This windshield does not offer any protection from the wind Never use this microphone outside on a windy day The CDA has a microphone kit that can be used in wind The winds...

Page 81: ...ot included In this compartment with a magnifying glass and a pin the output level for the microphone can be adjusted Arrange the two switches to correspond to the desired output level The camera has...

Page 82: ...d subjects If the speaker under four feet 1 2 m from the camera use the 10 dB level If the speaker is between 4 and 7 feet 2 1 m from the camera use the 0 dB level Don t use this microphone if the per...

Page 83: ...here is no headphone output So there is no way to monitor audio input directly into the camera There is no way to check your audio signal while recording The microphone is mono so the same signal will...

Page 84: ...Audio Menu Settings There are only two audio controls on the camera Disable the beep in the menu Turn audio recording on...

Page 85: ...Rode Microphone ON Because there are no audio meters on the LCD screen of the camera and no indication that you are recording audio it is very easy to plug in the microphone and to not turn it on...

Page 86: ...lified by the microphone Keep the microphone as close as possible to the subject using the recommended output settings Try not to manipulate the camera while you are recording If you have difficulty e...

Page 87: ...either two four or six microphone inputs They all operate with AA batteries The recorder has a tripod mount on the bottom of it It can also be mounted to a microphone stand with an adapter The H6N has...

Page 88: ...SD card slot the Zoom records directly on to a SD card Headphone output Always monitor the signal with headphones You may hear an echo in the headphones while recording due to latency Check the first...

Page 89: ...s On the right side USB output to use the recorder as a USB interface or to copy files on to a computer You can also copy files by taking out the SD card The menu button and the toggle switch to go th...

Page 90: ...ed analog headphones to monitor recording like the pair pictured here The CDA has many Sennheiser HD 280 headphones These are excellent The Sennheiser HD 206 headphones are OK too if you want to purch...

Page 91: ...e built in stereo XY microphone Directional condenser Sennheiser 416 Dynamic Shure SM48 Wireless clip on or Handheld microphone The CDA has other microphone options as well but these are the most comm...

Page 92: ...that sound is situated The center of the two microphones should be directly facing the subject or sound source Point the Zoom recorder at the subject like you would with a directional microphone It wi...

Page 93: ...pick up audio from a wider area The recording will feel more spacious For a recording of a single person in front of a camera choose the 90 degree width The recording level is adjusted below the XY m...

Page 94: ...ording Levels Adjust the recording volume level so that the audio peaks around 12 dB or between 12 and 6 dB Press the Record button to start recording The recorder will indicate the recording time in...

Page 95: ...dB If a sound gets to 0 dB it will clip and distort The read out on a digital peak meter cannot respond rapidly to display transient very rapid peaks For this reason it is necessary to give the record...

Page 96: ...Be consistent Always record at the same sample rate for one project 48 kHz refers to the sample rate The sound is being sampled 48000 times per second The higher the sample rate the more accurately h...

Page 97: ...te file at a 12 db lower volume than the original file This is a safety recording in case your original file becomes too loud and distorts Distortion cannot be corrected So I advise turning on this op...

Page 98: ...thin that folder The file name of the audio will indicate the channel LR means the built in microphone The file appears in the menu system of the Zoom recorder as the date shown above as year 20 month...

Page 99: ...f Files Do a quick test recording In the menu system navigate to the folder where you have recorded the file Then press play on the Zoom recorder Adjust the volume for the headphones on the side of th...

Page 100: ...Folder 01 on the SD card My recording format is 48 kHz 24 bit WAV file I am recording on track 1 red that has phantom power I can also see that I have compression effect on the XY built in mic input a...

Page 101: ...ing audio to the SD card This output could be used to send audio to the microphone input of a DSLR camera Unfortunately this output does not work with an input that has an automatic level control like...

Page 102: ...o file can be quite thin sounding in comparison with other microphones The low frequencies are not very present and there is also a sense of space from the stereo XY pair This is not an intimate recor...

Page 103: ...d to record very loud sounds Condenser microphones are smaller and more sensitive They are ideal for recording soft sounds They can reproduce a greater range of frequencies but they must be powered by...

Page 104: ...publication can be downloaded free from the Shure website I highly recommend it Microphones do not only pick up sound from what they are pointing at They can have a spherical omni directional or more...

Page 105: ...Microphones Inputs All the following microphones will plug into one of the four XLR inputs on the Zoom The Zoom accepts TRS cables and XLR male connectors The XLR male connection has three plugs...

Page 106: ...one input on the front of the Zoom recorder XLR microphone inputs should have the PAD set to 0 The PAD switch is used when connecting devices that output at a higher volume mixers or effects pedals Do...

Page 107: ...ut so it will require more input gain than a condenser microphone The SM58 has a cardiod polar pattern and is a great choice for voice recording in an environment where you cannot eliminate background...

Page 108: ...attern of a Shure SM58 The Shure SM 58 dynamic microphone will offer the maximum rejection of surrounding noise It is often used by vocalists on a stage where is can minimize the sound of all the surr...

Page 109: ...by consonants b p t and d People who speak softly may benefit from pointing the microphone more directly at themselves but still trying to keep a little off axis by pointing it between the nose and t...

Page 110: ...oom recorder Go into the INPUT OUTPUT menu to add this effect This will reduce the proximity effect Here I am adding a 80 Hz low cut filter meaning that the low frequencies will start to have their vo...

Page 111: ...be placed about 20 to 25 cm below your mouth It also gives a very close intimate recording like the SM 58 This is an omnidirectional condenser microphone so it does pick up more room noise than the SM...

Page 112: ...rst and then turn on the receiver once it is plugged into the WAVE recorder and has phantom power see next slide Then long press the PAIR button on the transmitter until it flashes green Then long pre...

Page 113: ...t should never be turned on when a dynamic microphone like the SM58 is plugged into the channel To use the AVX wireless condenser microphone through the receiver go into the Menu system to enable the...

Page 114: ...the side of the receiver shows the output volume level of the signal to the recorder Press the AF Out button to change the level Keep the level three quarters of the way up three lights lit up The in...

Page 115: ...ne This microphone has a built in transmitter Follow the same procedure turn on the microphone first and then turn on the receiver once it is plugged into the WAVE recorder and has phantom power Then...

Page 116: ...t use this with the Canon T2i or any other DSLR camera that has automatic volume control on the input The recording will be constantly distorted In this picture the adapter is used with the Sony A7R c...

Page 117: ...is a highly directional microphone and should be pointed directly at the subject It can be placed a long distance from the speaker or subject 12 to 15 feet 3 5 to 4 5 m but still produce a good record...

Page 118: ...Rycote for recording outside The kit includes a shock absorbing mount and windshield The windshield works well and also comes with an additional furry shield The microphone is often mounted on a pole...

Page 119: ...Polar Pattern of the MKH 416 This diagram is reproduced from the Sennheiser MKH 416 manual It has an unusual shift to the left in the pick up pattern...

Page 120: ...hone I recommend putting a limiter effect on the input channel The limiter will avoid loud sounds distorting and peaking It could also save your ears when you are wearing headphones to monitor the rec...

Page 121: ...udio to the guide track audio on your video file For example if you used the low quality camera microphone on the front of the T2i this might suffice as a guide track But take no chances always slate...

Page 122: ...ow you to visually identify the shot and take Start recording on the camera and the audio device before you make the sync mark and announce the shot you are about to record what is written on the slat...

Page 123: ...helpful Look on the Video and Sound Editing Technical Support Documents page of the CDA website for more equipment and software guides www concordia ca finearts cda html Positive and constructive fee...

Reviews: