57
Recording Video
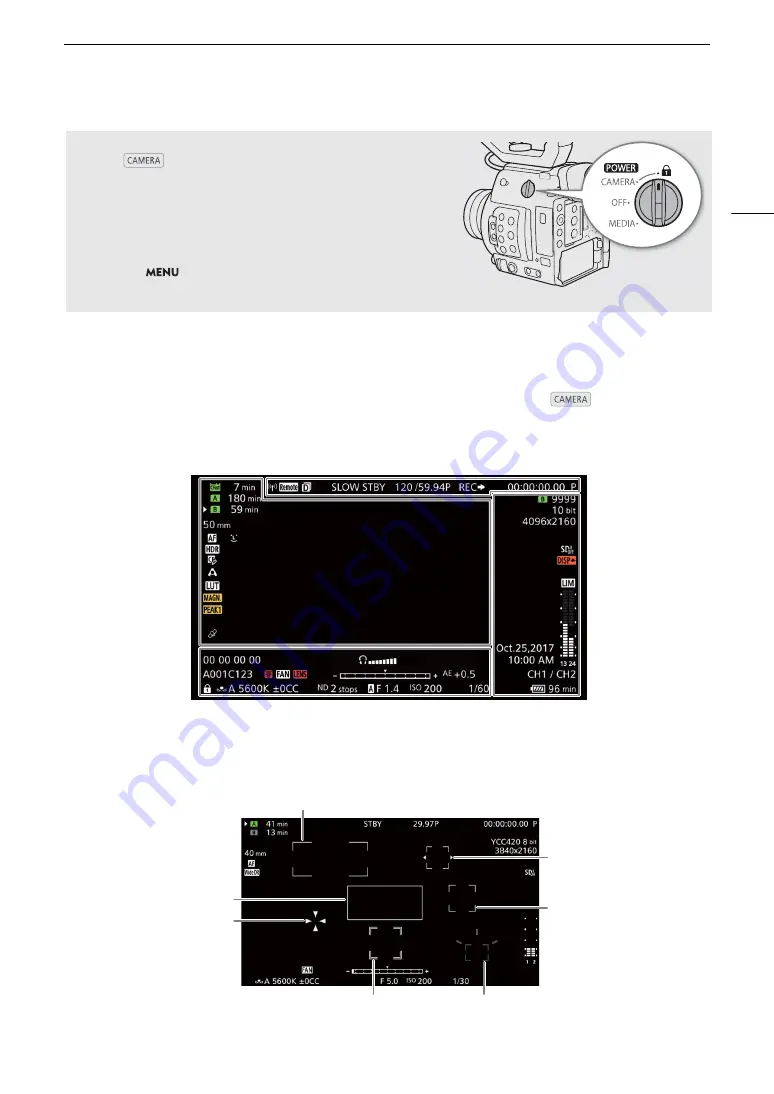
Onscreen Displays
Refer to this section for an explanation of the various screen displays that appear in
mode. You can use
the custom display function (
A
176) to turn off individual onscreen displays if they are not required. The menu
item that controls each display is given in the following table (1: indicates a menu item under [Custom Display 1]
and 2: indicates a menu item under [Custom Display 2]).
AF frames
Depending on the focus function used you may see some of the following AF frames.
Locking the Controls in Recording Mode
Once in
mode, you can set the
Q
switch to
C
(key lock) to lock all the physical controls (buttons and switches)
on the camera, save for the REC button*. This is useful in
preventing settings from being changed due to inadvertently
pressing one of the buttons. Return the
Q
switch to the
CAMERA position to reactivate the controls.
* You can choose to lock the REC button on the camera body or the camera
grip with the
>
[
B
$
System Setup]
>
[Camera REC Button]
and [Camera Grip REC Button] settings. In either case, you can still operate
the camera using the Browser Remote application (
A
Continuous AF frame – always in white (
A
AF-Boosted MF frame – in yellow: manual adjustment range; in white: automatic adjustment range (
A
One-shot AF frame (
A
84)
Face AF: Main subject (
A
Face AF:
Other face detection frames
Tracking: Subject selection (
A
88)
Tracking: During tracking
Focus frame with focus guide (
A
Summary of Contents for EOS C200
Page 1: ...Digital Cinema Camera Instruction Manual PUB DIE 0504 000A ...
Page 8: ...8 ...
Page 22: ...4K Workflow Overview 22 ...
Page 54: ...Adjusting the Black Balance 54 ...
Page 138: ...Clip Operations 138 ...


